It’s no secret that coffee is a big deal around our house. We will drink it just about any time of day and in any way, shape or form, just as long as it’s good coffee. From the moment Justin moved into our first apartment, we had a dedicated coffee area set up. When we moved into our home back in April, we knew that we wanted to build some sort of coffee area that could house our mugs, coffee gadgets, and caffeine paraphernalia. I scoured Pinterest and the like for hours, trying to find the perfect coffee bar that would fit our space, as well as our style. Enter, Gray House Studio, and their awesome DIY coffee bar. With weathered wood, concrete, and an industrial vibe, it was a perfect fit for our dining area. Before I jump in and tell you about our building experience, let us have a moment of silence for the messy coffee bar that has been recently replaced…
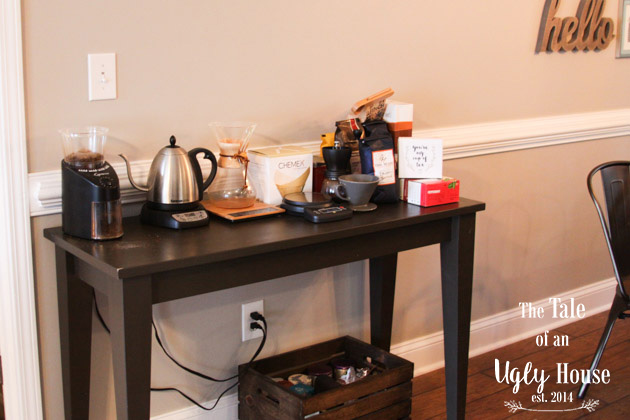
If you are serious about your coffee and decent design, this is not an ideal situation. We were given this awesome table by a family member, and we can’t wait to put it somewhere it will make more sense.
Do you see the bags upon bags of delectable coffee beans? That’s what we’re trying to corral here. And that crate below the table? That’s filled with tea. We also like tea. Thankfully, this mess is on its way out!
Gray House Studio’s version of the coffee bar is about seven feet long! Unfortunately, we don’t have that kind of space. Because of that, we changed every horizontal measurement to create a coffee bar that is roughly 50 inches wide. I am not going to recreate their plans here, because they have done a great job! (Be sure to sign up to be an Insider and access those plans!) I will, however, detail the changes that we made, and how that works into the original structure.
Before we dive in, here are the measurements that changed. These will be consistent across the entire structure:
All measurements that were 75″ across were cut down to 43″.
49.5″ became 18.5″
25.5″ became 24.5″
If you decide to make the shorter version, please note that this will cut down the amount of wood that you need. Make sure to write an edited cut list to make sure you don’t end up with way too much wood!
Let’s get started! (Please bear with me through these photos. Building a coffee bar is not a tidy venture! It’s also very much a two person job, so where we failed to take photos, I will try to give you a detailed explanation of what was going on).
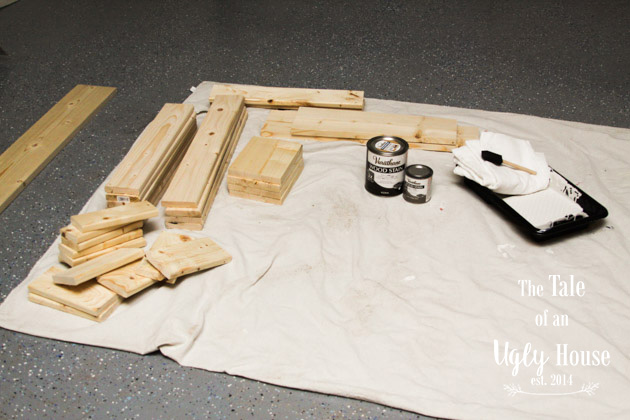
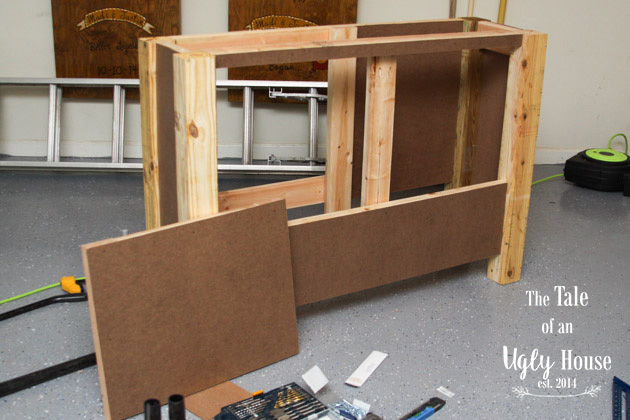
Step one is going to be cutting all of the wood. The plans provide an excellent cut list, along with what supplies you will need. Don’t forget to adjust measurements if you will be making our smaller version. Cutting and labeling all of the wood ahead of time is going to help streamline the building process. Also, it allowed Justin to get started building the frame, while I stained the outside planks.
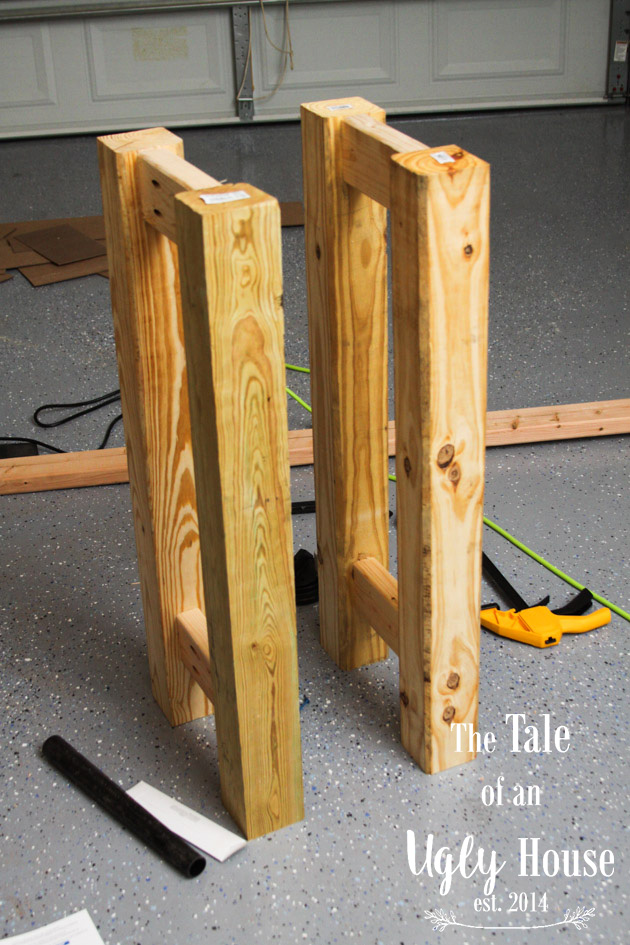
 While Justin was drilling pocket holes using the Kreg Jig and assembling the frame out of 2″x4″s and 4″x4″s, I sanded and stained the outside planks (all 1″x3″, 1″x4″, and 1″x6″ boards). Doing this ahead of time gave the planks plenty of time to dry before we installed them. I used a mix of Kona and Classic Gray stains. Because this piece is made to look weathered, I varied the tone on each piece of wood. Some received a first coat of Classic Gray and then a second coat of Kona. The darker pieces got two coats of Kona, and the more gray tone pieces, got a layer of Kona sandwiched between two light coats of Weathered Gray. The way that you treat your outer planks is up to you! You can distress them, paint them, stain them in a uniform color, or whatever your heart desires. I will say that I only stained the sides and tops of these planks. The backs will not show, as they are all mounted on masonite panels. Go ahead and get this step out of the way, and you will thank yourself later.
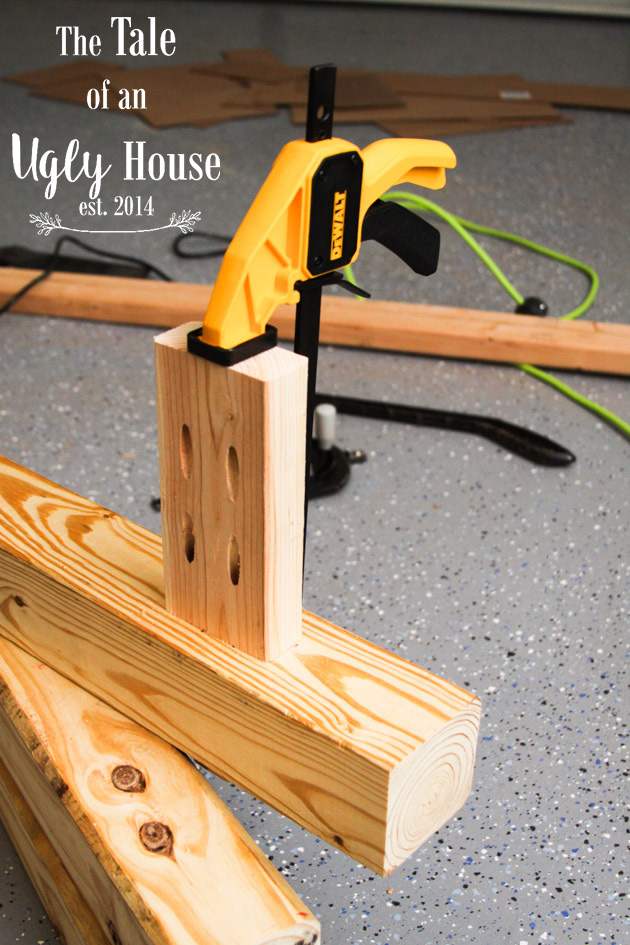
We found our set of clamps to be invaluable while assembling this frame!
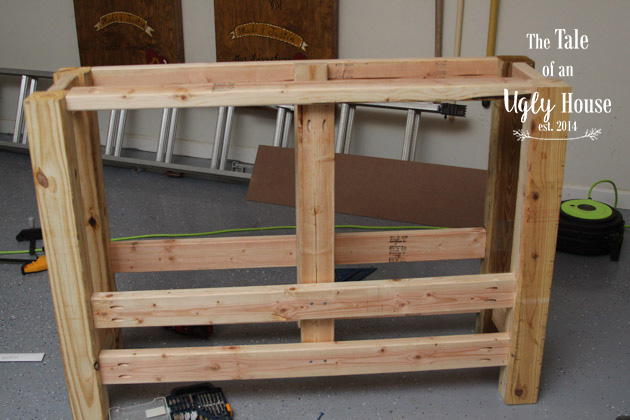
Once both sets of legs are assembled, it’s time to connect them with horizontal braces and add vertical supports.
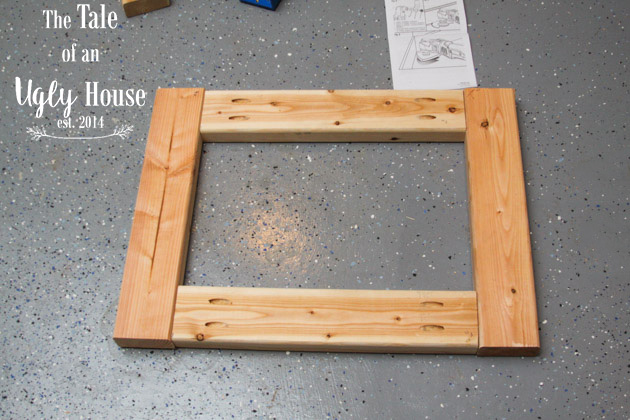
Next, assemble the door frame, using pocket holes once more.
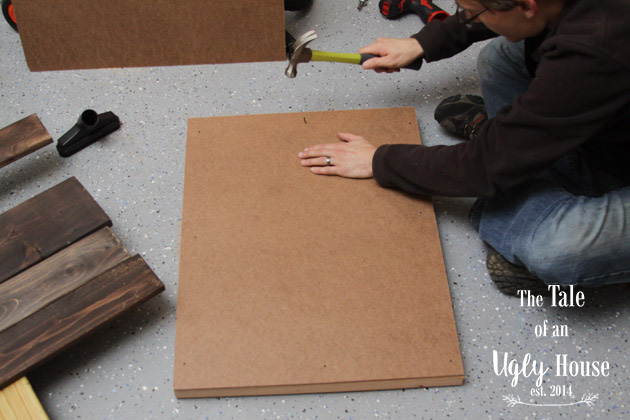
Once that step is complete…CONGRATULATIONS, you have a finished frame! The next step is simple. You will be attaching the masonite panels to the frame, that will eventually act as a sort of backboard for the outer planks.
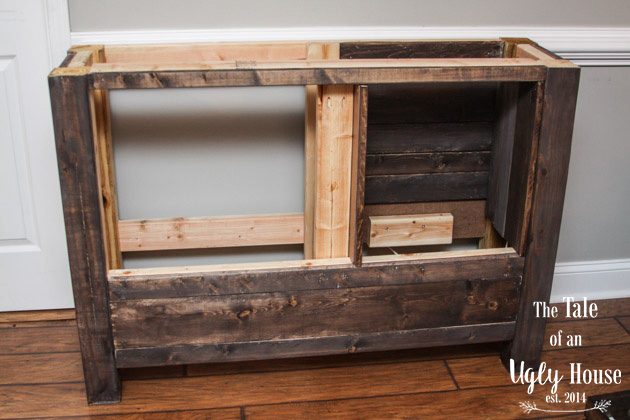
The next part was one of my favorites– attaching the stained boards. I had stained boards for so long that I couldn’t wait to see them all together! The stained planks are attached in two different ways. If they sit on a 2″x4″, they can be attached using 2″ finishing nails. If they sit only on the masonite panels, they will be attached using ½” pan head screws. We used self-tapping screws. I don’t recommend this, as they don’t secure the boards quite as well due to the tip not having threads. In hindsight, non self-tapping screws would have been better, but because we also used wood glue, I don’t foresee us having any issues.
Also during this step, we added a 2″x4″ scrap to support the concrete shelf. It is installed directly opposite the front horizontal support so that the shelf will sit evenly on the two.
After all of the planks were attached and the shelf support was installed, we brought the base inside, and put it in it’s future home. Let me tell you, this thing is HEAVY! I’m so glad that we chose to bring it inside before we put the door on, because I don’t think we could have carried anything much heavier.
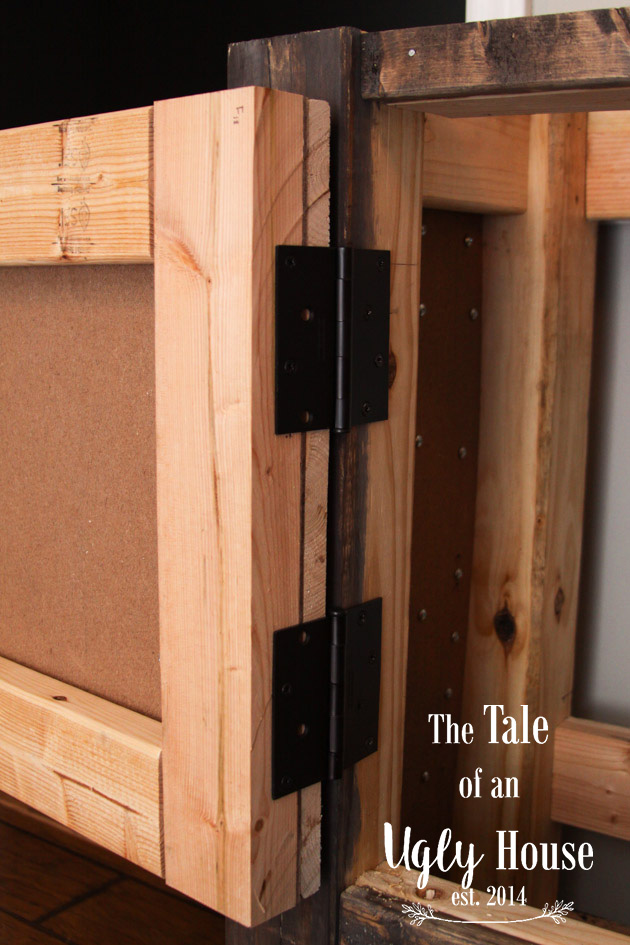
The next couple of steps will really make the coffee bar come together and look complete! The door installation was a little bit of a challenge for us. In the original plan, the door opens downward. We wanted our door to swing outward like a typical cabinet. Because of the thick frame and where it is mounted, we really had to brainstorm on what type of hinge to use. We finally settled on some heavy-duty hinges that have a barrel on the outside. We didn’t mind it showing since the black is discreet, and it seems like the most sturdy option. Because the door is so hefty, it has a tendency to be pulled open by sheer gravity. We remedied this by adding a magnetic single-touch latch (or, as I call it, the “clicky”). This was a great choice! It clicks to open, and clicks closed. Very satisfying and functional.
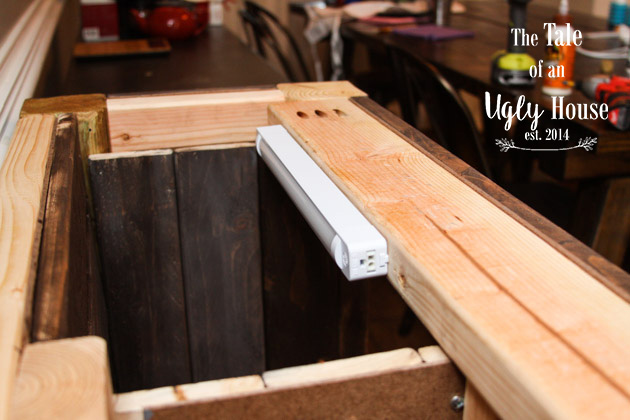
Justin also installed a light that will illuminate the shelf area. He was going to wire up something complex, but we ended up finding a slim LED light bar at Home Depot, and it fit the bill perfectly. Having the light in the otherwise dark cubby really helps show off the wood inside. A neat bonus to the coffee bar structure is that it lends itself to hiding cords very well! They can be dropped between the frame and masonite panels, or run through the cabinet.
After a lot more brainstorming, Justin created a plan for shelving that could go inside the cabinet door. The creators of this coffee bar plan mentioned that they installed shelves, but there wasn’t any detail, which left our options pretty open. We ended up measuring every nook and cranny inside the cabinet and cut some MDF to fit snugly inside. We supported the two shelves using blocks of 1″x4″ board screwed into the legs and frame. This seemed to work well, and we ended up with enough space to store our extensive mug collection and some extra coffee and tea.
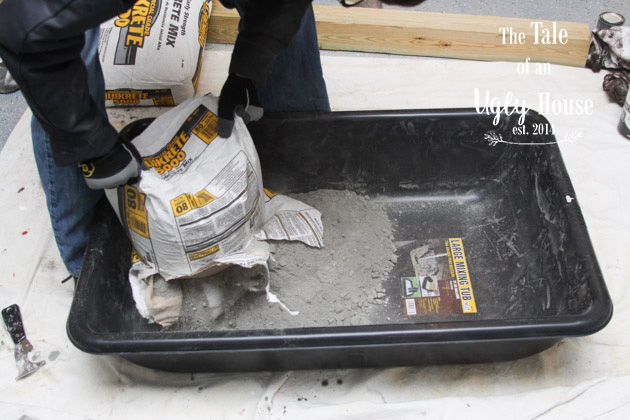
Once we were satisfied with everything structurally, we moved on to the countertops and decorative aspects of this project. I will spare you the gritty details of the concrete pouring experience, and refer you here, here, and here. I will, however, provide a few notes of advice.
- Know your product. Every single blog we read on creating concrete countertops seemed to use some form of Quikrete. We saw that Quikrete 5000 was a popular choice, so we started with that. Unfortunately, we were a little shy with the water (the instructions on the bag make the water content sound like a life or death situation), and ended up with a rocky mess on our first pour. That slab will make a lovely outdoor bench or tabletop. We settled on Quikrete Countertop Mix for our second attempt, and the smoother texture made for a much more pleasant time.
- Blow the $30 and rent a concrete mixer. We used a concrete mixing attachment for our little corded drill. It was 2″ wide. Don’t make our mistake. Please. Your biceps, sanity, and countertops will thank you!
- Be very patient. It’s hard to wait for the countertops to cure when everything else is ready to roll, but you will be so glad you did! Use plastic sheeting to help with the curing process.
- Don’t take it too seriously! We ended up with lots of neat variation and some little bubble divots on top of our counters, but I think it adds to the charm. Have fun with it! Concrete is cheap, and the memories are forever!
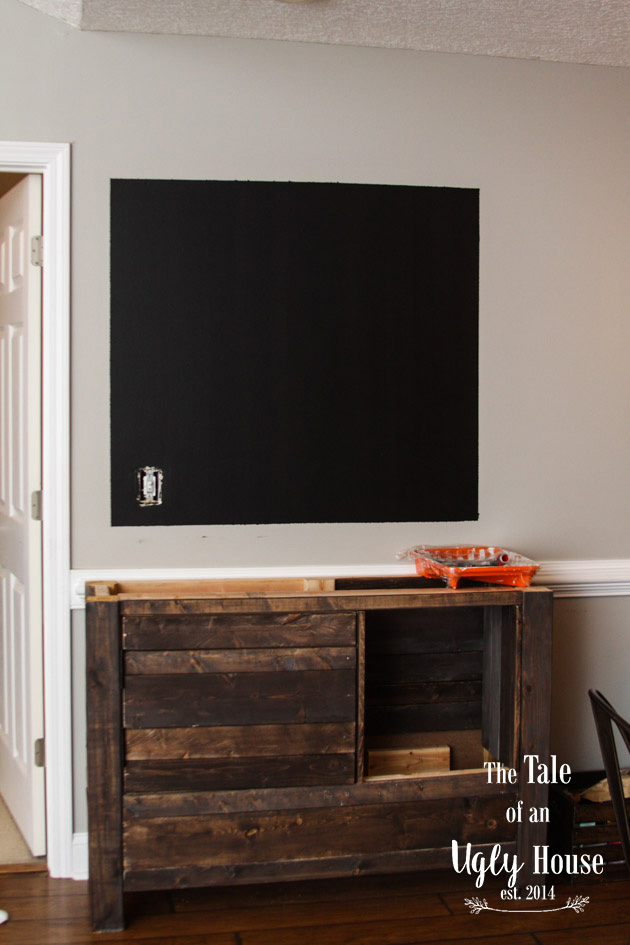
Okay, so, during/after the countertop process, I got started on the shelving and chalkboard that I wanted to add to our coffee area. For the chalkboard, I just taped off a square on the wall, and painted away (following the instructions on the can of chalkboard paint, of course). Make sure to let it cure the full three days! Again with the waiting, I know.
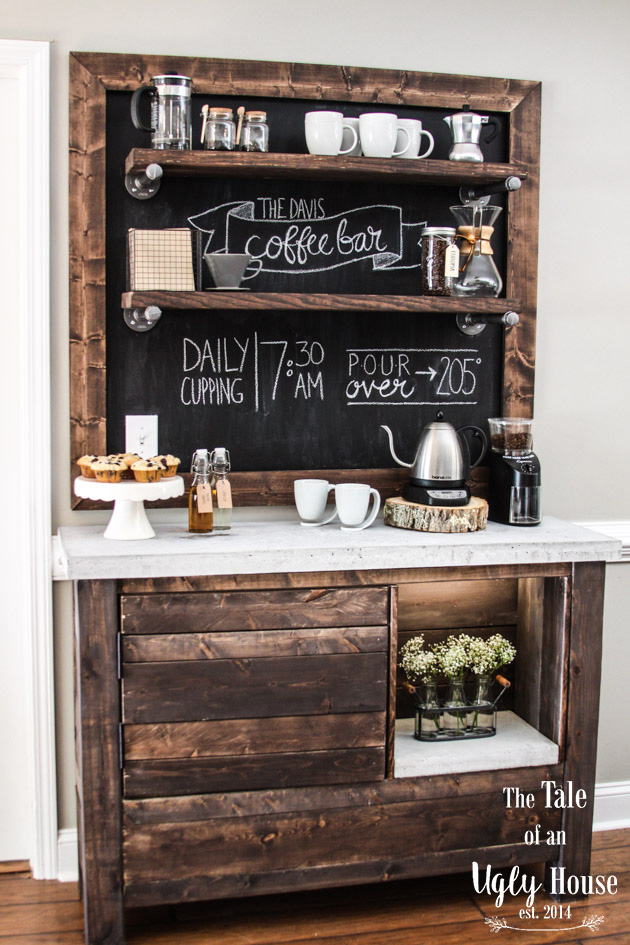
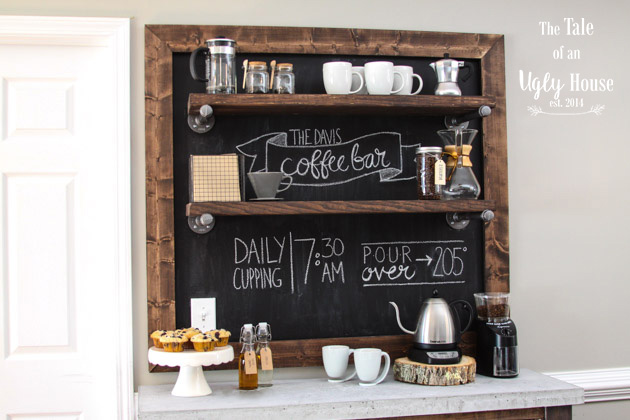
We also added a frame made of 1″x4″ boards. We joined the boards using pocket holes, and hung it up using D-ring hangers. The shelves are made of 2″x10″ boards and plumbing pipe. Super easy, but fun and unique! After everything was said and done, I added some chalk art inspired by an adorable coffee bar that was featured on the show Fixer Upper. The possibilities are endless, and I think I’m going to love having something we can switch up every now and then.
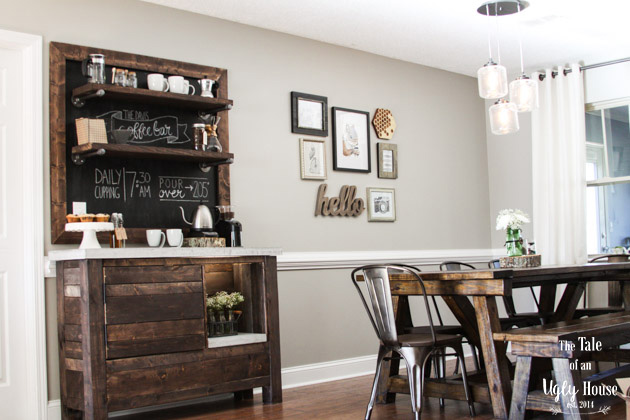
And just like that, our coffee bar was finished! This was also the last component to our kitchen/dining area re-do, so we are super excited about it!


This looks incredible! I love every detail you added. And a concrete top? Love! Great job:)
Thank you, Teresa! We had so much fun building it!
Hi! How much did this cost to make? I really want one for my new apartment and am going to ask my dad to make it for me, if it’s affordable. If he isn’t able to do it are you guys willing to make one and sell it?
I would love to know too!
Amazing! That wood is gorgeous and the framed chalk board wall is such a great touch!
Thanks, Jenn! We really enjoyed making it “perfectly imperfect.” It was part of the fun!
Gorgeous! And it really does look amazing with the rest of the furniture & decorations in that room.
I agree Tiffany! Madi did such an amazing job! It’s perfect in that room 🙂
This is gorgeous! Love that weathered look. Awesome job!
Agreed! I absolutely love it in her space.
So much love for this! It’s gorgeous.
It’s incredible!!! LOVE that gorgeous countertop!!!
OMG, this is fantastic! Pinning!
Amanda – would you be willing to email me more details regarding the chalkboard, frame, shelves and the plumbing hardware? Ive never done a project like this – so please assume I know nothing! I will be doing this on a plaster wall. I’m doing my own coffee bar and while I purchased the base counter rather than doing the gorgeous one you guys did – I want to copy your chalkboard and shelves. I would greatly appreciate it. [email protected]
With much thanks!!
Carrie
I meant to address this to Madi – I’m sorry for putting the wrong name in there!!!
Hi Amanda: I also would like to know how you got your shelves to hang. I love the look of the plumbing hardware, but have no idea how to install it to the wall. Your coffee bar looks great!
Thanks!
Hi Mary!
We just bought floor flanges, pipe to fit the depth of the shelves and caps. We spray painted the pieces, and then attached the floor flanges to the wall using really strong drywall anchors. You can find them at the local hardware store. I believe each anchor is rated at 50 pounds, so as lon as they are installed correctly, they will definitely hold up. The planks of wood settled nicely onto the pipes, and the caps on the end keep the shelves from sliding off. I hope that is helpful! Please let me know if you need any extra tips or close up photos!
Our daughter would like my husband to make her the coffee bar. Do you have a material list and step by step instructions?
Now THIS is a coffee bar! Not so much the construction but the brewing methods you have displayed. If I see one more coffee bar with a Keurig machine on it – LOL. I am a die hard third wave coffee traveler and blogger. Thanks for the share!