
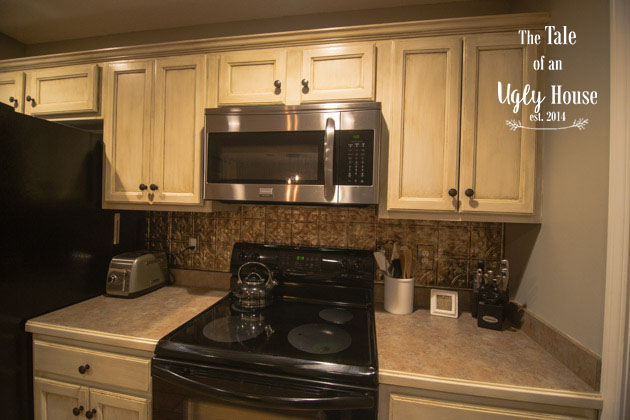
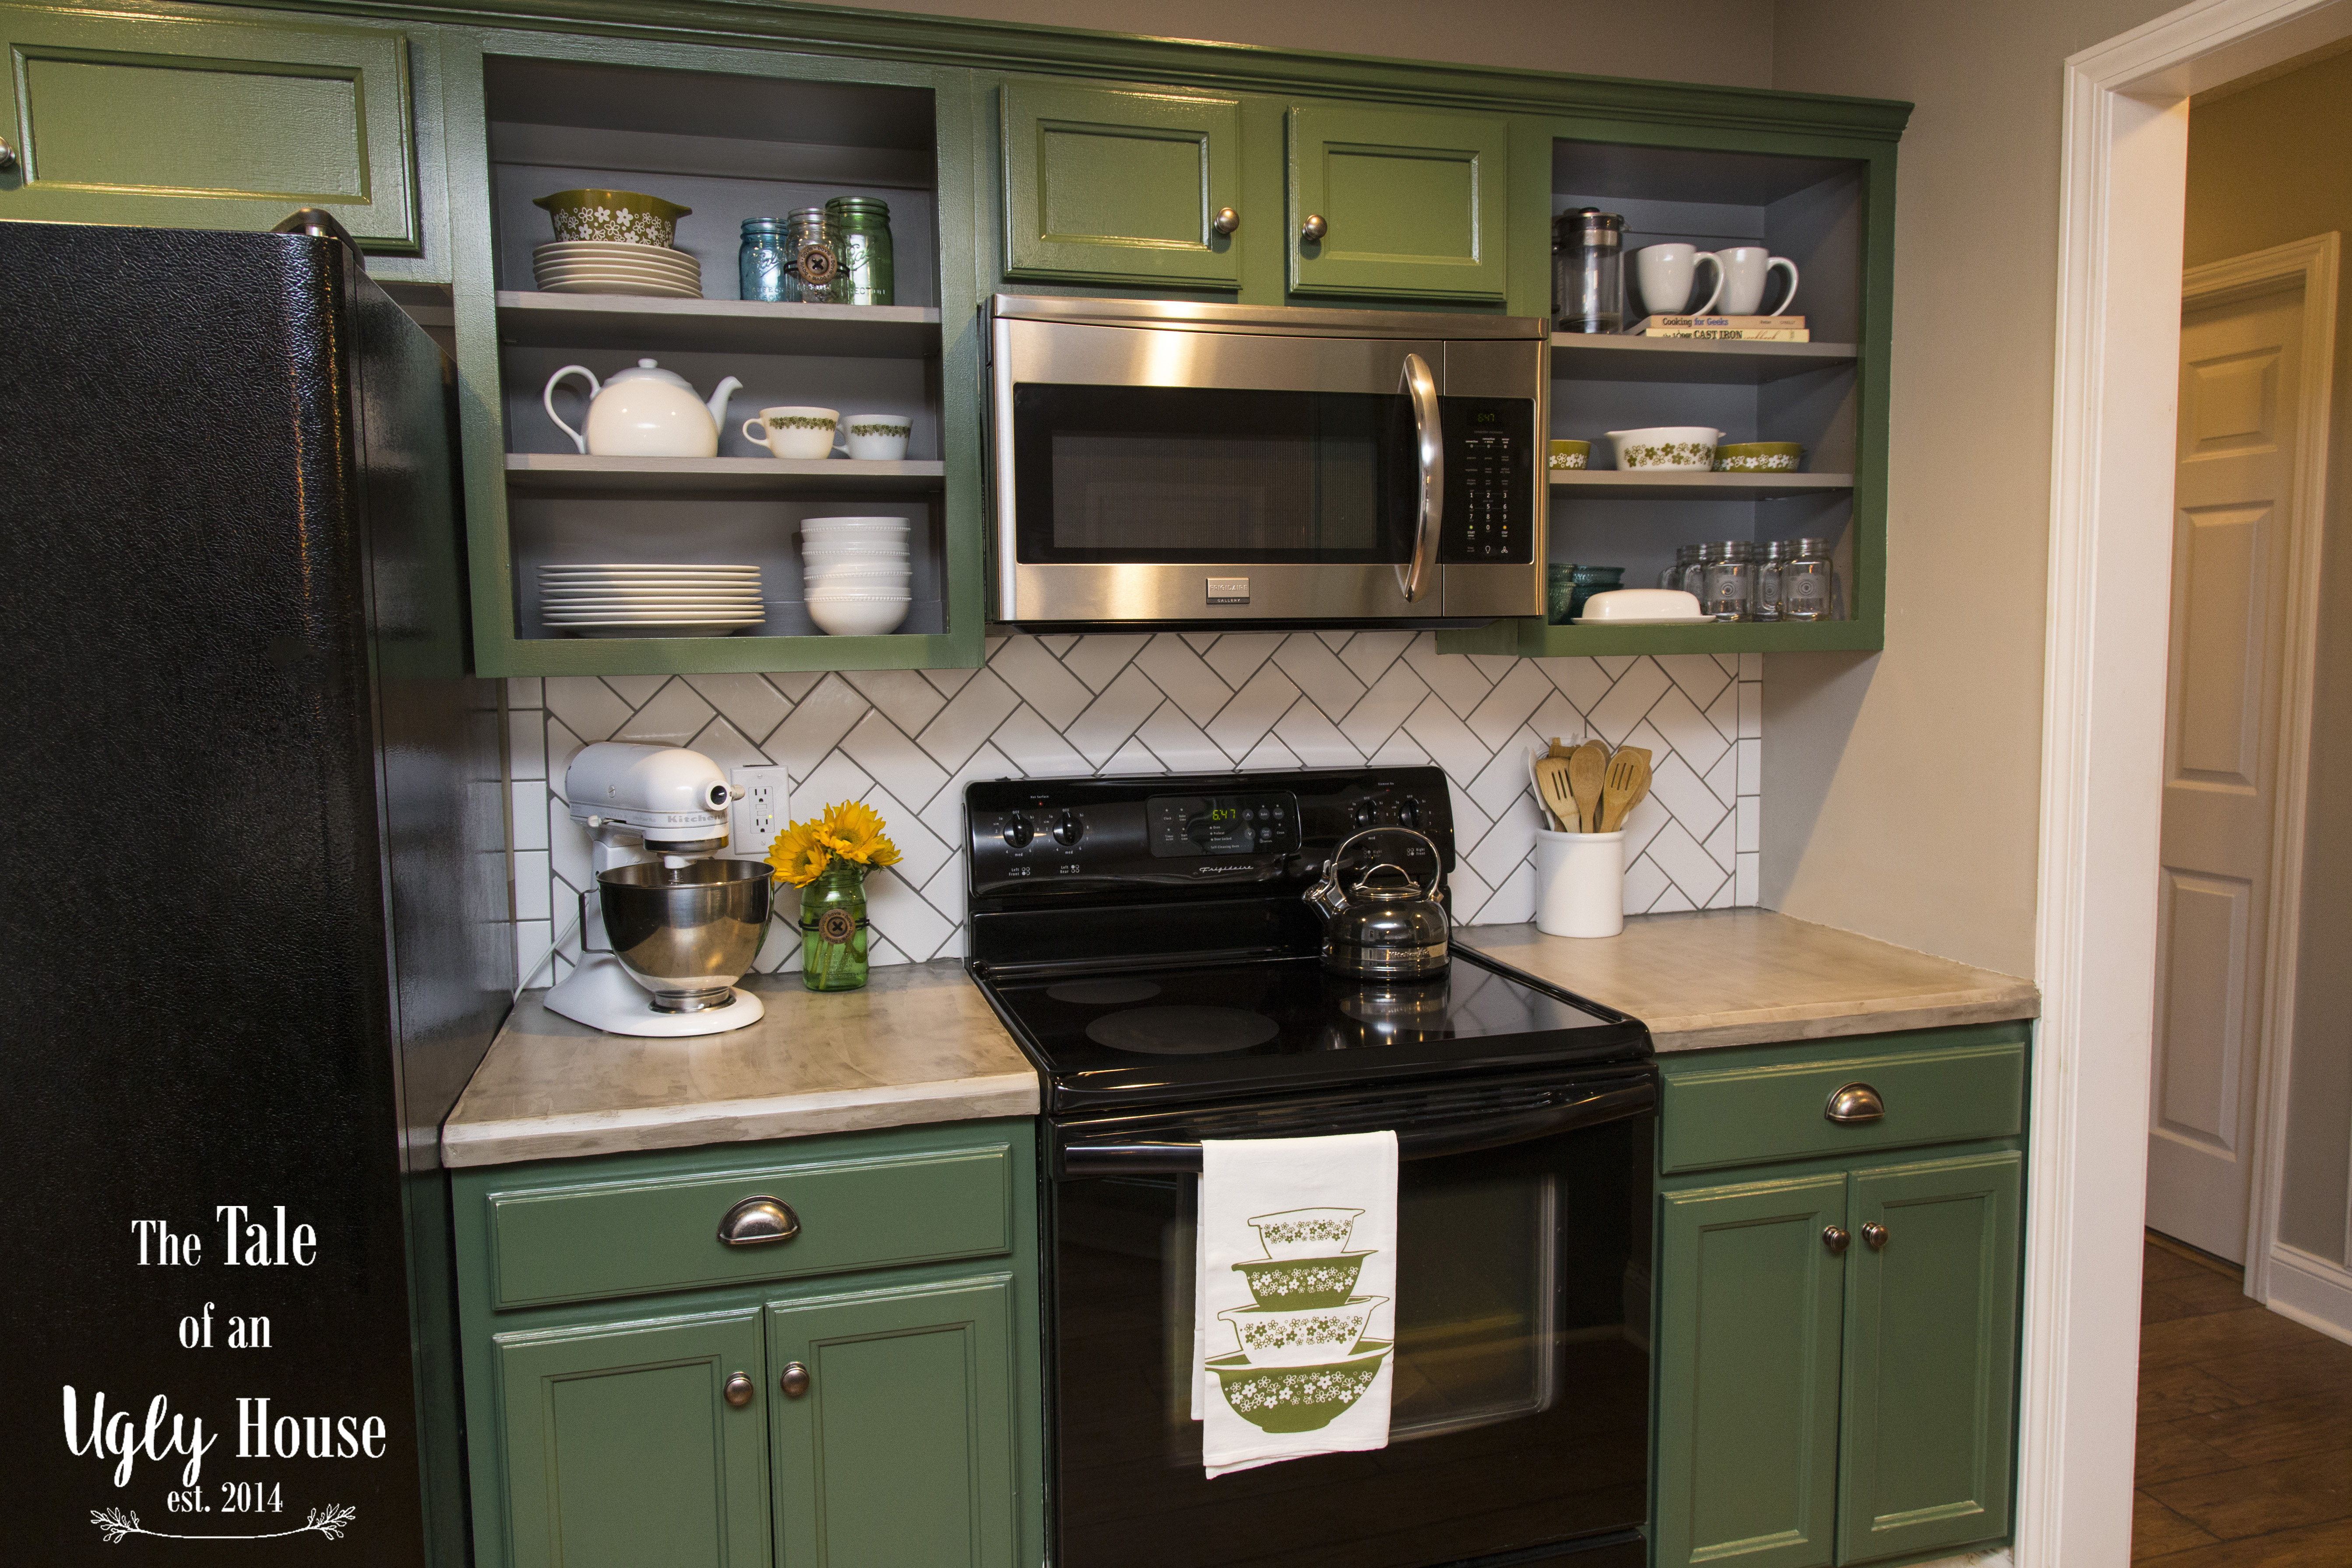
One of the first things that I knew I wanted to change when we decided on our first home were the countertops. Now, don’t get me wrong, they were really great countertops—structurally sound, well-maintained, and a great match to the cabinets and walls. What I didn’t love about them was the texture. They weren’t smooth, which made for a difficult time cleaning up bread dough and other sticky things. I felt like I was always scrubbing the counters, and I’m not about that life.
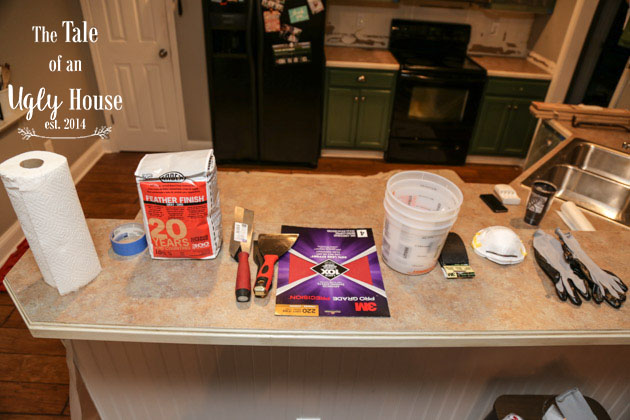
I researched so many different countertop options before deciding to give Ardex feather finish a shot. It was just about the only affordable option that seemed like an upgrade. So, after getting all of our cabinets painted, we ordered a couple of bags on Amazon. I was SO excited when they arrived, and couldn’t wait to get started.
Having read no less than 20 blogs on the matter, I felt like a seasoned expert on this product before I even started. Maybe I was a little bit overconfident (okay, definitely a lot overconfident), but it is actually super easy to use!
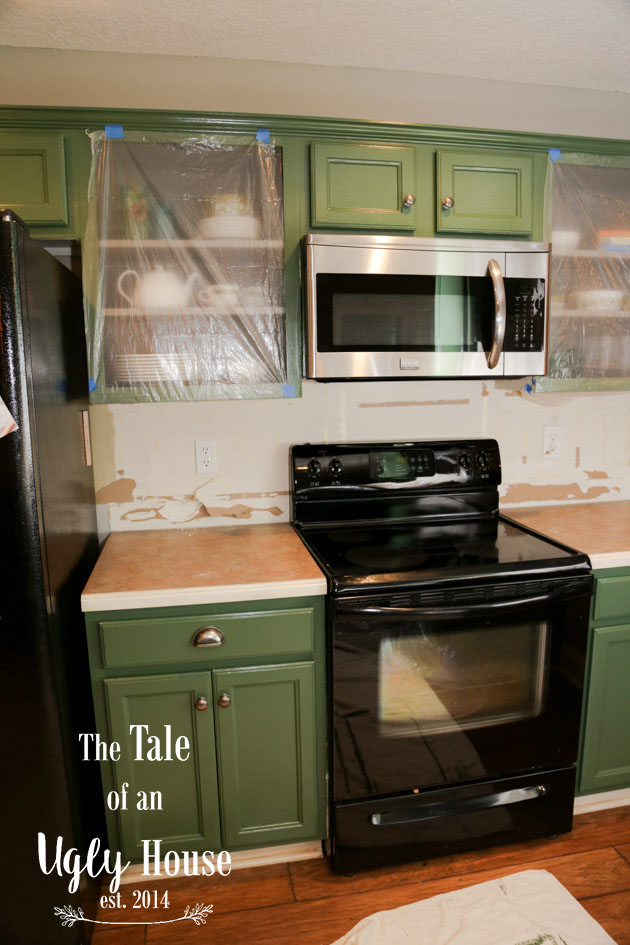
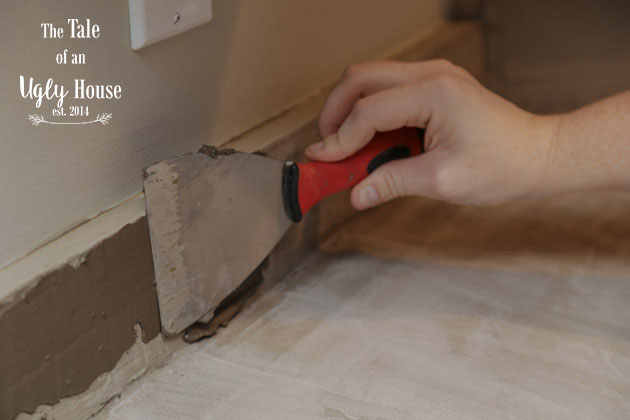
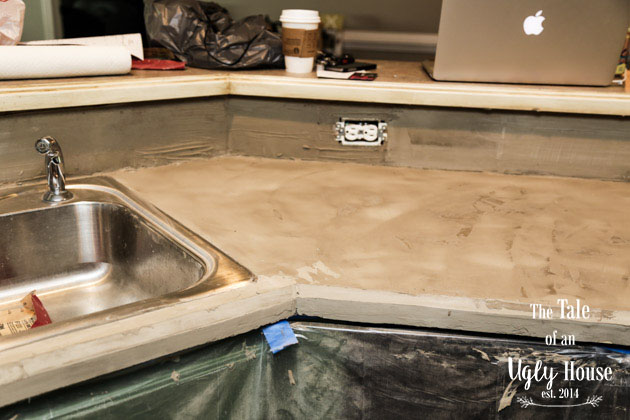
We started by cleaning our countertops, removing the 4-inch backsplash around the oven (since we knew it needed to go anyway), and then scuff-sanding the counters with some 120- grit sandpaper. Roughing them up gives the feather finish a good surface to adhere to. Then came the mixing…
*DISCLAIMER*
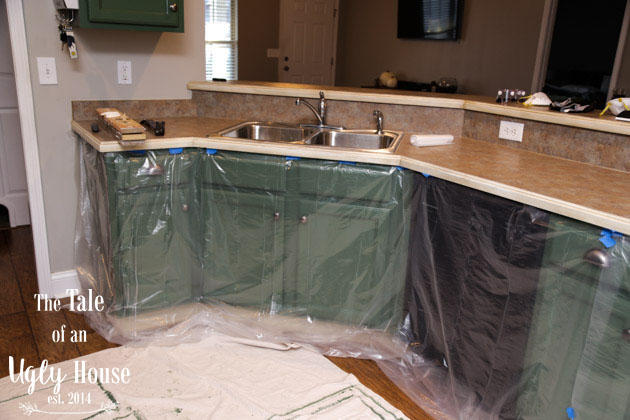
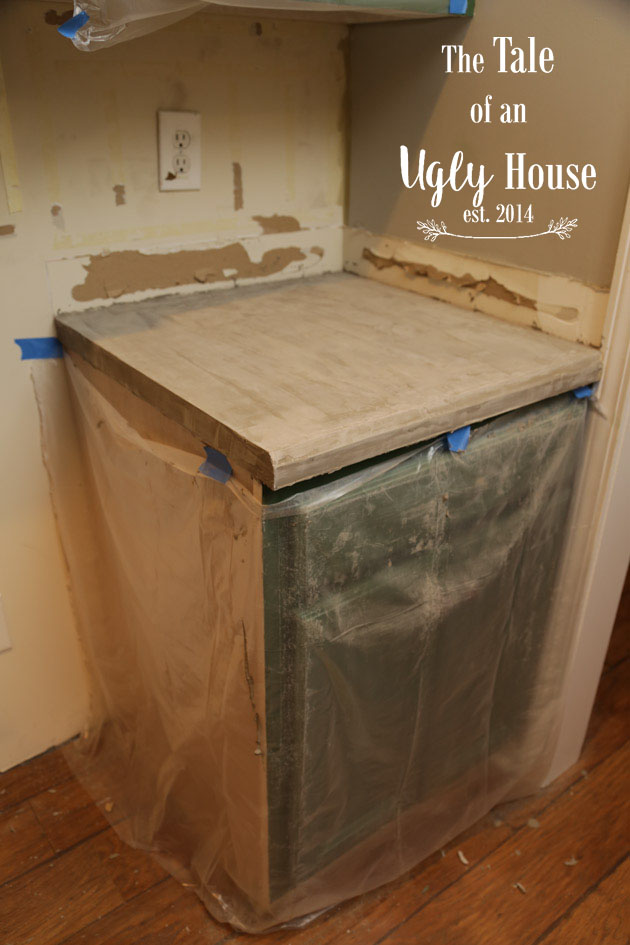
I will be the first to tell you that this stuff is MESSY! As soon as you open the bag, fine gray dust particles will coat your entire kitchen house. Wearing the proper safety gear is a MUST with this project, especially while mixing and sanding. I also purchased a big roll of plastic sheeting and taped it over all of our cabinets. I really didn’t want to have to scrub them all down at the very end. This was a GREAT decision, and I highly recommend it.
We mixed the Ardex with water in cheap plastic buckets that we could throw away when we were finished. I’m not going to lie, I didn’t actually measure the water to create the proper 2:1 ratio that is mentioned on the bag. I just added water and mixed with a plastic fork (good for keeping it smooth) until it was the consistency of peanut butter.

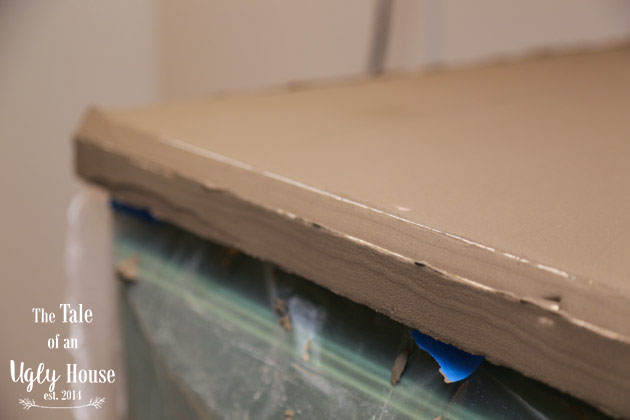
I quickly began troweling the first layer onto the countertops. With the odd texture of our countertops, our first layer didn’t cover as much as I expected. It was kind of patchy and difficult to get even, but it worked. We also had the added challenge of our countertop edges. They are slightly similar to the “waterfall edge” that can be found on some granite countertops. This issue was actually our biggest hesitation going into the project, as all of the others that we have seen were smoother edges. I ended up using a small putty knife on these areas, and the Ardex filled in the ridges surprisingly well!
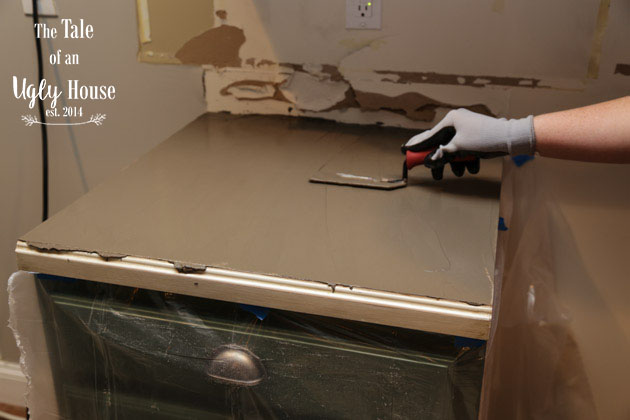
The feather finish sets pretty quickly, so it’s best to work in very small batches. Whatever was left in the bucket after troweling was usually a little bit more moldable and thick, so I used it on the edges. It adhered much better than the thinner mix.
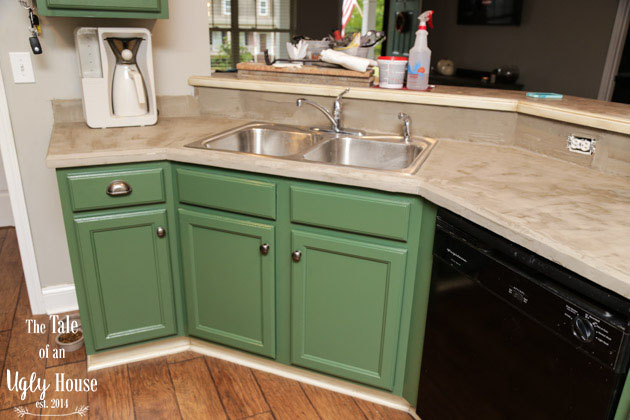
We let the first coat dry overnight, and I started sanding in the morning. This first round of sanding was mostly to just get the big ridges out and smooth the corners. I also used a drywall knife to knock off some of the drips and get clumps off the edges and corners. After sanding, I vacuumed the countertops to get them ready for the second coat.
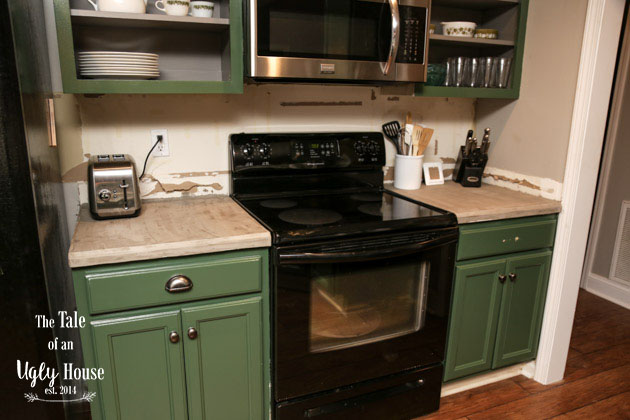
The second coat really made me feel so much better about our decision to use Ardex. It went on so much smoother and helped a lot with the edges. At this point, we decided to stop applying the feather finish to the area behind the sink and tile it instead, so you will see no progress on that area from here on out. I let the second coat dry all day (probably 10 hours or so) before sanding and vacuuming it just like the first coat. It was a breeze! After sanding the second coat, the counters really started to look intentional instead of messy, which I loved!
The third coat was a lot like the second, only better! It was really neat to watch this coat dry and see the trowel marks and variations from the first coats begin to come through. Conveniently, Justin and I had planned to leave town for the weekend, so I left our countertops to fully dry while we were away.
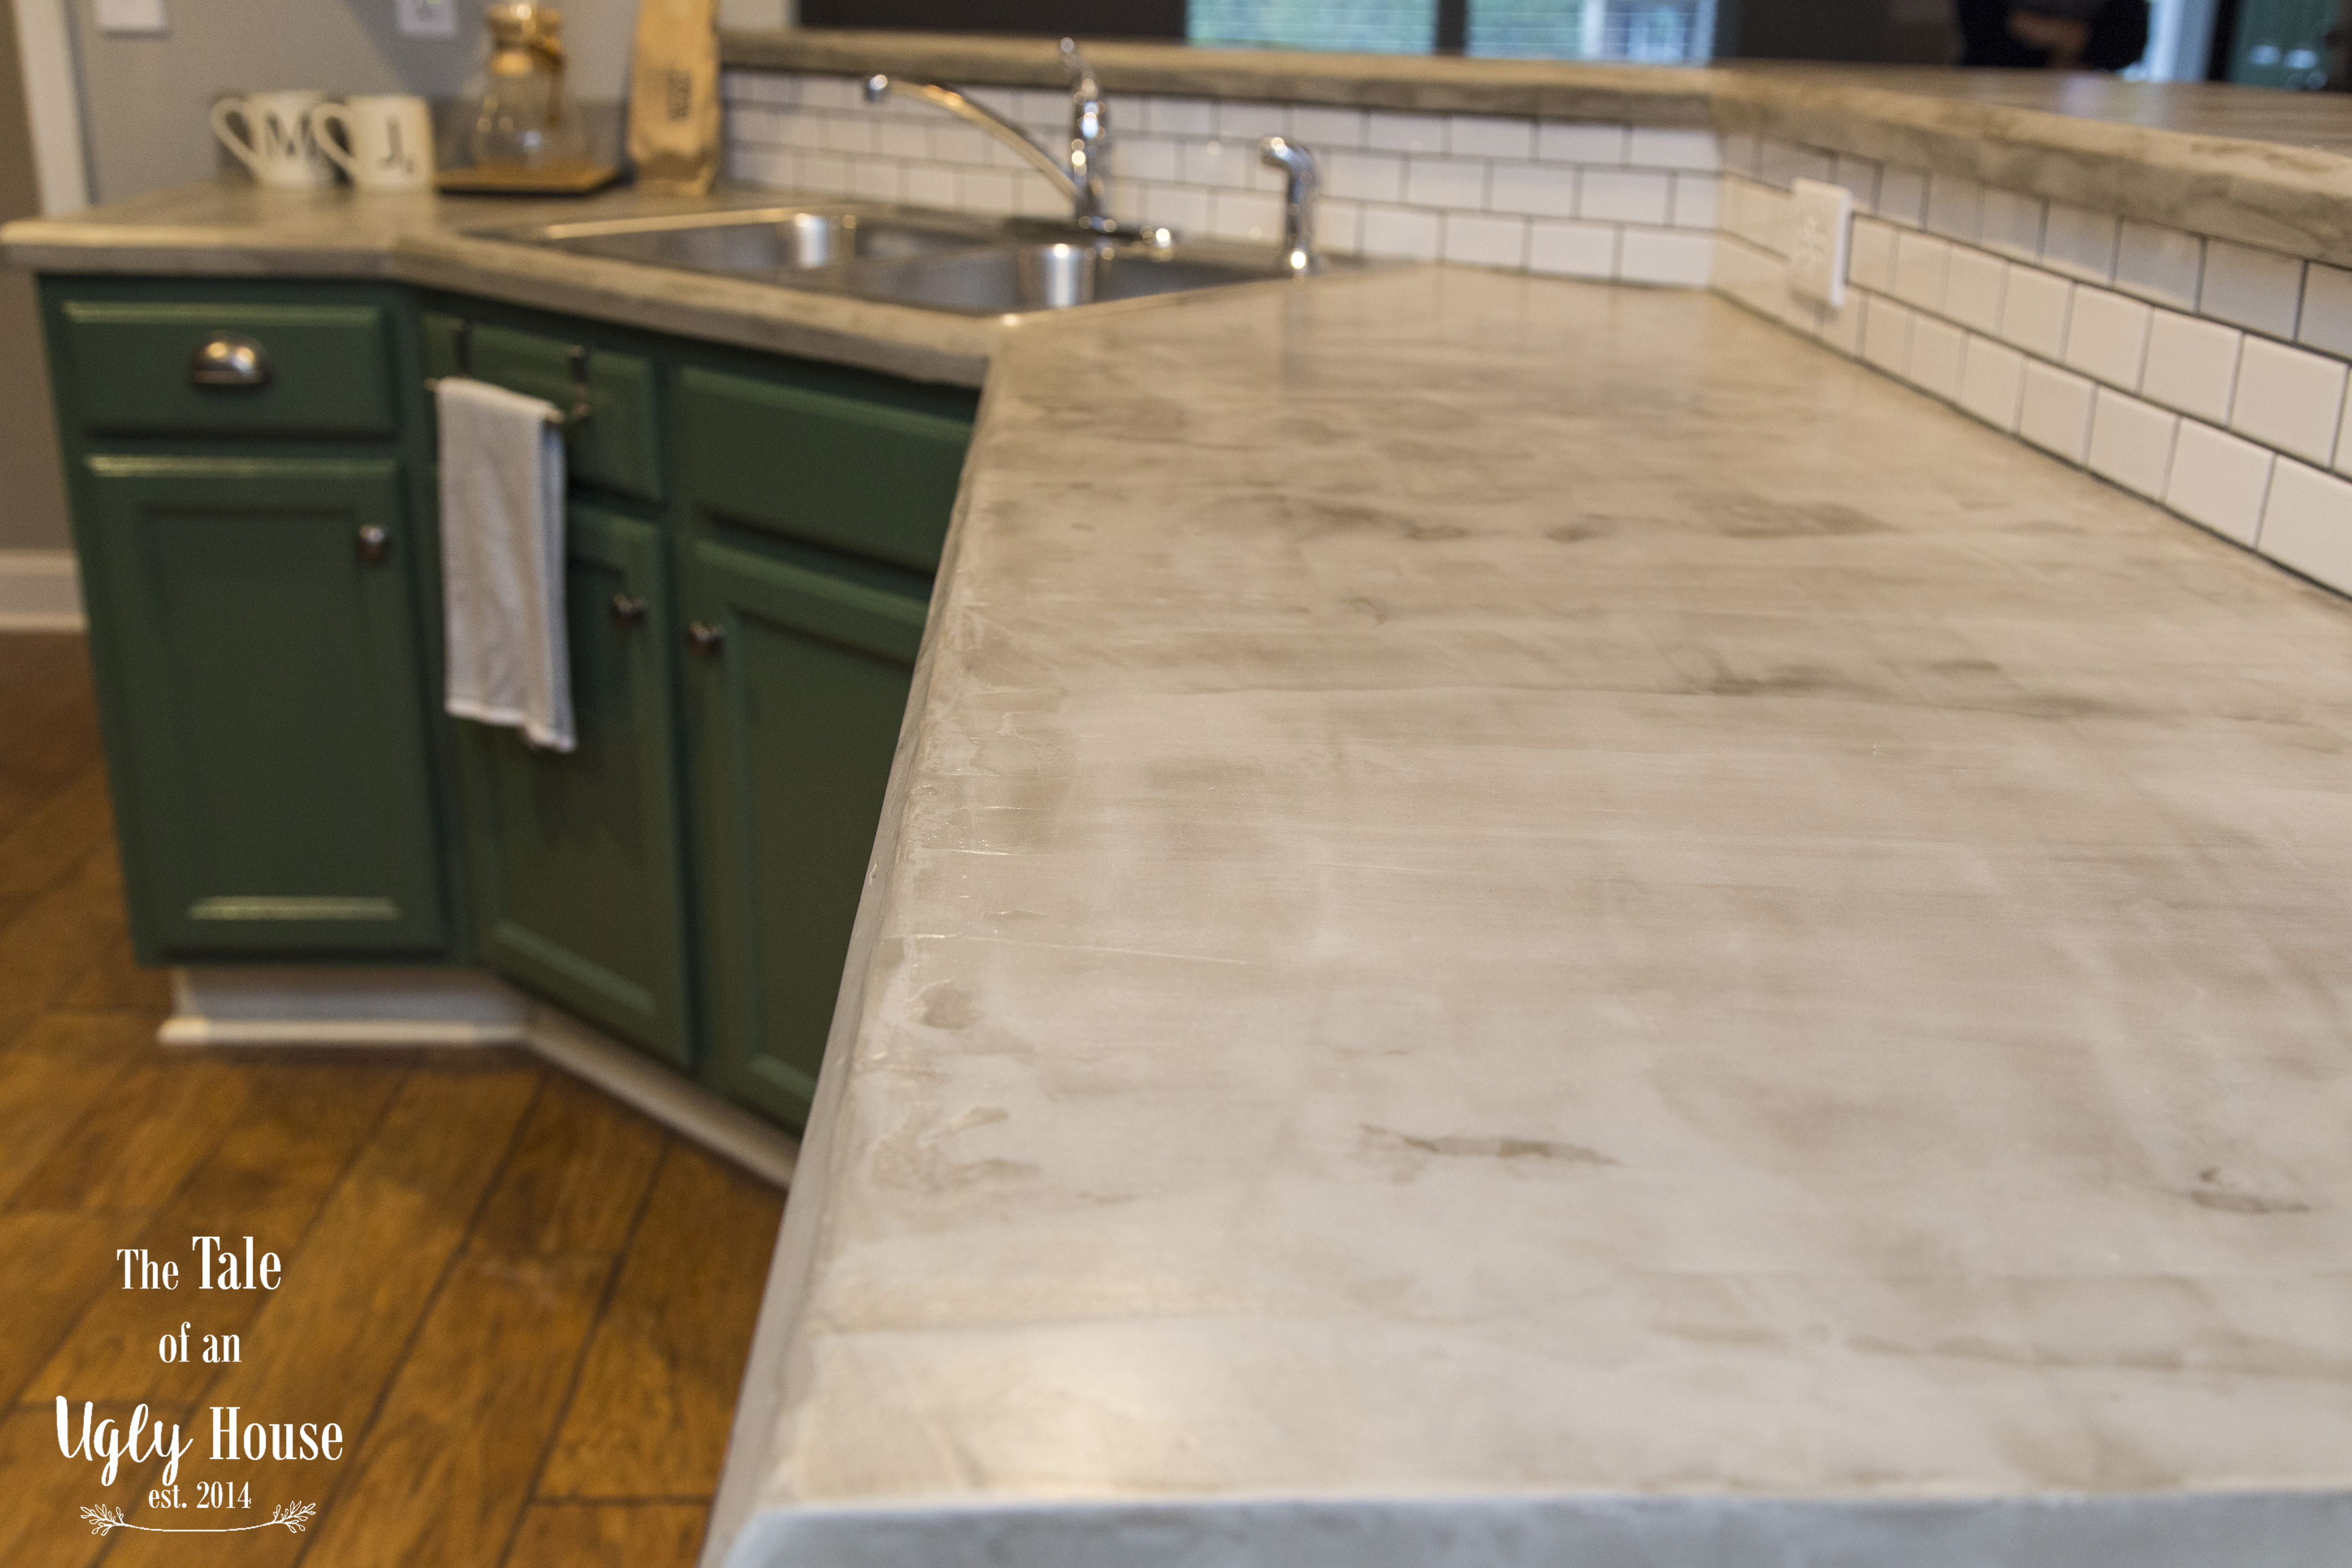
Two days later, there was no trace of moisture on the countertops, and they looked great! I was thrilled with the variation in color and pattern, and beyond delighted that they would soon have a smooth finish. I sanded the last coat with 120-grit sandpaper and vacuumed. I followed up by sanding with 220-grit sandpaper—twice. There were a few small divots or spots where air bubbles had been, but I really loved that. They look very lived in and have a slightly industrial feel, without making our kitchen feel cold and stark.
Next came the make-or-break part of the process—sealing the countertops. Based on what I have read, choosing the right sealer is everything! You want something that is waterproof, stain resistant, dries to a hard finish, resists scratches, and is food safe. I wasn’t sure that such a thing existed. We decided to follow the lead of Young House Love, and do a two step sealing process.
After using a slightly damp microfiber cloth to make sure our countertops were dust-free, we applied 2 coats of the Miracle Sealants 511 Impregnator using a white cloth. I didn’t wait super long to apply the second coat—just until the first was completely dry, which didn’t take much time. As soon as this was dry, you could sprinkle a little bit of water on top, and it would bead up instead of absorbing into the countertops. Honestly, I think that we could have done a couple more coats of this, but since we were going to use a topcoat as well, I didn’t bother. We will probably use the remainder to seal the grout on our tile backsplash.
Part two of our sealing process was Acrylaq by Safecoat. We chose the satin variety. It took less than a quart of this to put 3 coats on our countertops and bar. We applied it with a high density foam roller on the flat surfaces, and a small paintbrush on the edges, and let it dry about 4 hours in between coats (per the instructions on the package). After about 24 hours, it was cured enough for light use. I love the slight sheen that the Acrylaq gave the countertops. It’s kind of stoney, and you can really see the variation in color and texture.
We didn’t really use them for probably 3 days, as we took a couple of days to tile the backsplash. For those who are curious about how to do the herringbone tile patten, we followed these impeccably detailed instructions. Kristi did a great job of simplifying the process for us amateur tilers.
We are so happy with the way everything came together, and can’t wait to use our “new” kitchen!


Oh my gosh! This is SO cool! Brilliant!!!
They turned out really great Kristi. I love Madi’s kitchen!
How have these held up?
Hi Chelsea!
We are still loving our countertops. My only complaint is that after super heavy use, there are a few speckles where oil has gotten on the counters (this happens with most any natural stone countertop). After lots of research, I found that it can be prevented by waxing your countertops with a food-safe wax over the sealer, just as you would wax real concrete countertops. As long as you apply the wax, there shouldn’t be any issues 🙂
As for as durability goes, they have been fantastic! I cook nearly every meal at home, and haven’t had any issues at all with chipping, cracking, etc.
I hope this helps 🙂
Wondering how long your countertops held up? We are a large family so ours would get a lot of heavy use. Any advice is welcome.