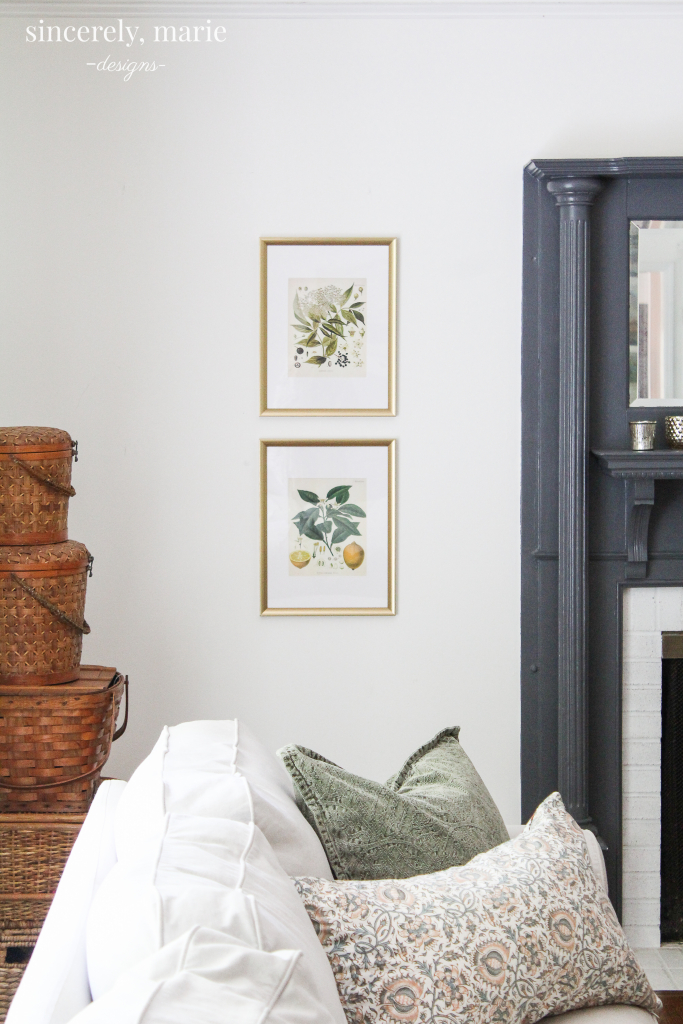
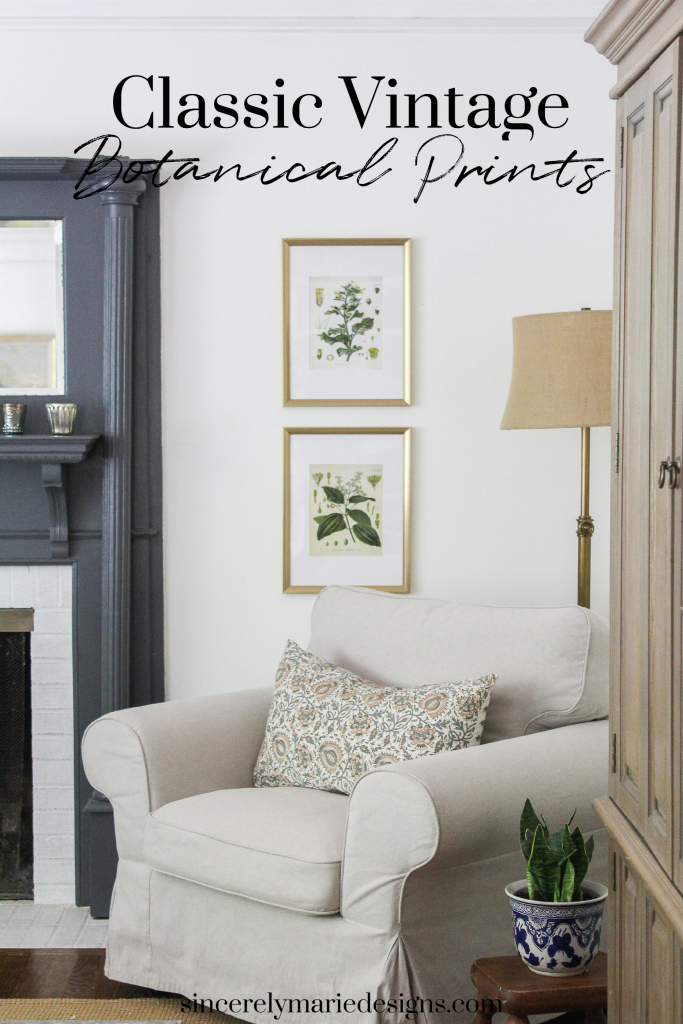
Vintage botanical prints that add a touch of charm to any space. Each one is available for free to download!
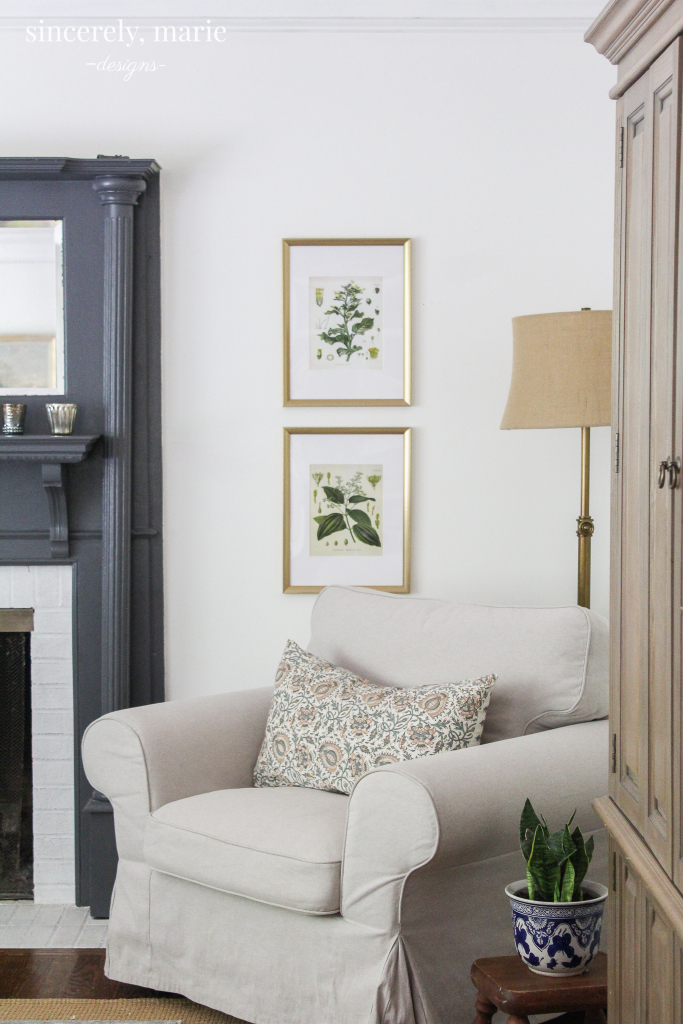
Over the last two years we’ve been renovating like crazy. The last few months we’ve been able to slow down and I’ve been able to revisit rooms and some of the decorating I had originally done. The living room as seen a few changes the last couple of weeks. I recently took down the large wall tiles and replaced them with something I feel fits the space better. I love those tiles and still have them, but because of their large size I just felt that they competed with the fireplace too much. If you saw my IG stories on Sunday you got a sneak peek of what I replaced them with.
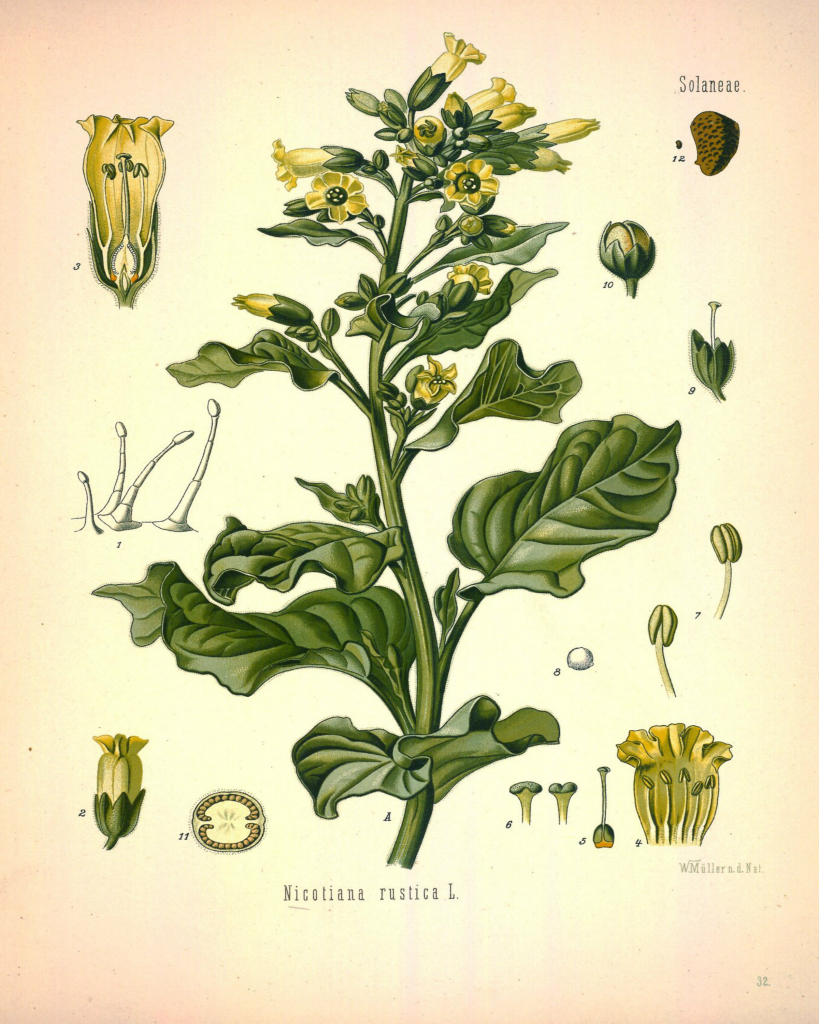
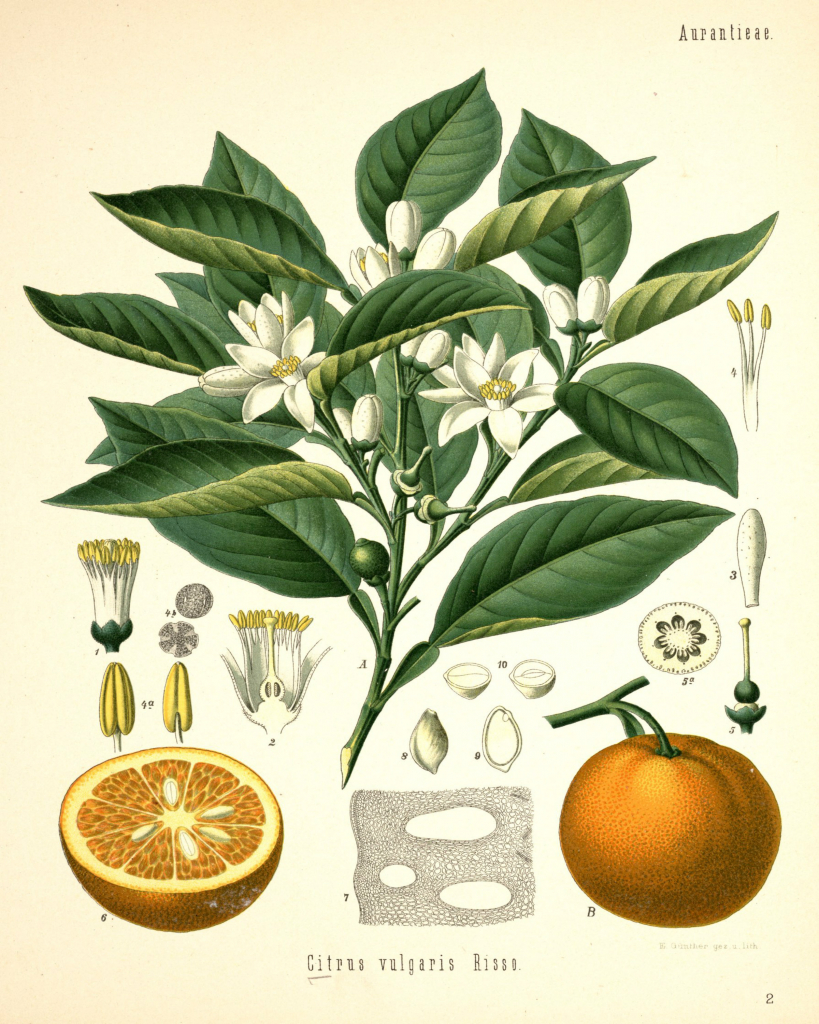
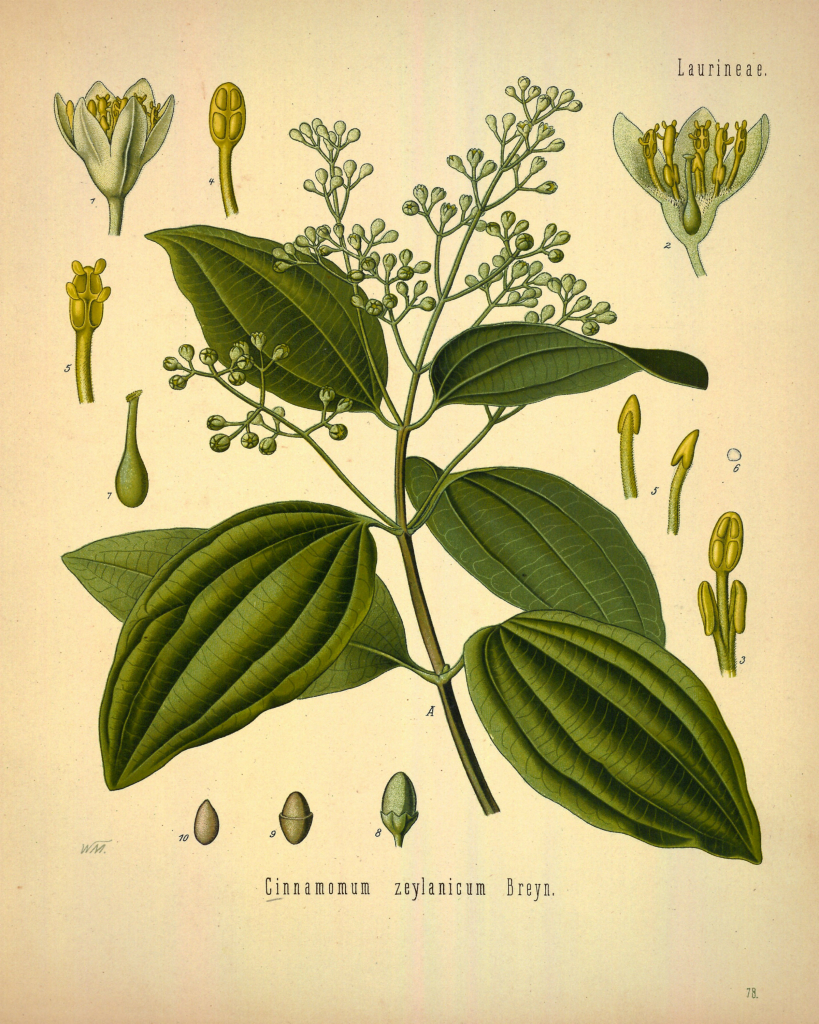
Not too long ago I found this great site that has an old botanical history book page by page. I went through each page. (You can view different pages from the box on the left.) and chose four that I really loved. I sized each to page to an 8×10 size in Photoshop and have them available at the bottom of the post for you to download. If you’re in need of a smaller print size you resize them. I had each one printed on card stock at my local Staples for less than a dollar a piece. I love when affordable and classic decor meet!

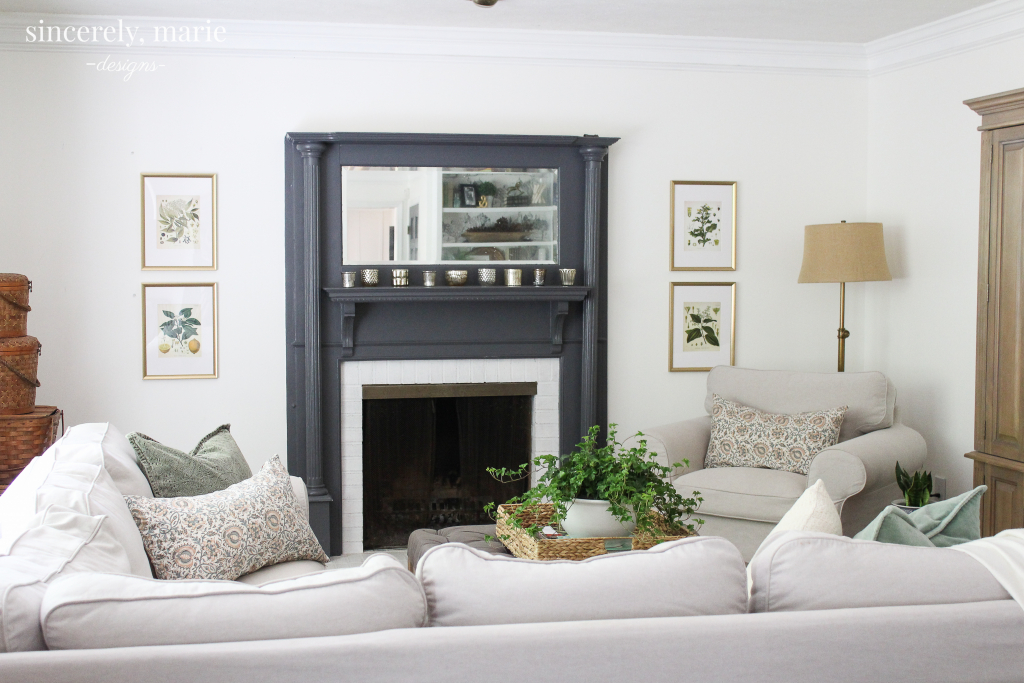
I love the classic look of these vintage botanicals and the smaller size fits the scale of the wall much better. I found these frames at IKEA for under $8 a piece and they’ve been great. They’re not super fancy for I’ve had a couple of the frames for some time and they’ve held up very well.
Now, for my awesome little trick to getting those frames hung just perfectly. When you’re hanging more than one photo in a space you want to make sure they line up. Years ago a family shared this little trick with me to get them lined up every time easily.
All you need is a paint stir stick and a wood screw. Crazy simple, right! Towards the bottom of the stick screw in the wood screw until just enough is sticking out to hanging your frame or decor on.
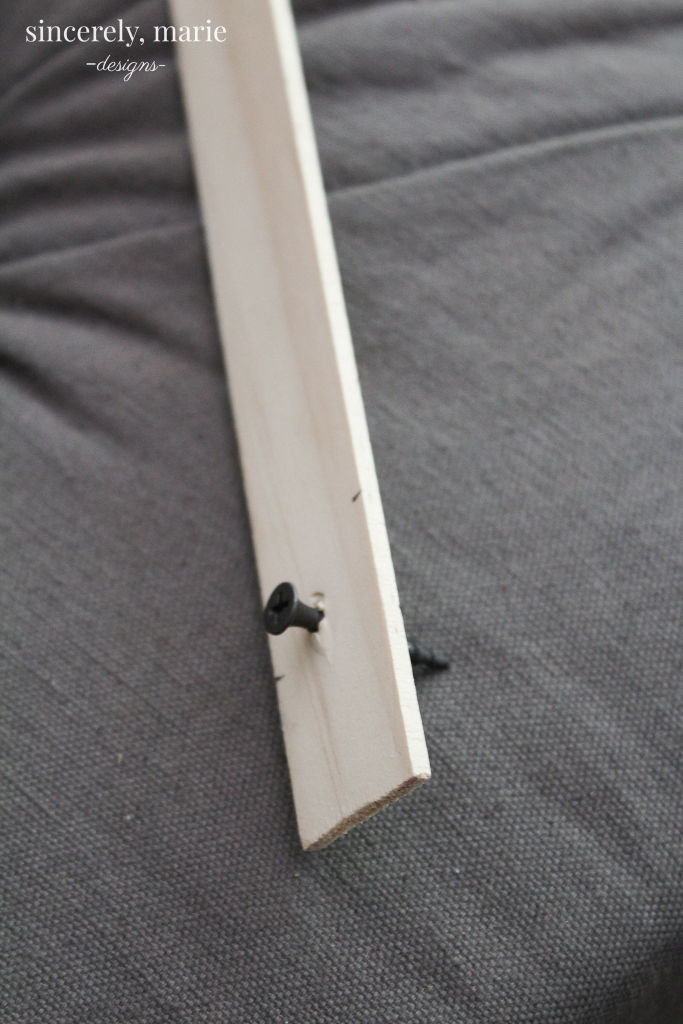
With your frames hanging to your stir stick, hold it up where you want it and apply a little bit of pressure on the back I the frame. The screw will leave a pen size hole in the wall. Now you know exactly where to put your nail. It’s that easy!

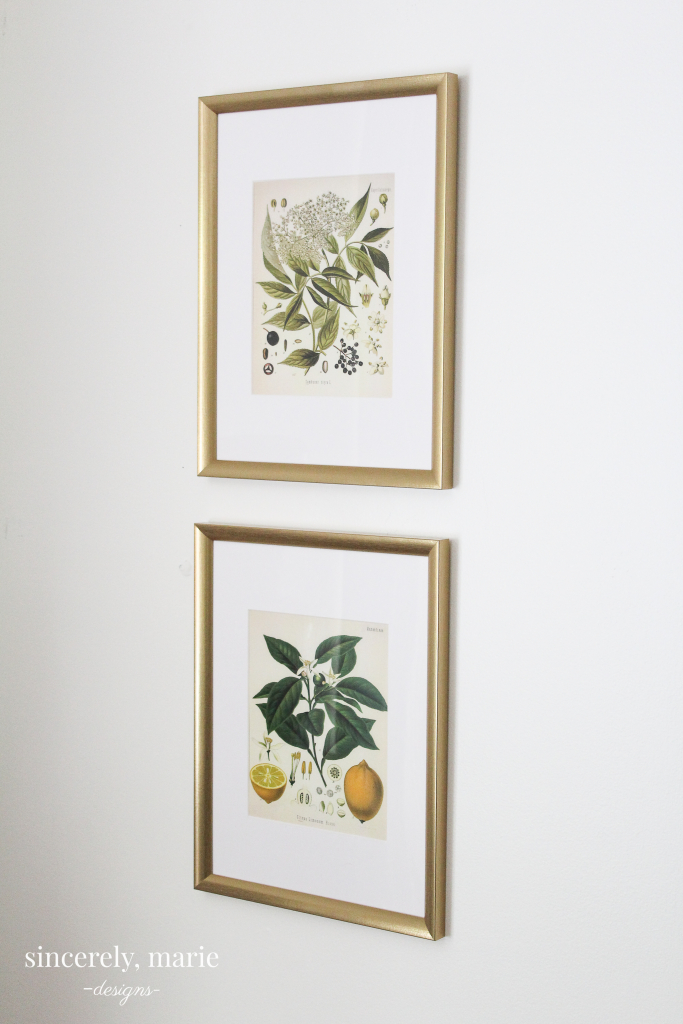
You can grab your free prints here. Just right click on each one, save as, and print. These botanicals would look great anywhere. You could even print them out in a mini size and use as gift tags or cards.

I’m really looking forward to sharing more of the living room changes soon. I’ve got a slipcover tutorial up my sleeve that I’m dying to share. I just finished making a slipcover for our upholstered ottoman this weekend and I’m completely in love with it. Stay tuned friends!


Marie – love your site and great design ideas! Your blog is always one of the first I read. Thanks for pix hanging tip. I will use that hack immediately! Love the botanicals and like the look much better than the earlier one. Since I am always overboard, I would actually find 4 more, frame and add two more to each side (total 4 per each side of fireplace) and move them in closer to the fireplace. Would look like a botanical gallery wall (if you will).
I was thinking the exact same thing! More!
Love the prints and your hanging tip is genius
Love, love, love your blog! You are so talented! Do you print the botanicals on regular paper and 8 1/2 x 11 paper?