I hope you all had a great weekend and a good start to the week. I know it’s back to school time for many families. It can be a crazy time of the year and decorating maybe the last thing on your mind this month, but I have found that a pretty, clutter-free space can bring a lot of comfort and provides a nice place to relax. If you like the sound of that, then this post is for you! One question I have had many times over the years from family, friends and readers is how to decorate areas that you use daily without them becoming cluttered. Today I’m going to give you my 3 simple nightstand styling tips as well as 2 free vintage prints to use in your own decorating! Our nightstands get used every day in our house but they don’t have to be tricky to style. You can still have design without ditching function!
 **This post contains affiliate links. You can see the full disclosure here.**
There are many things I could say about decorating but I think I’ve narrowed it down to three very basic tips that really simplify the process. There are tons of great tips out there and I am in no way shape or form an expert. These are just the techniques I have found to be successful. I guess you could say they’re tried and true!
3 Simple Nightstand Styling Tips
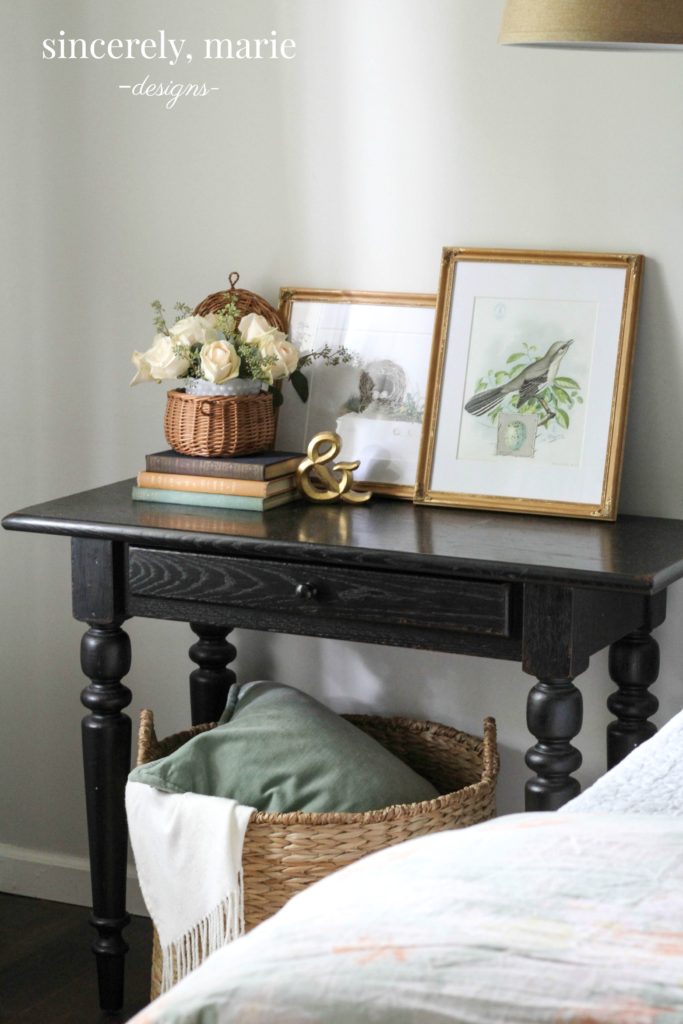
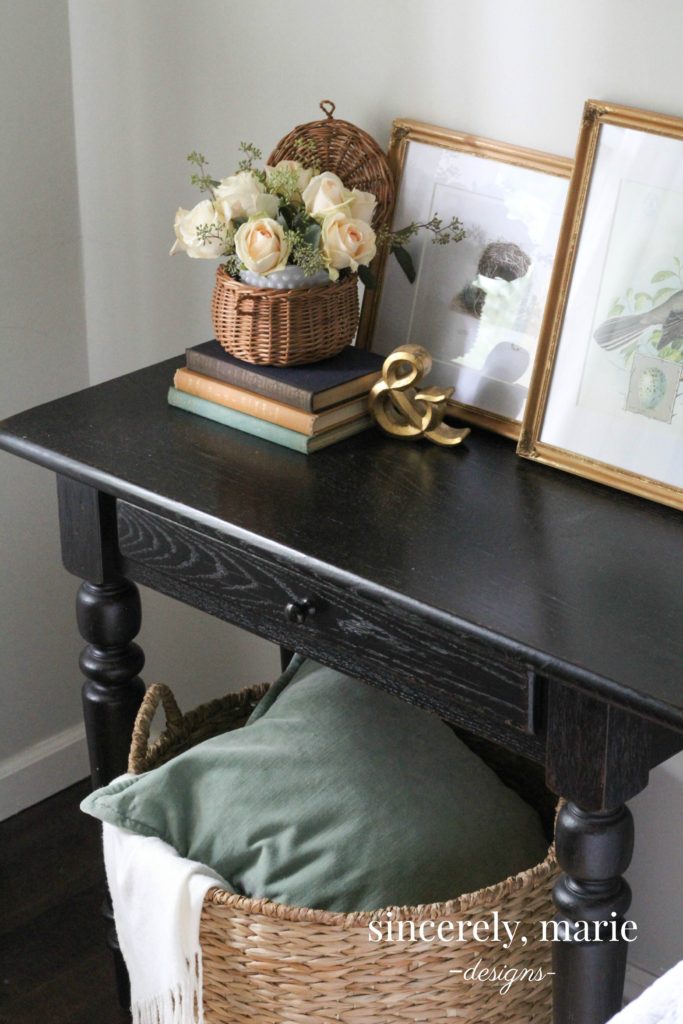
- Layer – Work out and up!
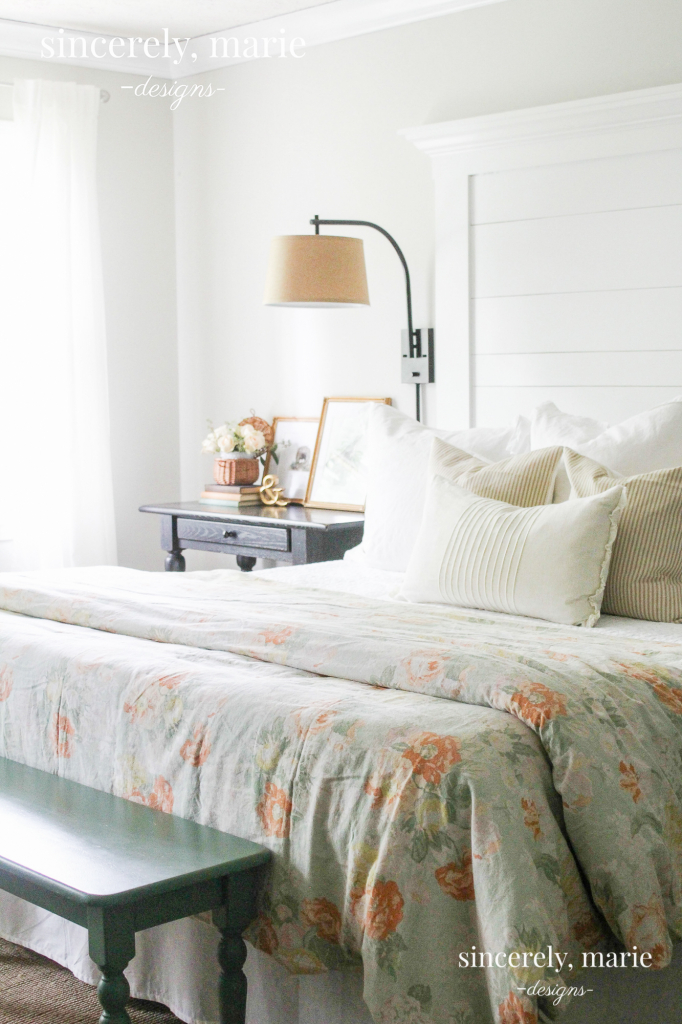
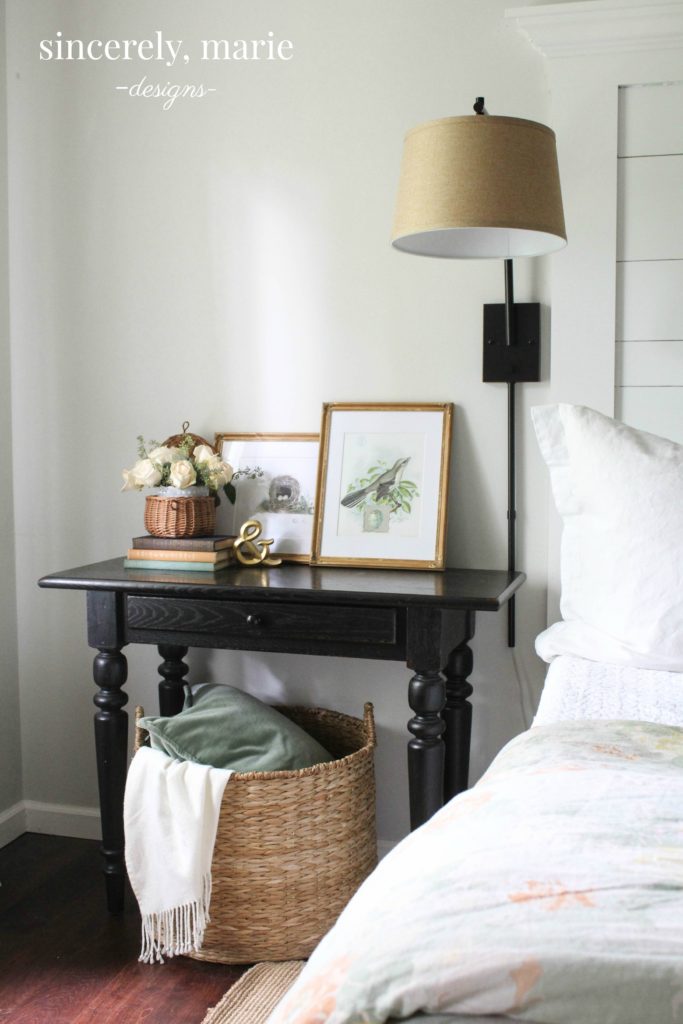
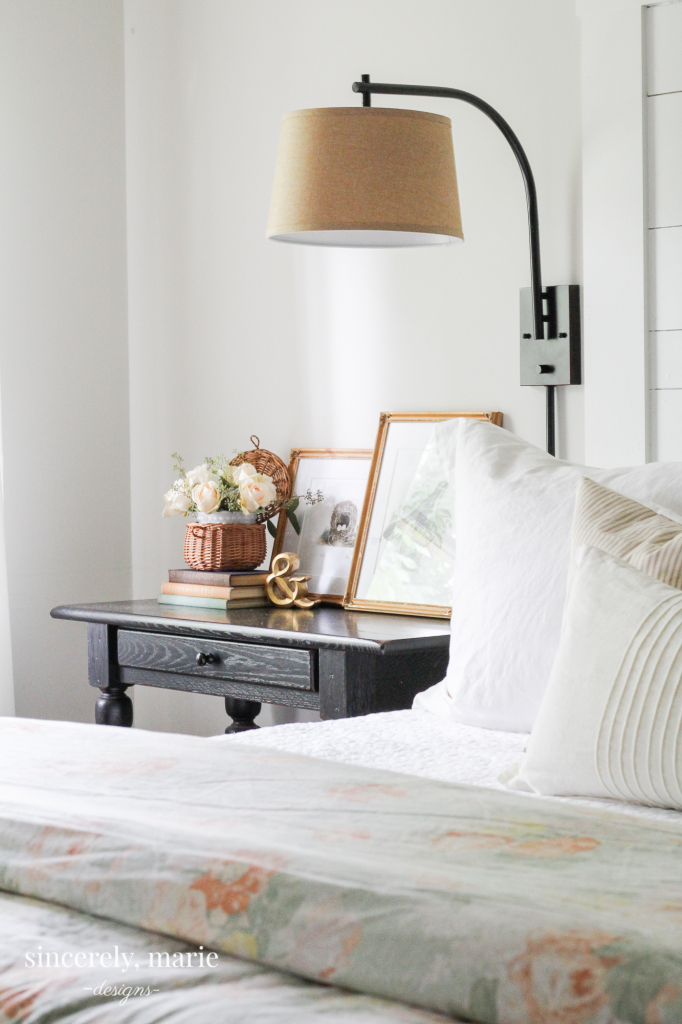
The easiest way to create a boring bedside table it to choose things of the same size and height. If you have a couple shorter items, elevate one of them using a couple books that you already have. Remember picture frames don’t have to go on the wall. If you have space stagger them, one in front of the other. This works great if you mix a portrait photo with a landscape.
Creating depth and different heights keeps the nightstand interesting and is a great way to conserve space! Just make sure to keep things on the lighter side. Too much “stuff” and it becomes cluttered and you’re left with little space for a good book and a glass of water.

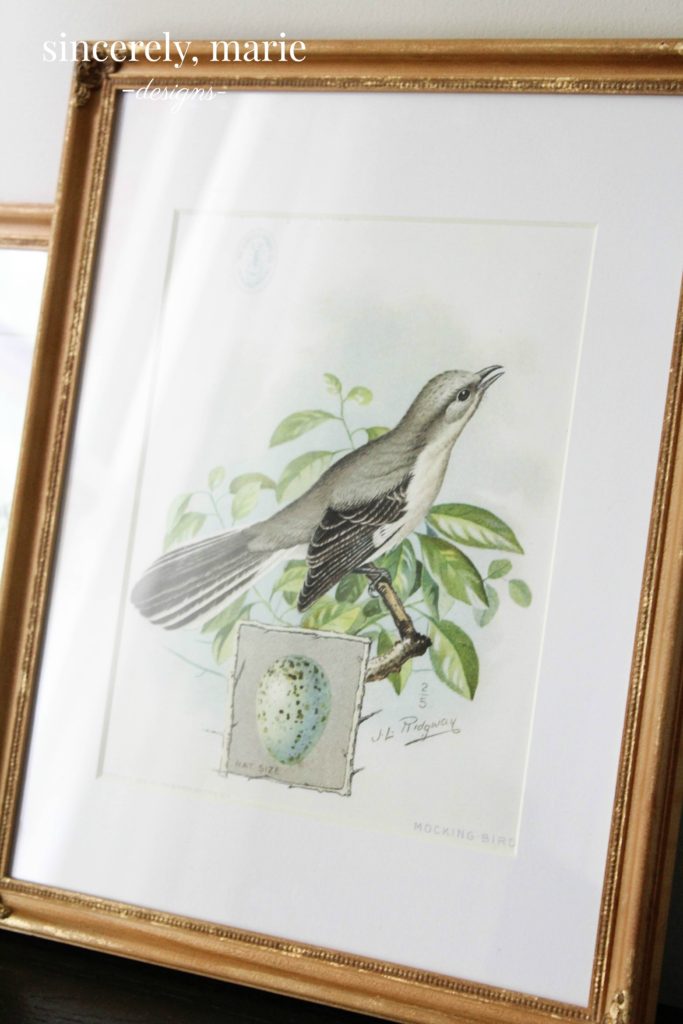
Are these vintage prints not the cutest you’ve ever seen? I’m totally smitten with them but we’ll talk about that later.
2. Use Different Textures.
Mixing textures isn’t just fun but a great way to add warmth and to keep thing interesting. To break up the flat surfaces I used a small basket with lid that I found at a thrift store. I incorporated some softer texture by adding some fresh flowers. You can do this with fresh or artificial.
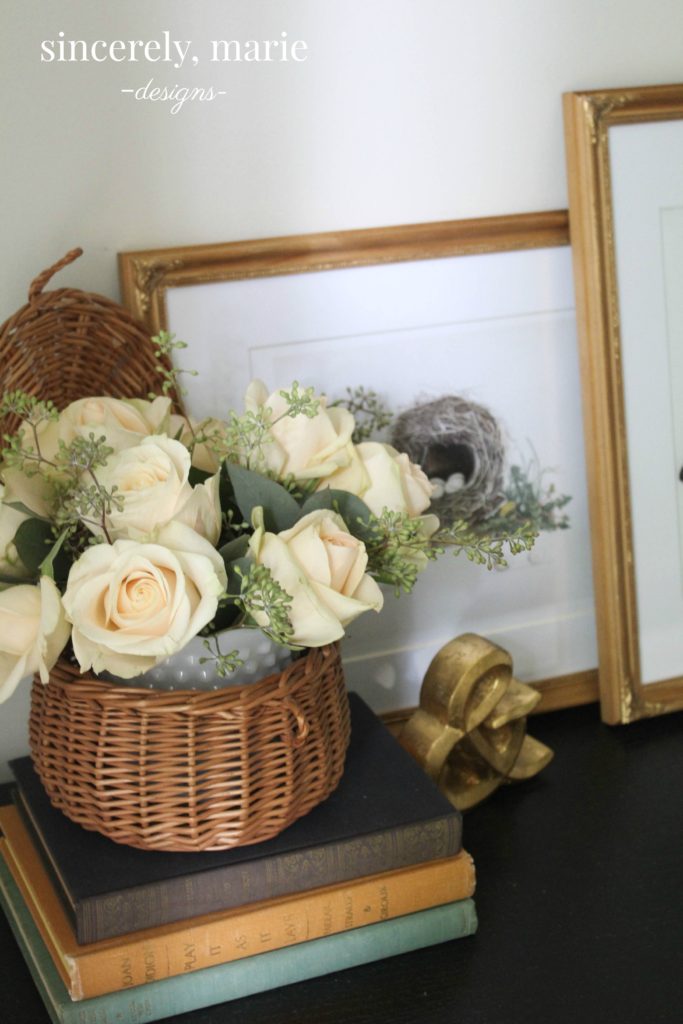

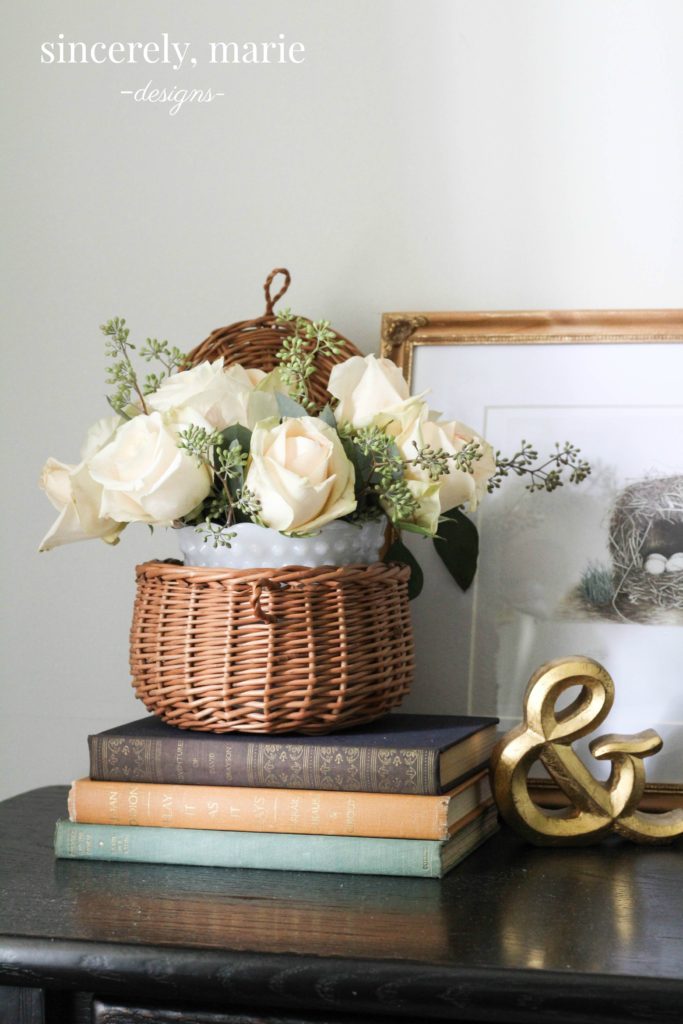
I picked up these two frames on clearance at Michael’s craft store. I love the gold dusting and the raised detailing. It adds a great vintage feel and works well with the vintage prints.
This little Singer sewing bird had me at first sight!
3. Stay organized by cutting clutter.
This tip may take a little practice but with time it can become a routine. Each morning I make sure to clear off my nightstand. It easily fills up with last nights water bottle, magazines, remotes, etc. I make sure to place the TV remotes and magazines back in the drawer. Anything that doesn’t belong there gets removed.
I’ve placed an oversized basket that I found at TJ Maxx for $25 underneath my nightstand to hold throw pillows and an extra blanket. Baskets are a great way to keep organized and fills what would be a useless space underneath the table. They’re especially handy if you have a nightstand without any drawers. You can keep all of those items you use each night in a cute basket or box and keep the surface nice and tidy! If you need some tips on decluttering, read my 3 Tips for Decluttering Your Home.
That wasn’t so bad, right? Now to those adorable prints!
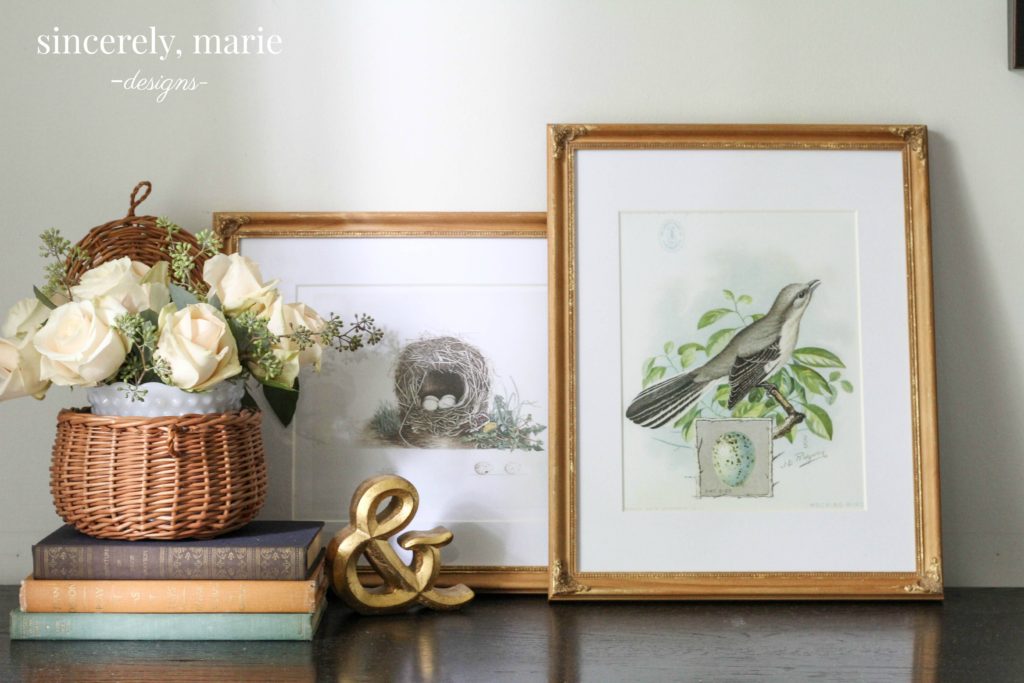
I got these images a few months back from The Graphics Fairy. I’m thrilled I finally found the perfect frames for them. I have resized them to 8×10 prints and you’re welcome to download them. Just remember they’re for personal use only. Just click on each and save.
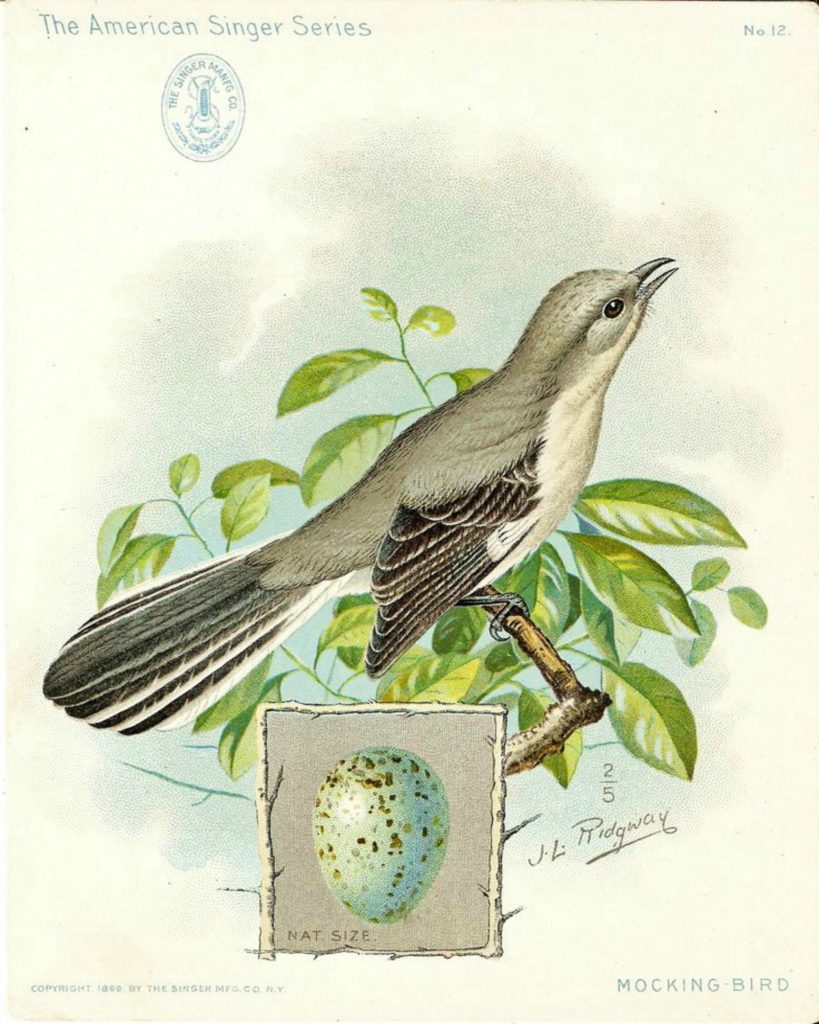
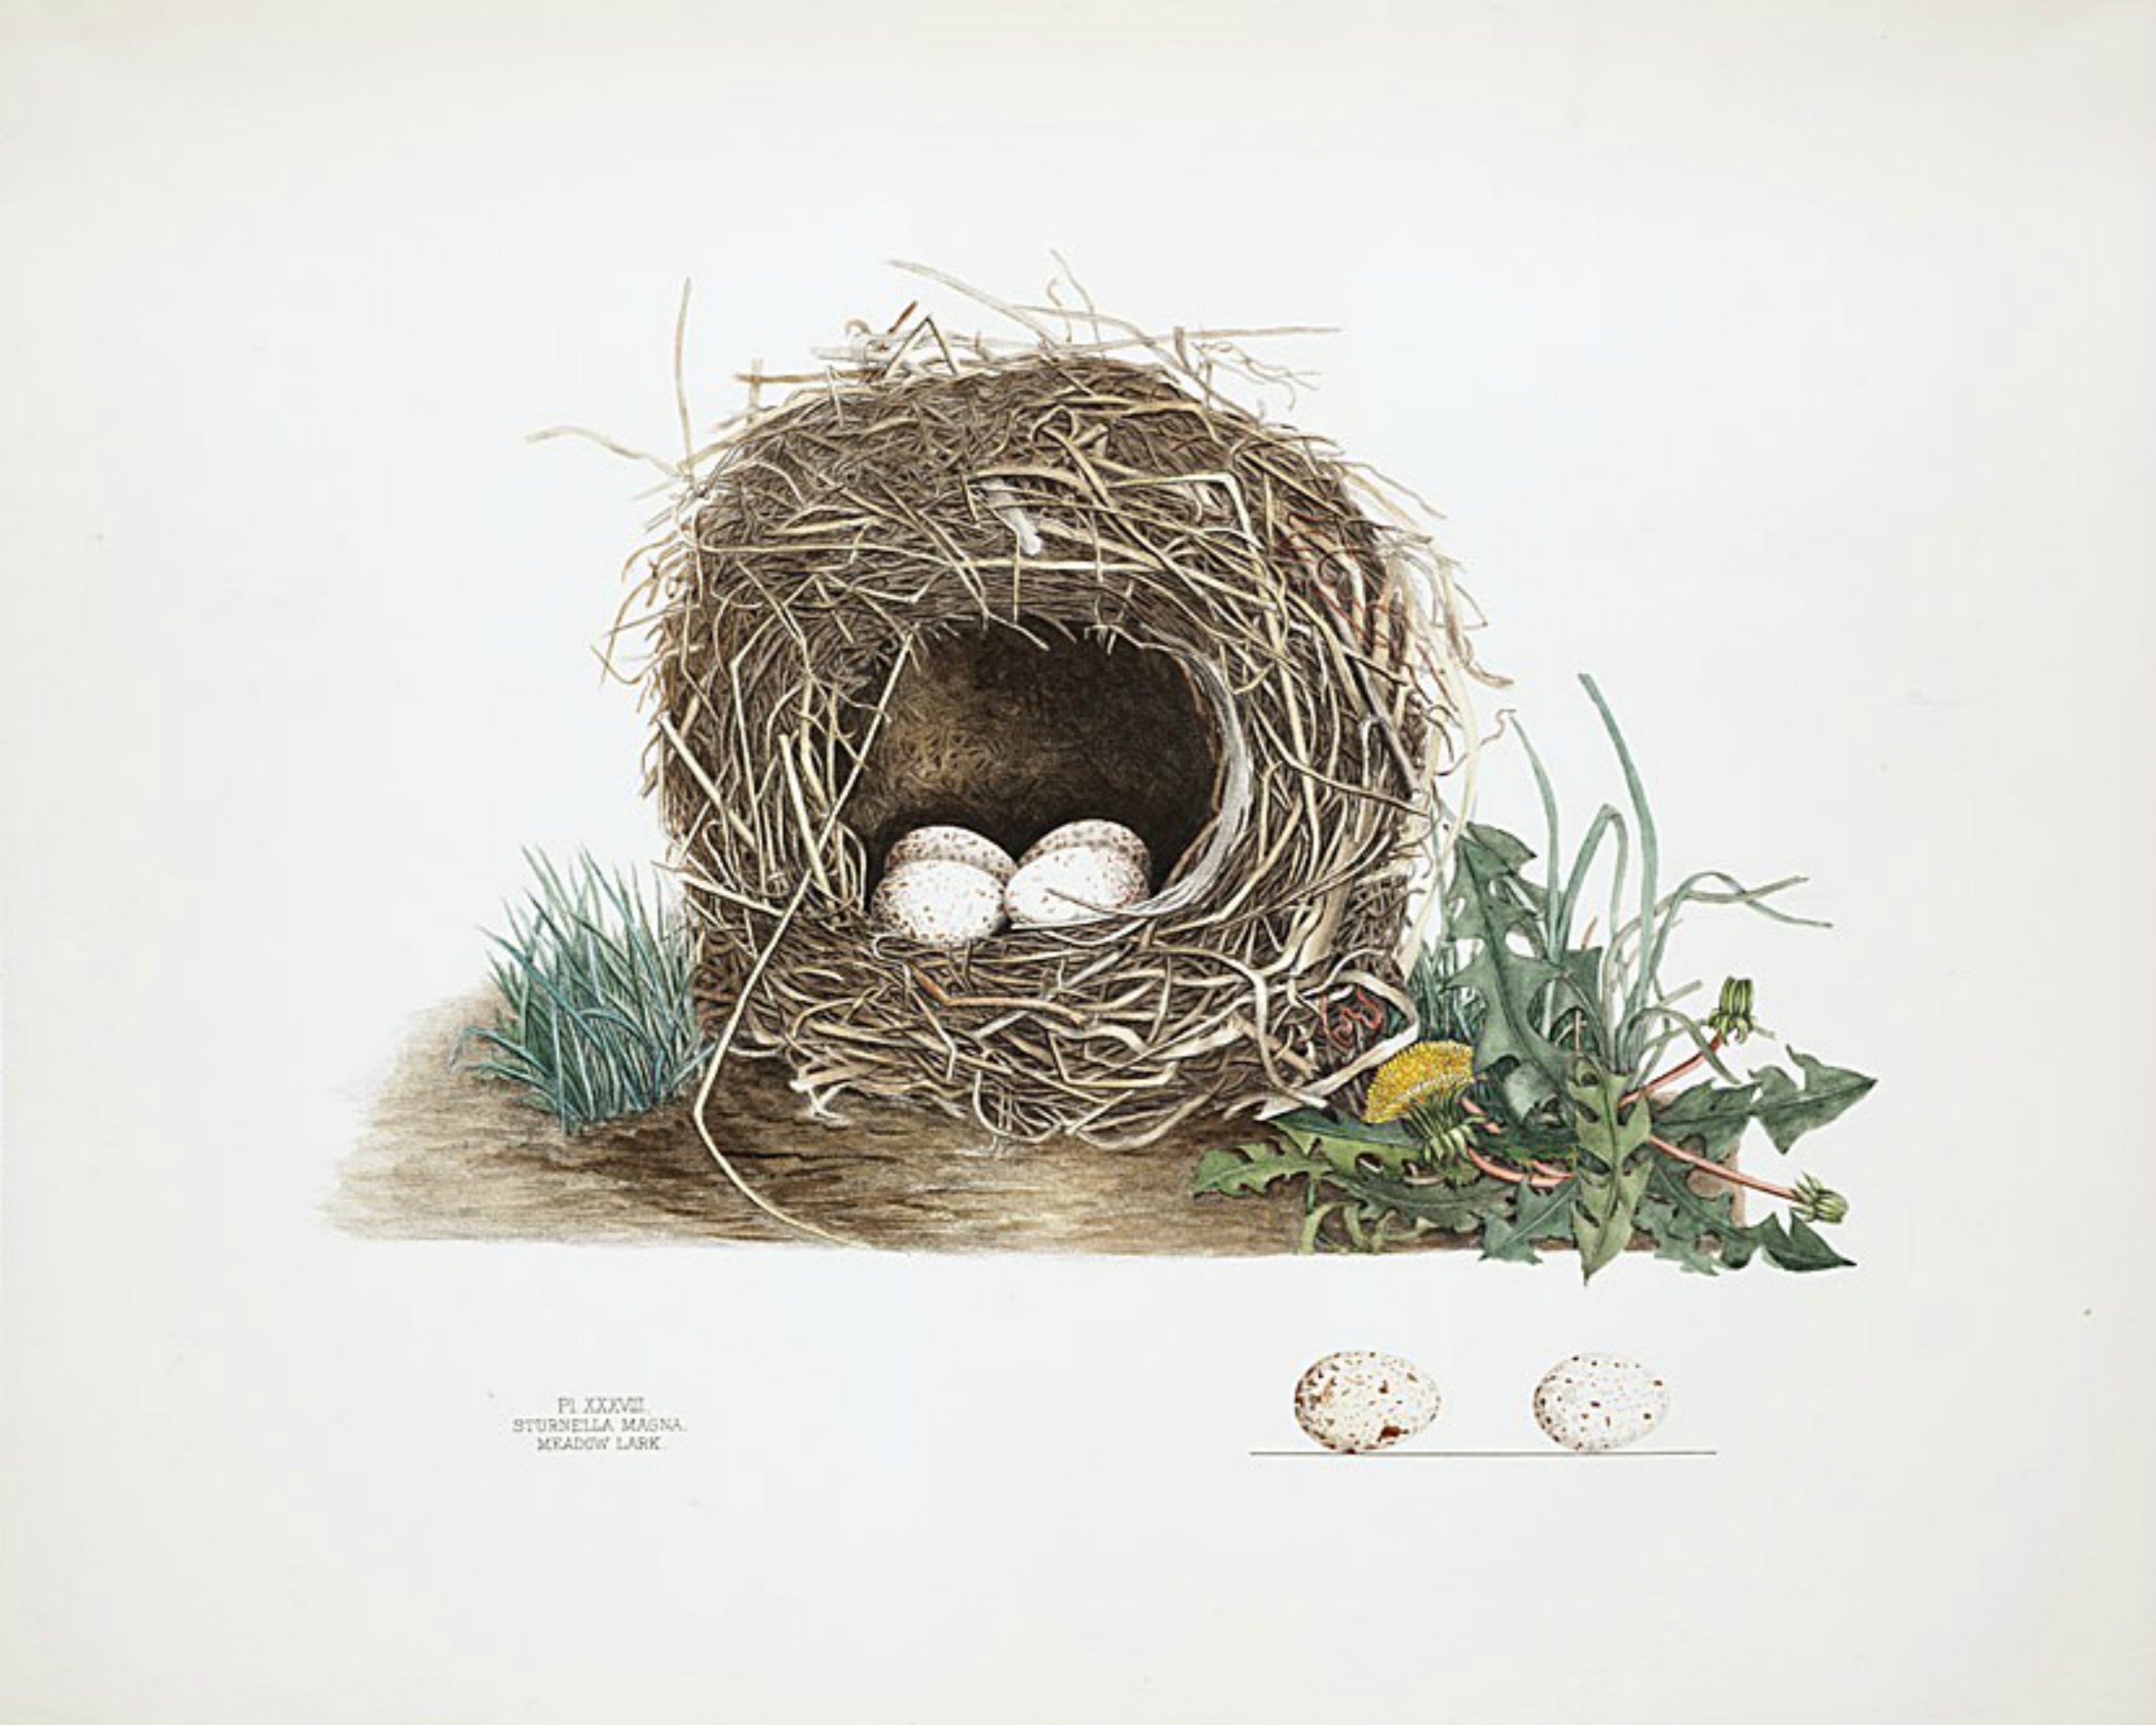
I had mine printed on card stock at Staples for around a $1 a piece. I just love when pretty and inexpensive meet!
You can also see where I used these same styling tips while decorating my high boy dresser.

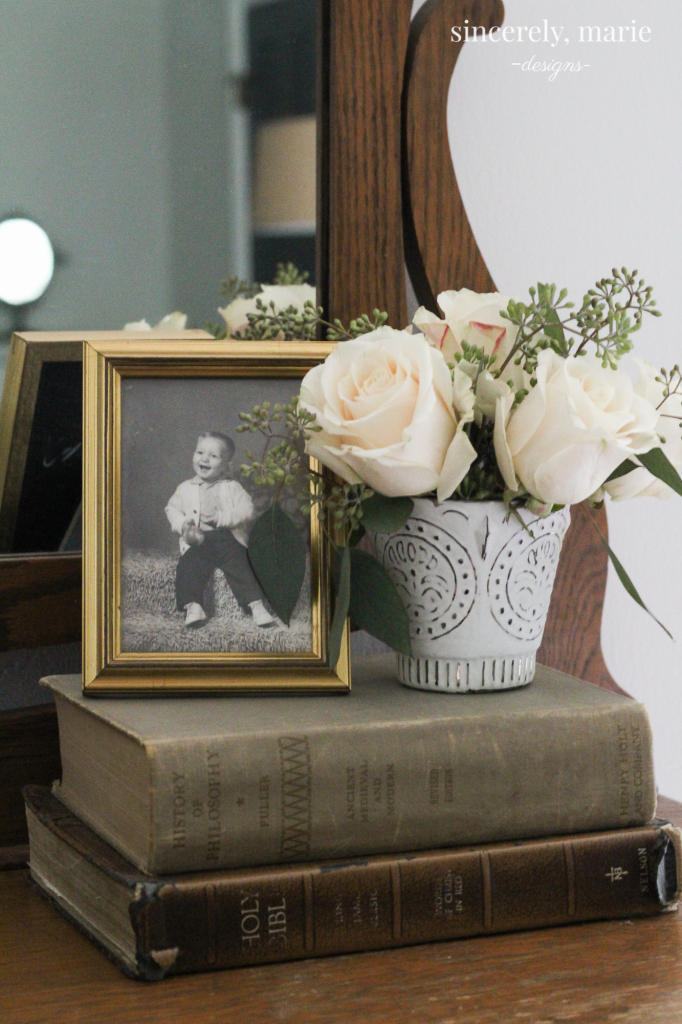
That’s my dad in that photo. I was just a little girl with he unexpectedly passed away. He loved the Lord, so having his Bible has meant a lot to me. It sits on my dresser along with this adorable photo. Although I have more recent photos of him this one of him at only a year old reminds me a lot of my own son, Charlie. I’ve always said, fill your home with items you love, those things that mean something and hold special value to you. Do that and you can never go wrong!
I hope these few tips help you navigate the world of styling. Whether it’s a nightstand, dresser or table top you use the same techniques. It doesn’t have to be textbook perfect as long as you find it to be lovely. If you have any advise you follow while decorating I’d love to hear! I’m learning new things all the time and love hearing from you guys.
I hope you all have a wonderful rest of your week and be sure to stop by next week when I share our 1.5 year fixer upper anniversary! This old house has seen a lot of changes this past year and can’t wait to look back and dish the details with you.

-Shop the Look-
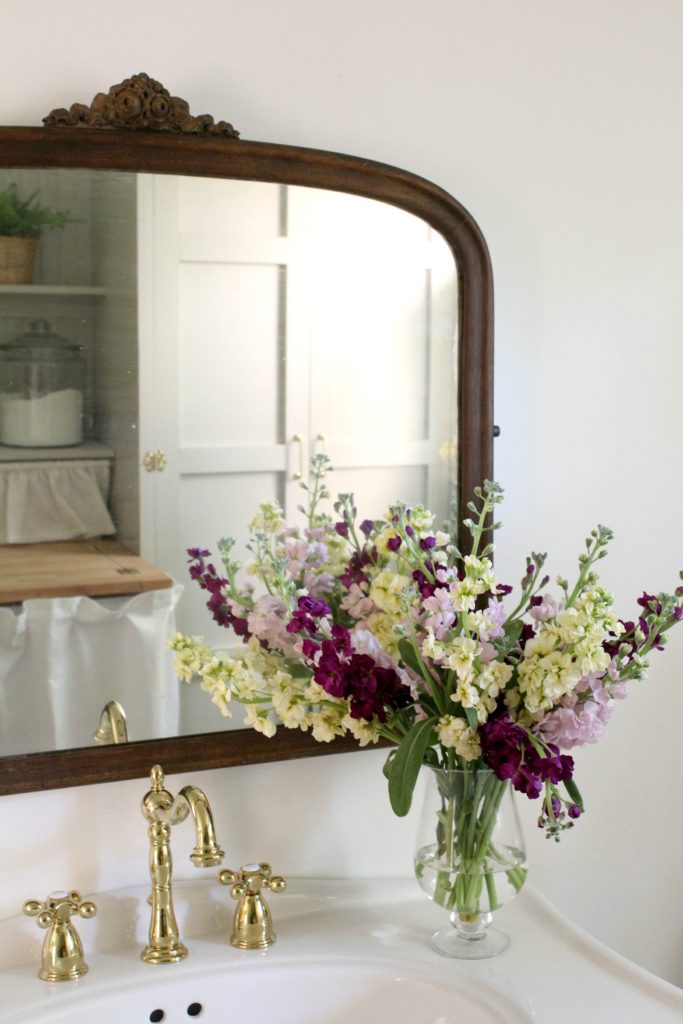
Vintage Inspired Powder/Laundry Room Reveal
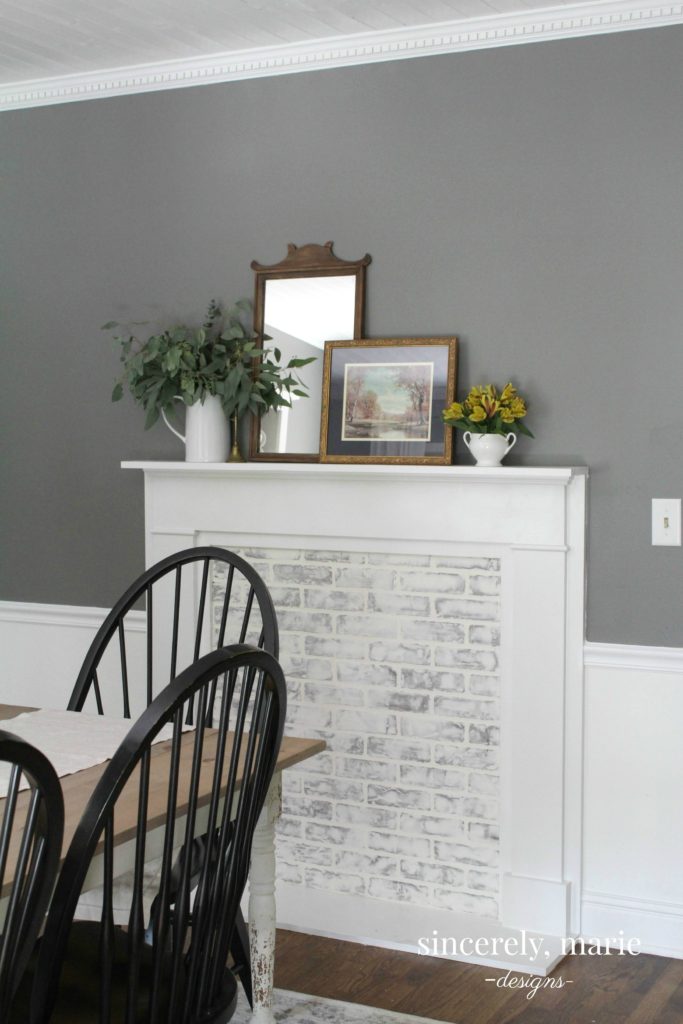
DIY Faux Fireplace with German Smear

Thank you for the prints! My BFF has a bird thing and this will make the perfect gift! I love the bedside look!!
That makes me so happy Heather! I’m sure she’ll love them as much as I do. Thanks for stopping by!
I love how this looks and I am going to print your pictures, but aren’t nightstands MADE for our bedside clutter? My hand lotion, chapstick, cuticle cream, reading glasses, clock radio all need to be next to me. I wouldn’t want to sweep that all into a drawer and dig it out every night. How do other feel?
Oh I def. have the bedside clutter! I personally like having the drawer for the storage. For my own sanity I need a clutter free nightstand. I say do whatever works for ya! 🙂
Thanks for the great tips – definitely good ideas worth sharing! I am currently working on our new guest room and will use these ideas when decorating in there – both the nightstand and the dresser! At the risk of this being a dumb question – can you give more details about having the prints printed? I’ve never done that before….I’ve usually printed things at home, but that takes a lot of ink and it’s not the best quality! What all does it require? Thank you! Blessings to you…..
I’ve been working a little in our guest bedroom too! How funny. I’m a long ways from being finished though. That’s not a dumb question at all. I should have given a little more detail on that. I have a Staples close to me so I go onto their website under the print and copy service tab. You can then upload the prints and choose your paper choice. I typically choose a heavy card stock. When you’re choosing the paper type, there will be a “size to fit” box on the bottom left, make sure that’s checked. You can then order your prints and choose in-store pick up. I agree with you on printing at home. I started printing at Staples for those very reasons.
Thanks, Amanda! Just looked up the nearest Staples and it’s an hour and a half away!?! Do you know of other stores that offer the same type of printing?
Office Depot offers the same services.
We have a Walgreens in the town next to us and they do prints as well 🙂
I am new to your blog and just love it! This is very helpful. Thank you for sharing. I’m in the process of planning a master bedroom update and find that no matter what I do, I get the big pieces in place but then have trouble styling everything to make it look pretty. I guess that’s why most of the rooms in my home are furnished but not decorated! I never know what to use or how to make it all work. I will be using your tips for sure!
Ahh, well welcome Bethann! I’m so glad you find my little corner in blog land. I thrilled this was helpful for you. Some times the trickiest part to finishing a room is those small details. I’m more than happy to share what I’ve learned over the years. Good luck on your bedroom renovations. Room makeovers can be so fun!
I love your oak dresser and breathed a sigh of contentment when I saw it in it’s natural state, not painted. You’ve created lovely vignettes on both the dresser and night stands. Thanks for the prints! I both saved and pinned them.
I’m new to your site and I love your bedside lamps. Where did you find them?
Thank you so much, Laurian! There is actually a link to them on my Shop the Home page at the top of my blog :). They’re great lamps!