This post was sponsored by Giani Granite but all thoughts & opinions are my own.
If you read the title of this post you probably popped over because a. you just don’t believe it can be done or b. you’ve been looking for an inexpensive fix to those ugly counter tops in your home and want to know the secret. Whichever one you are I am happy to report it can be done and the result is awesome! Here’s how you can update your counter tops for under $100.
When we moved into our house a few months ago I immediately tried to make up my mind on exactly the counter top I wanted to replace the old laminate with. I looked at butcher block, quartz, marble and even a couple faux marble laminate options. I couldn’t find anything that gave me the feels like Calcutta marble. What took me down from my cloud pretty quick was the price tag! With all the other necessity repairs that had to be made, real marble just wasn’t in the budget. I decided to just suck it up and live with the beige nightmare that were my counter tops until the day came that we could splurge. I was just starting to come around to the idea of waiting until I came across a product that seemed too good to be true. Let me introduce you to my counter top’s saving grace – Giani Granite. They sell kits that completely transform your existing counter tops. The best part, the kit’s only $79! I wasn’t originally looking at granite however, I came across their White Diamond kit which has a very similar appearance to Calcutta marble. I thought what the heck, why not. Anything had to be better than what I already had. My kit arrived within a week and I was more than anxious to get started.
Here’s a reminder of what the kitchen looked like before we moved in.
 This post contains affiliate links. You can read my full disclosure here.
Mid-way through the kitchen remodel. Those tired laminate counter tops were crying for a makeover!
Prep is key here friends. There is a short DVD video on Giani’s website but they also include a DVD as well. Make sure to watch it first. I think I may have watched it more than I needed to but I didn’t want to waste a kit. I started by cleaning my counter tops really well with just warm water and dish soap. Harsh chemicals are not recommend. You don’t want to botch the adhering process.
Next, lightly sand your laminate counter tops. This is just to give the paint something to grab onto. I then wiped the counter tops off again with a wet rag. I went over them twice to make sure to get all the dust that was left.
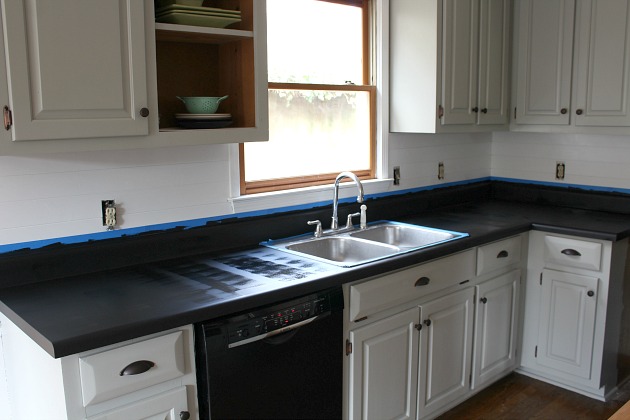
It was then time to tape off the back splash and cabinets underneath. Using tape just gives you more freedom when you go to sponge the paint on.
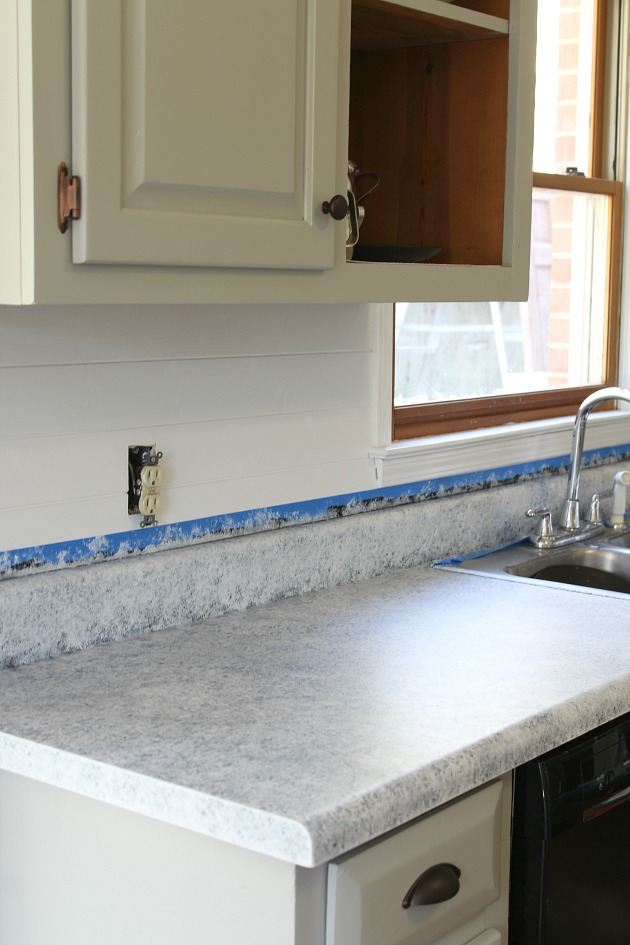
Once everything was taped off I rolled on the black primer like instructed. One coat completely covered my counter tops. Here’s what they looked like with the primer finished.
You can do a second coat if needed. I let that dry over night.
The next day I started adding color.
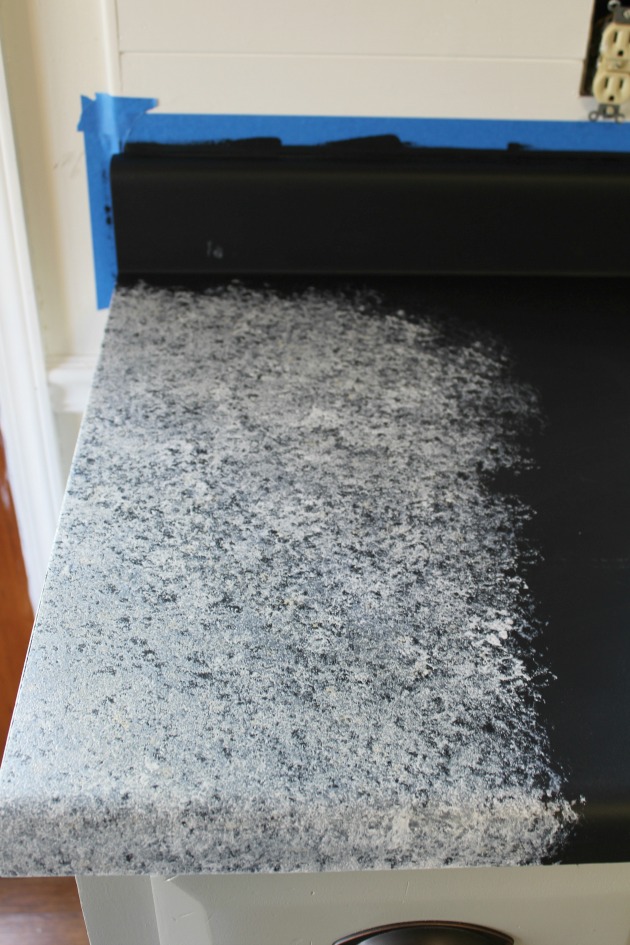
You want to work in small sections at a time. I will admit, this was a long process. It did take most of the day to complete. There are three different colors. You sponge on in an order and amount recommend for whichever kit you purchase. There’s not an exact pattern to stick to. You want to keep it random. I layered and layered. I didn’t want a very busy or speckled look so I made sure to use more of the white paint.
Here’s how they looked once I finished my first time around.
I wasn’t horrible thrilled with the corner of the counter top and back piece. I ended up cutting a much smaller piece of sponge to get more white paint into the corner and used all the white paint I had left over to continue to lighten them up. I tend to be a perfectionist. By the end of the day I had to force myself to let them be.
Last, I rolled on the top coat. I let that dry overnight and then rolled on a second top coat the next morning. I did let my counter tops sit a couple days to cure before using them again.
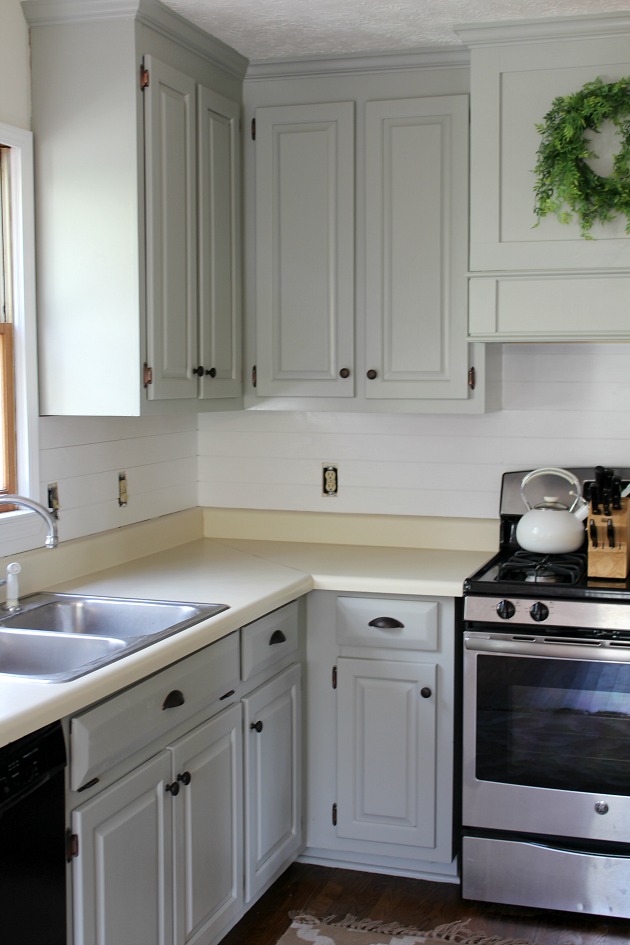
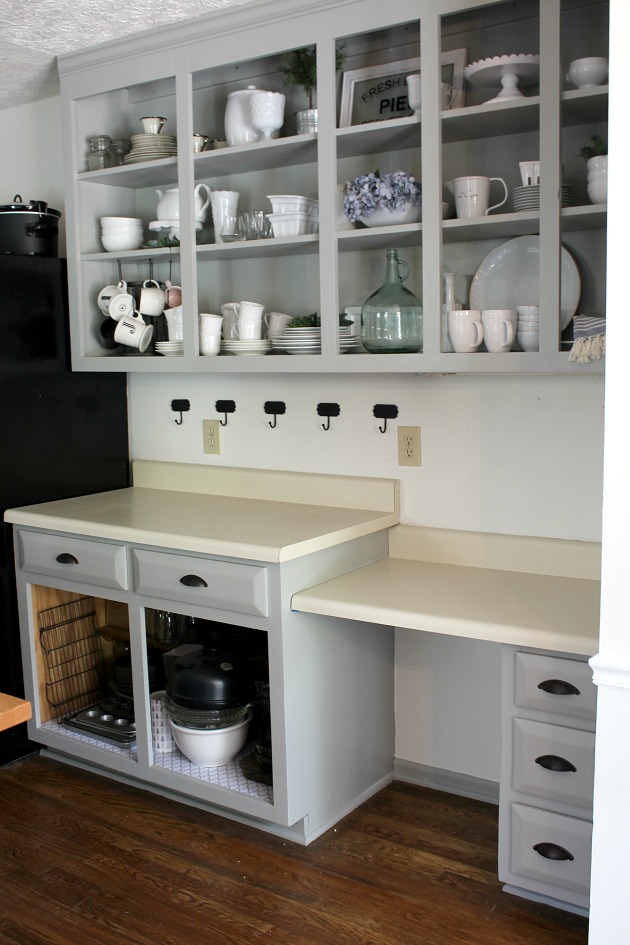
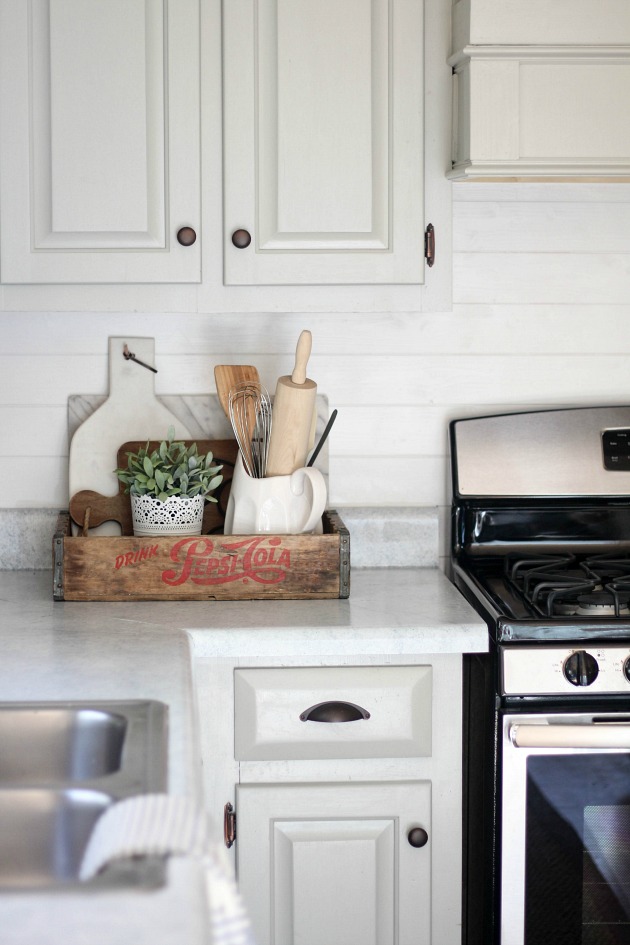
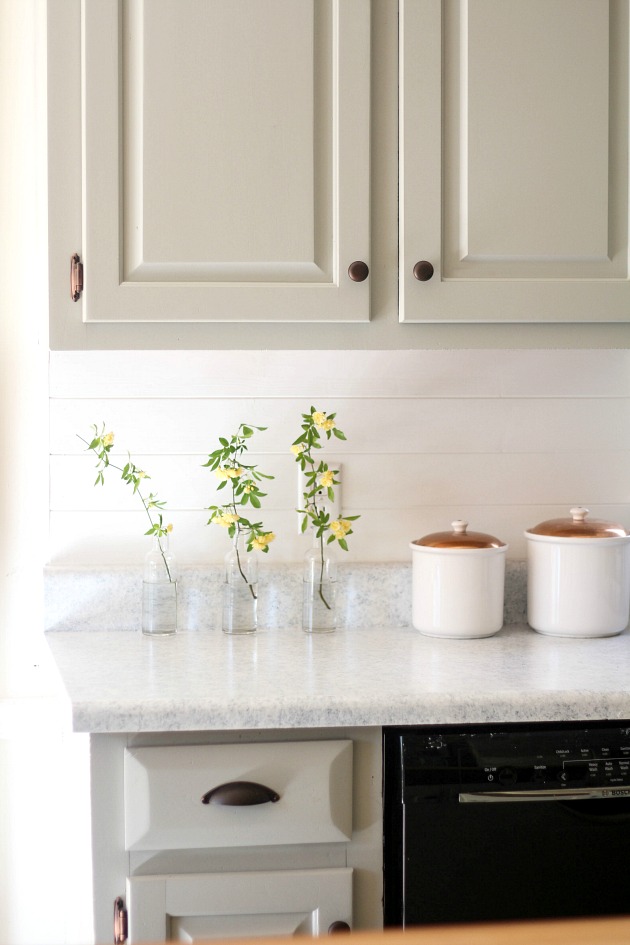
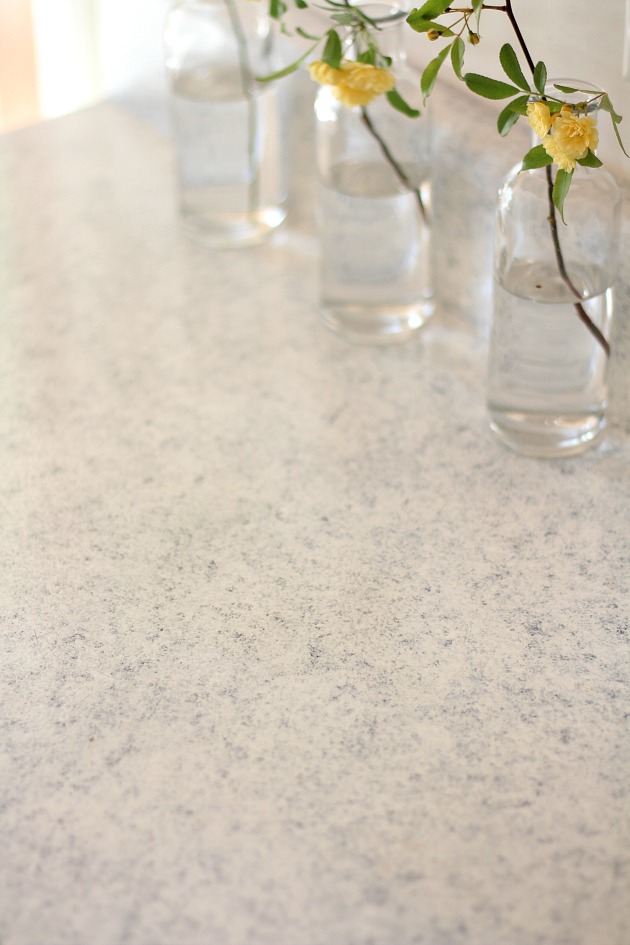
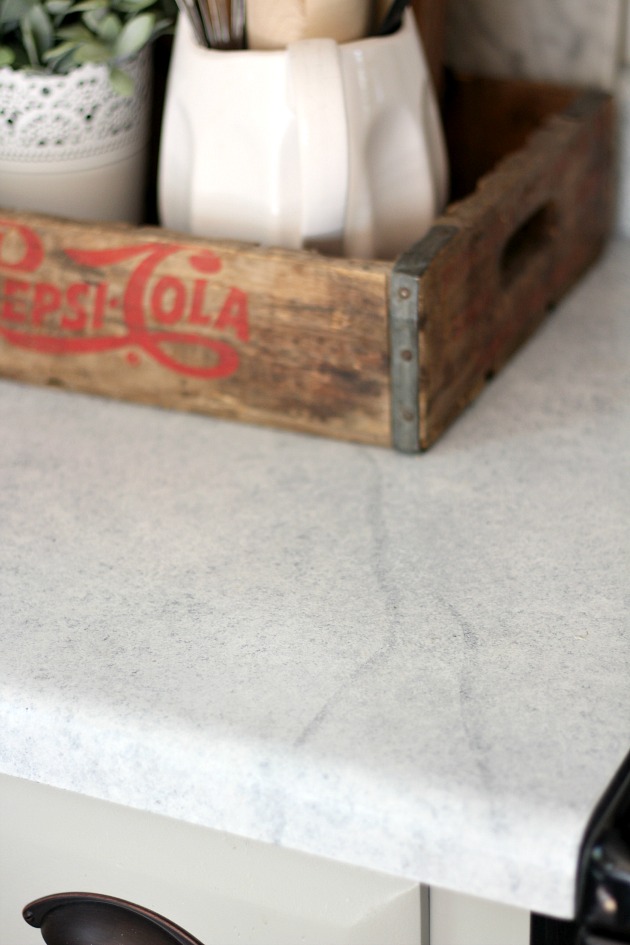
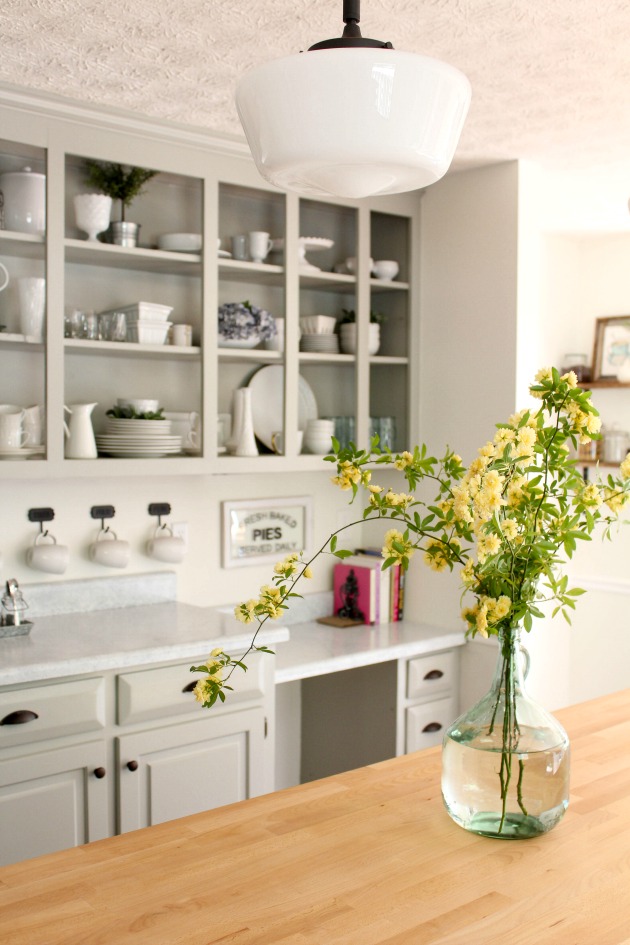
Here’s how they look today!
I was amazed at how something so affordable and simple completely changed the whole feel of my kitchen. The room feels brighter and looks so much cleaner. Heck, I’m much more chipper while I’m cooking too! I couldn’t be happier with the result. Thee finish gives the counter top a nice shine that gives them the look of a solid surface counter top. It’s held up great in the last month and a half. We’re not gentle on our counter tops by any means. My three year old is constantly climbing onto them. Shh don’t tell my husband. Just like most kitchens, our counter tops can be a catch all but so far so good! I’m really looking forward to see how well they hold up long term but the finish seems extremely hard and durable. I really don’t foresee and issues. You can see the full kitchen makeover here. I think it’s a great option if you’re waiting on the day to put in your dream counter tops and are looking for a refresh now or if you’re wanting to keep your existing counter tops and just need a different look.
Have a great week friends!
You can also check out how I gave my tired dishwasher a makeover using their dishwasher stainless steel kit!


Your counters look amazing!!
This is on my “to do” list right after I paint my upper and lower cabinets!! Did you add any veining (I only see the one pic showing a little?) Did you use any of the gold paint that I believe comes with this particular kit? Not afraid to admit that I am a perfectionist and the thought of starting this project freaks me out! It’s so great to read tutorials and helpful hints from bloggers.
Thank you so much Beverly. I did add some veining but not a lot. I wanted to keep them as simply looking as possibly. I did use the gold but very sparingly. I used just enough to add a little depth and to keep them natural looking. You can do this! Just take your time and know that not any real piece of granite is perfect. The paint is very forgiving though 🙂
Amazing difference! How is it holding up to everyday use?
Roxanne, it’s been great. I haven’t had any issues. You can’t put hot things directly on them, very similar to some hard surface counter tops and it’s not recommended to use harsh cleaners. I just use warm water and dish soap and so far so good!
Those countertops really do look amazing! The color is perfect for your kitchen. I like the finish, too. It looks really nice and way more expensive than it was! P.S. those yellow flowers–I am drooling.
Thanks Bess! I’m really happy with them. I’m glad this is what I get to look at while I wait for the real thing. Those yellow flowers are actually from our back yard!
The countertops look awesome! I was just wondering what kind of feel do they have to them? Is it smooth like marble would be or by touch can you tell it isn’t marble?
I love this!!! Thanks for sharing!
What color did you do for your cabinets? They are so beautiful!
Thank you so much Heather! The cabinet color is Fieldstone by Benjamin Moore.
HI Amanda! Love your kitchen. Where did you get those black hooks for your coffee cups? and how did you attach them to your tile?
Thanks!
I purchased them as a box set from Home Depot a couple years ago. I’m not sure that they sell them anymore but they’re the Home Decorators brand. We actually do not have any tile on that wall. We were able to just anchor them to the sheet rock. I know you can drill through tile with a drill bit made for cutting ceramic tile, marble, etc.
Hi Amanda,
These look great! I’ve used the Sicilian Sand kit at my mom’s house and am thinking of buying the White Diamond for my house. Did you end up using all the colors in the kit, or mostly just the white paint? I want mine to turn out like yours, very subtle. I’ve seen some other results with the white diamond kit and they were too dark.