It’s been five years since we started renovating our current house. Here’s a look at the before & after of our renovated colonial home!
I’m finding it hard to believe that it has been five years since we purchased our home. Sometimes it seems like yesterday that we walked through the door. Time has gone by much too quickly but in those five years we have accomplished quite a bit!
Today, I want to take a look back at what our colonial looked like when we first walked in and what it looks like now, five years later. I will let you know now, this is going to be a lengthy post, so grab some coffee!
“We shape our homes and then our homes shape us.”
– Winston Churchill
This house had seen better days when we first stepped inside, but it sits in a sweet old town and had all the charm that I was looking for. As soon as we walked in I knew it was the one. Under all of that grim and mess there was a gem. Over the last five years we’ve steadily brought this old house back to life.
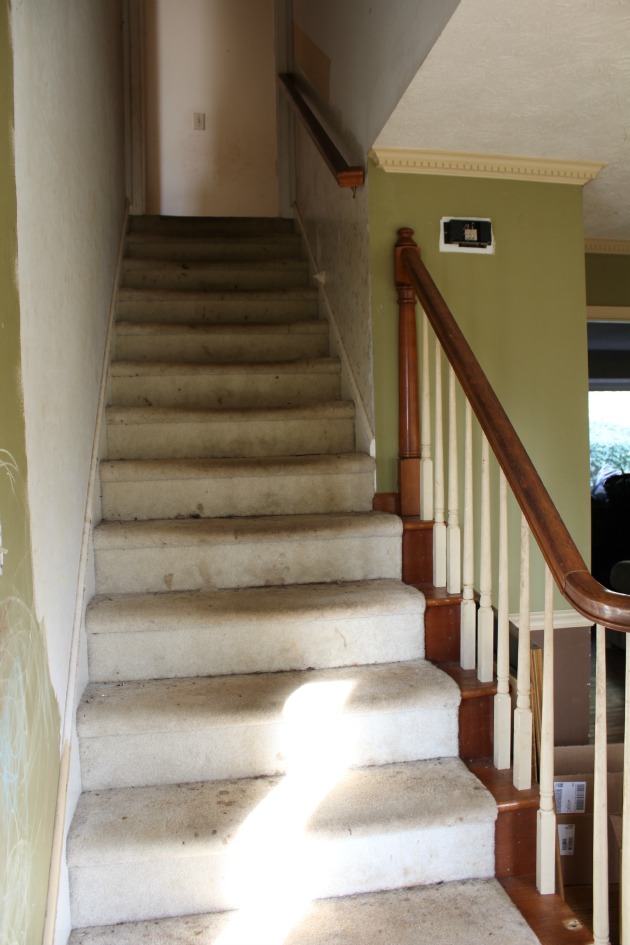
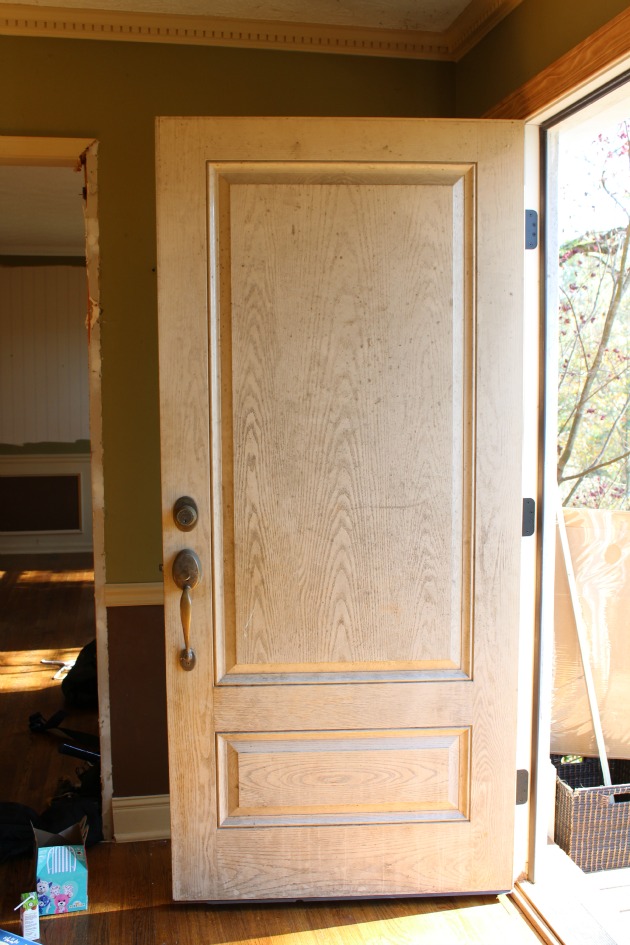
The Foyer
Our Foyer was not the welcoming space that I wanted it to be. It was dark, worn out and smelled terrible, which happened to be the case with the rest of the house as well. We got to work by getting rid of a 40 yard dumpsters worth of trash, broken furniture, old carpet, counter tops and a number of other things.
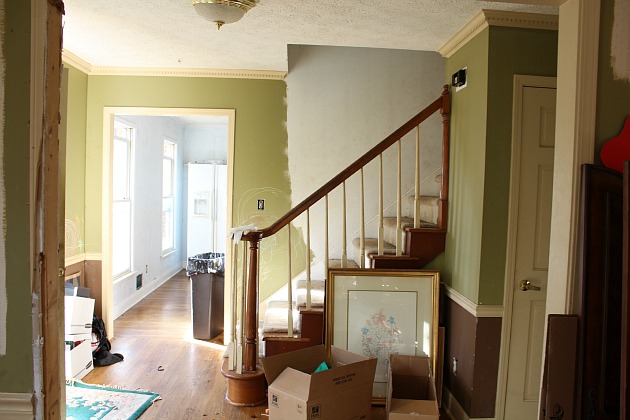
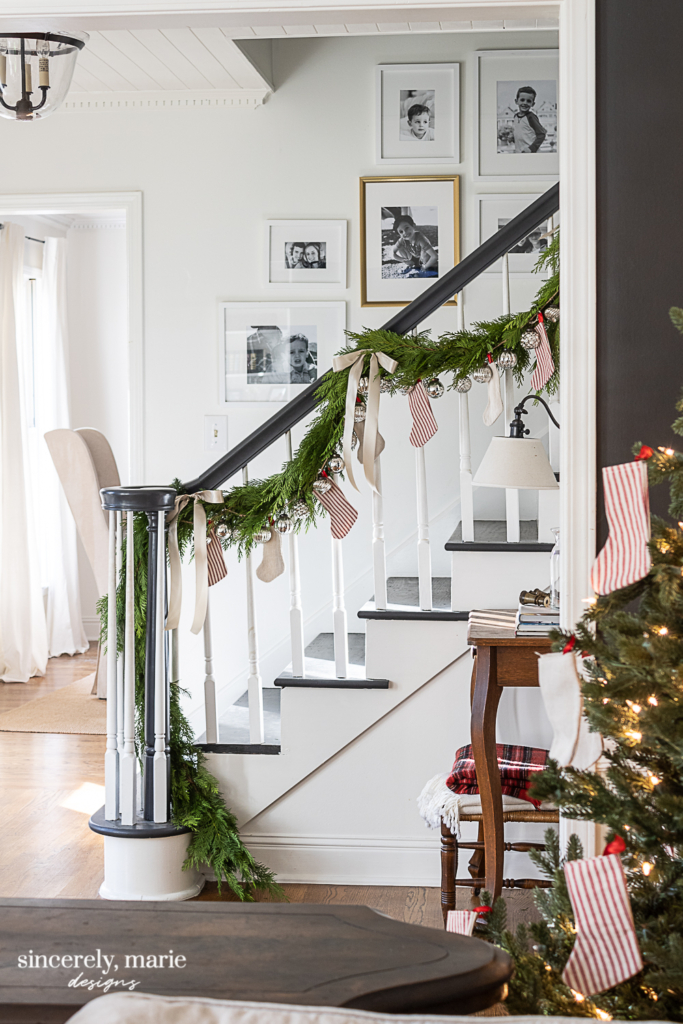
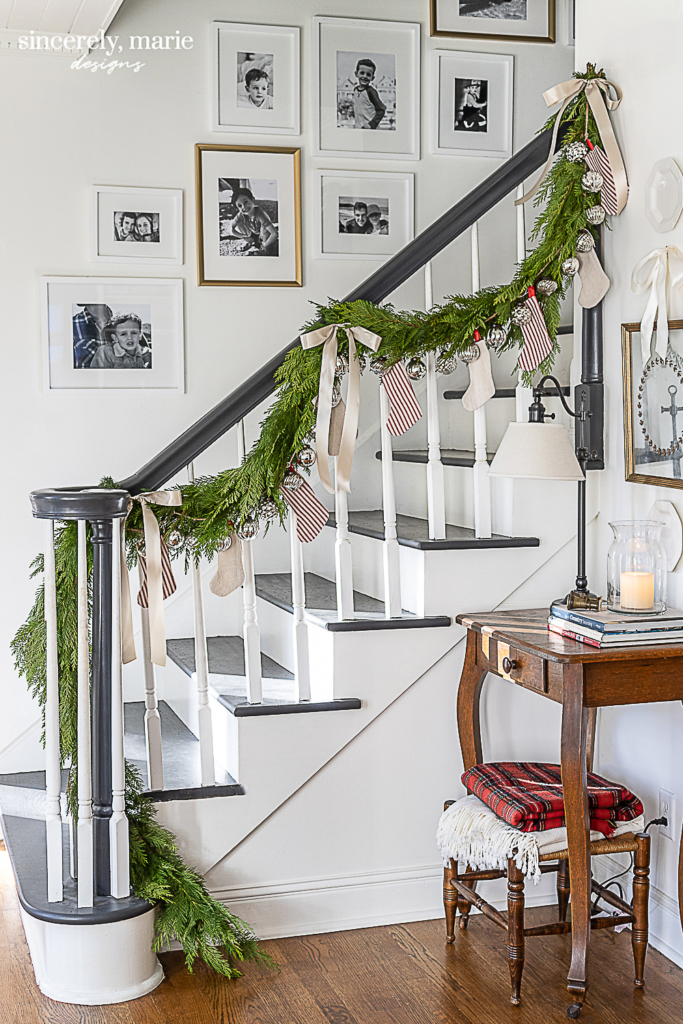
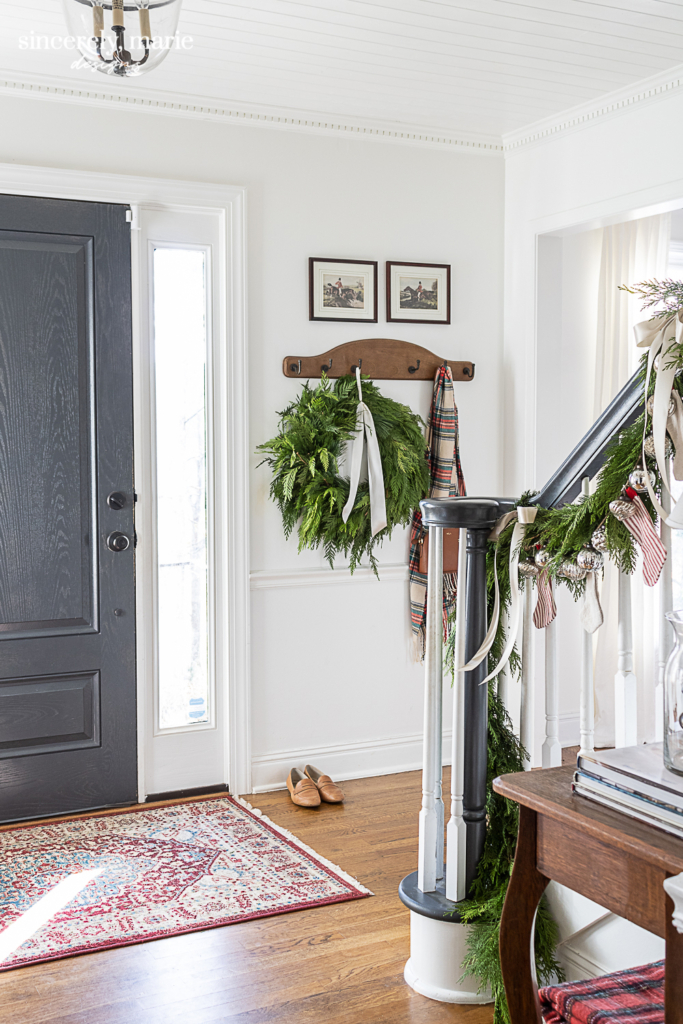
We brightened up the space with some fresh paint and new light fixtures. We planked the ceiling with tongue and groove and painted it with the same color as the trim and walls for a tone on tone look.
We removed the old carpet from the stairs and opted to paint them instead for a budget-friendly fix.
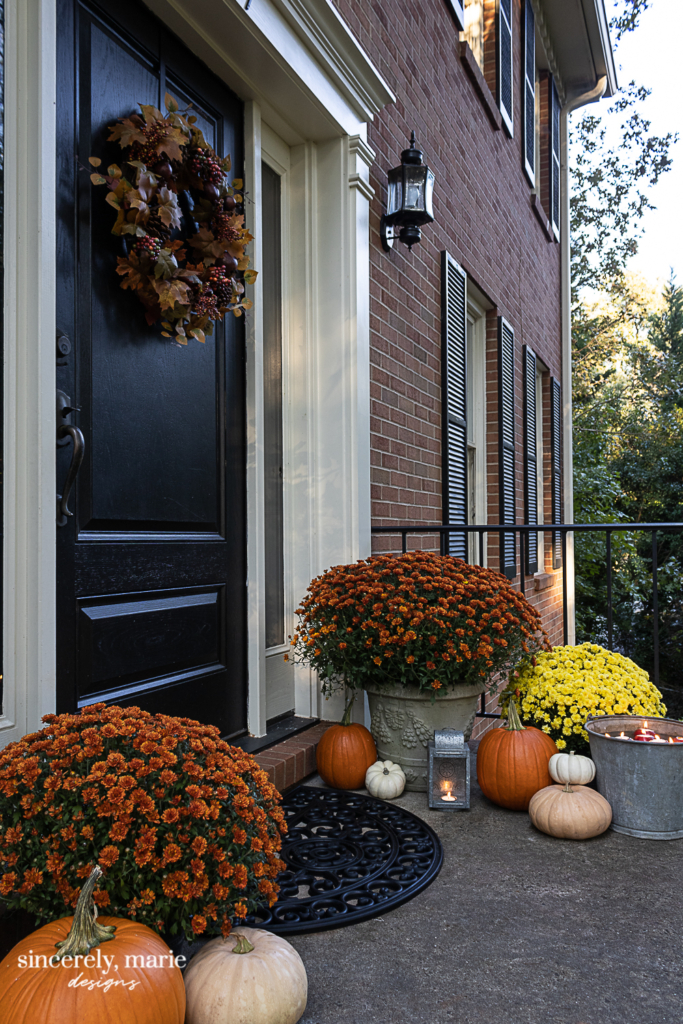
Our house sits on top of a big hill and has been quite difficult to capture on camera. One of these days I’ll get the exterior photographed. Since we purchased the house, the exterior has gotten a new roof, gutters, fresh paint on the shutters and trim and lots and lots of yard clean up!
We are still working to clear over-grown areas in the yard. We have a really great size property, but sadly it wasn’t given any attention for a number of years. We’ve slowly been unburying ourselves out of English ivy and over grown shrubs and trees. I hope to share more of those projects very soon.
The Living Room
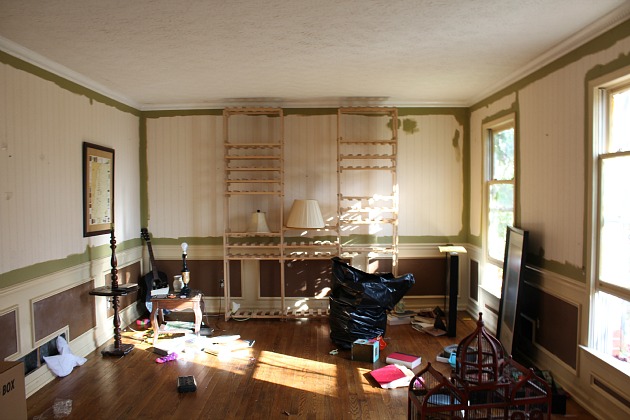
The room that is to the right of the foyer is the formal living room. The formal living room is a nice size space but just needed a good clean out and paint. I have yet to share this room on the blog because it’s still an on-going project, but it’s almost there!
We used this room at first as an office and music room, but we recently converted it to a TV/game room for our family. We have French doors to close off the space from the foyer when needed, painted the walls and trim and have installed built-ins along the back wall for lots of storage.
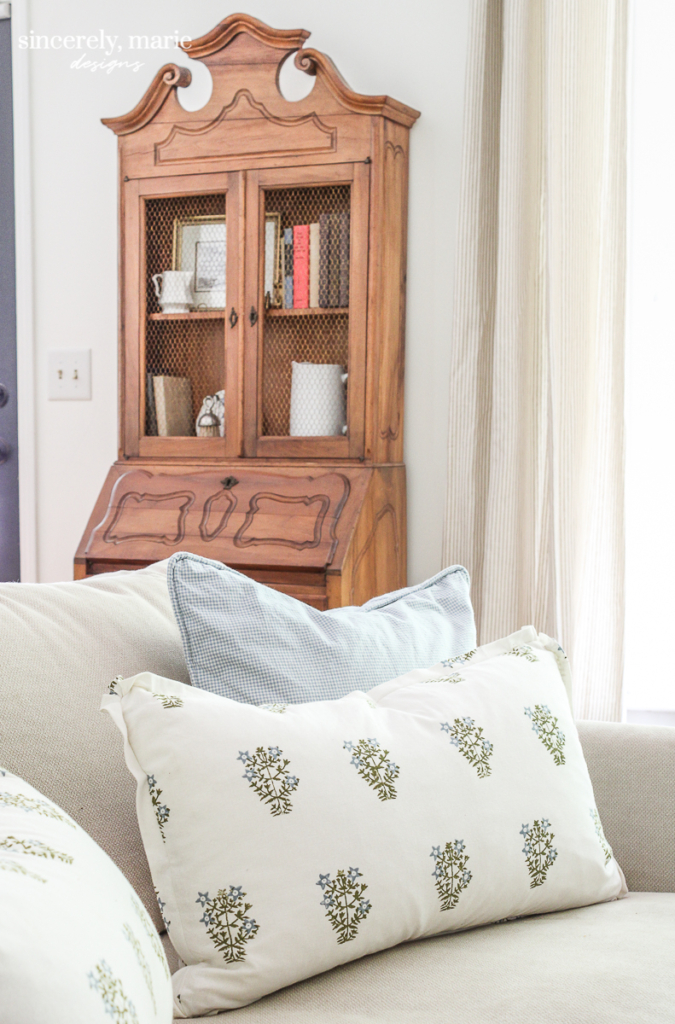
The Family Room
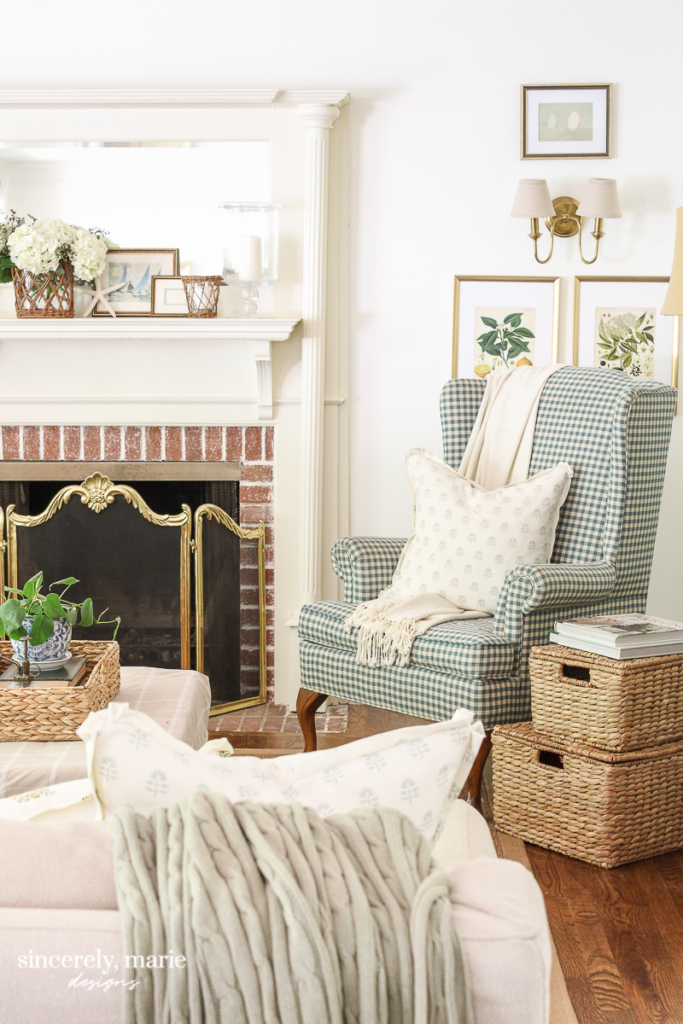
Straight back from the foyer is the family room. The antique oak mantel really sealed the deal for me with this home. It was love at first sight. This room was one of the easier rooms to work in. It was mostly just in need of a deep cleaning and some fresh paint.
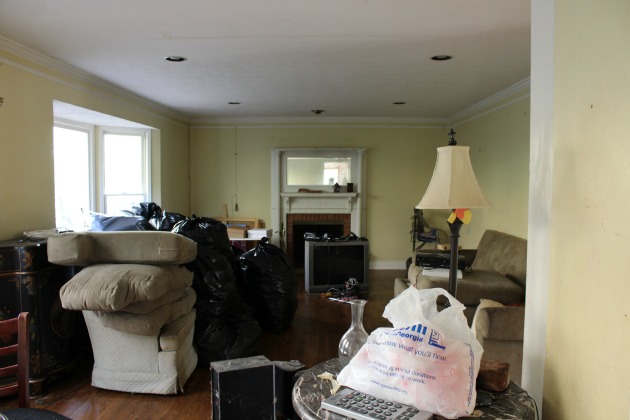
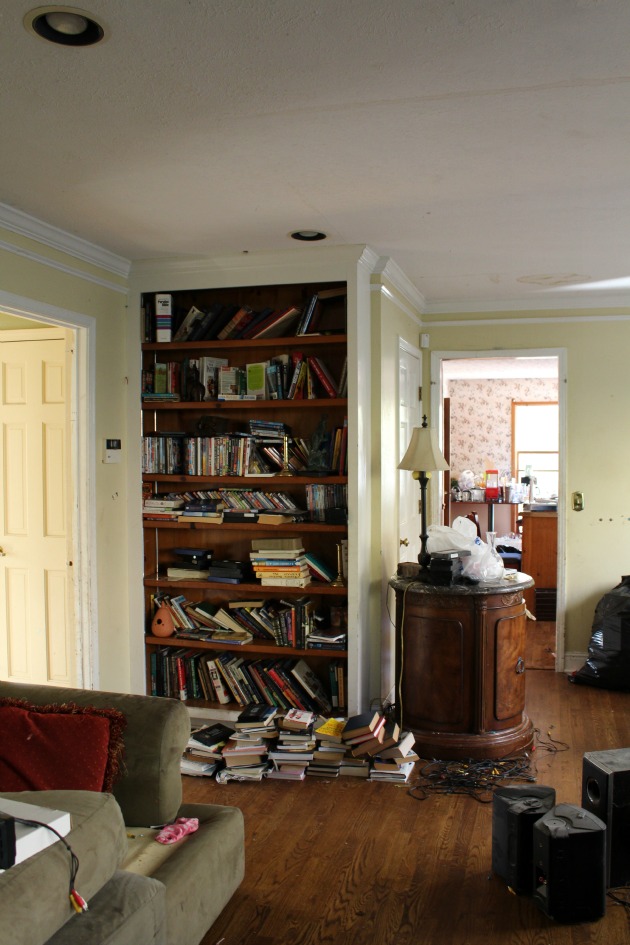
We scrapped the textured ceiling and made repairs from a previous leak. I chose a warm white paint color in this room as well. There’s big bay window but it still stays a bit more dim compared to other rooms in the house. The light walls and trim keeps the room light and bright. The fireplace mantel was sanding and repainted with a cream color that pairs well with the walls.
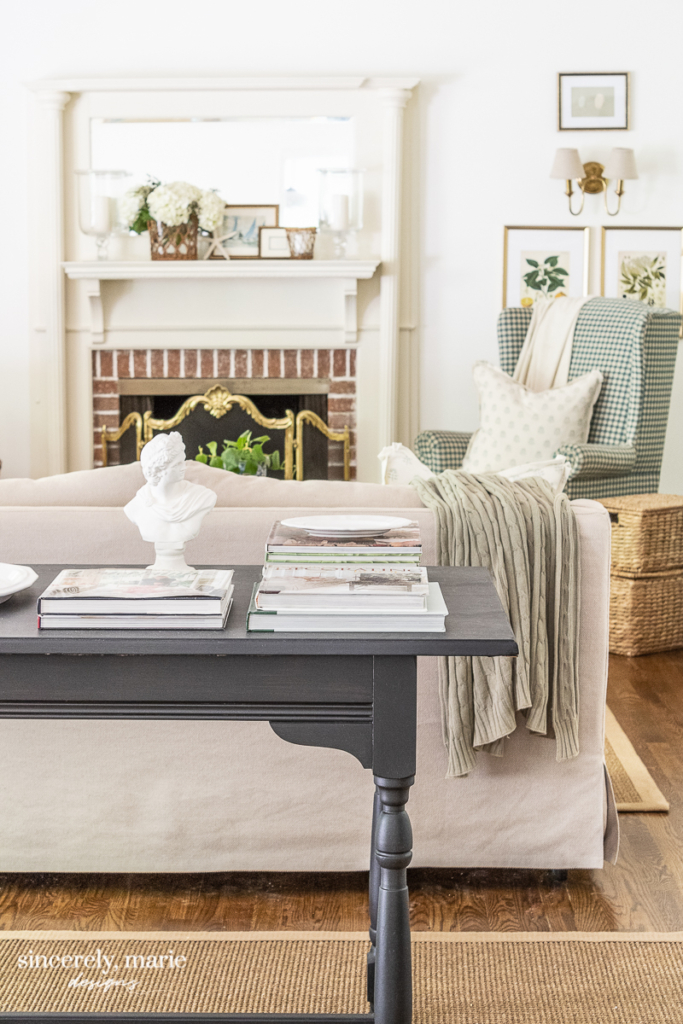

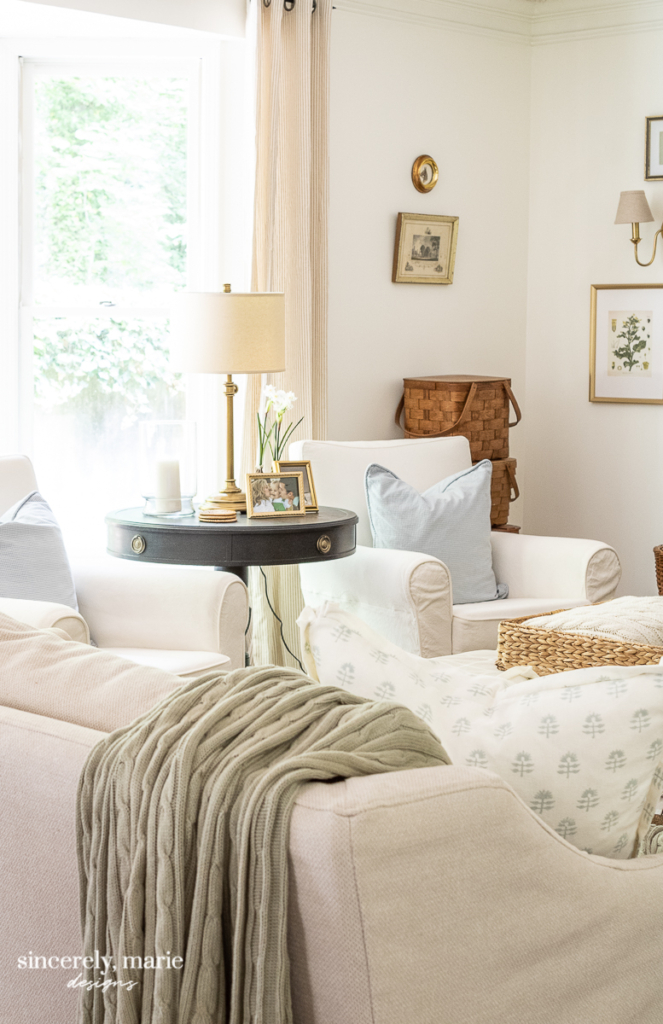
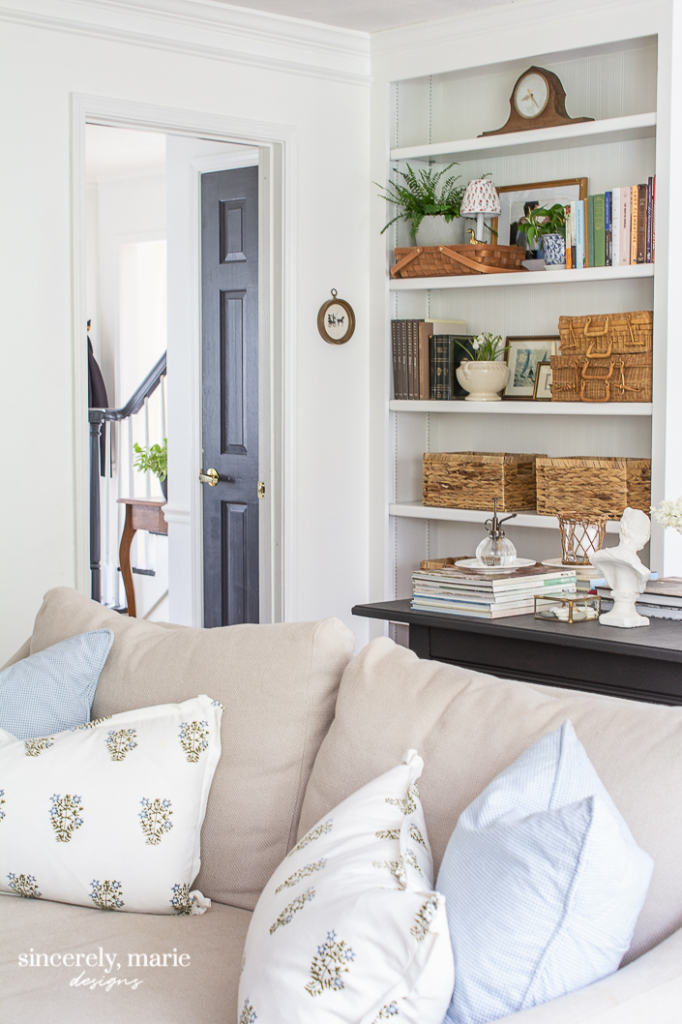
The built-in bookcase was painted and I hung bead board wallpaper on the back for a little character. We’re hoping to close up the bottom half of the bookshelf this year with cabinet doors to create more useful storage.
All family room sources are HERE.
The Dining Room
To the left of the foyer is the dining room. This room was pretty rough to say the least. After a little time and hard work it’s sitting pretty. 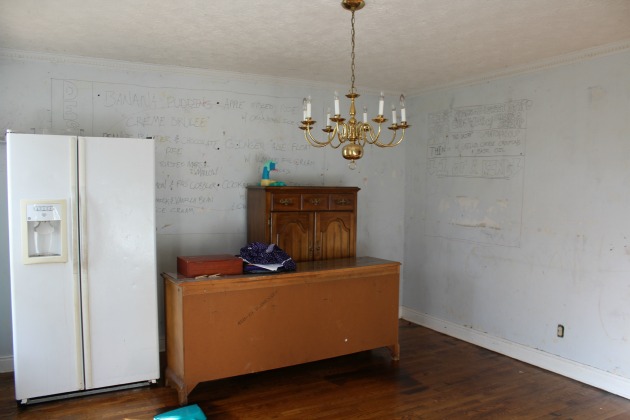

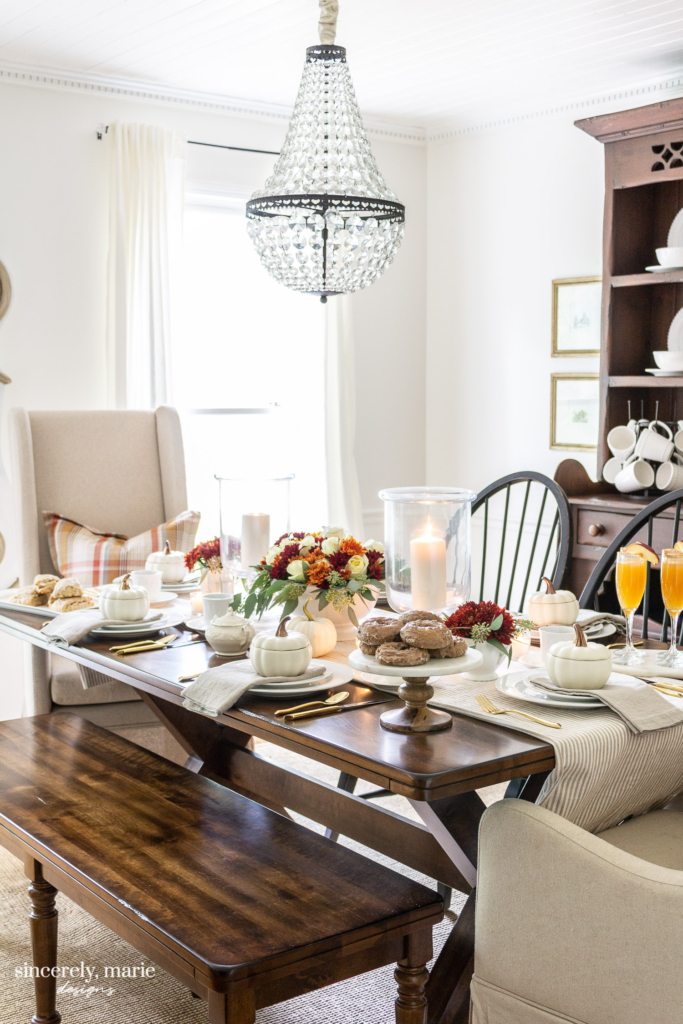
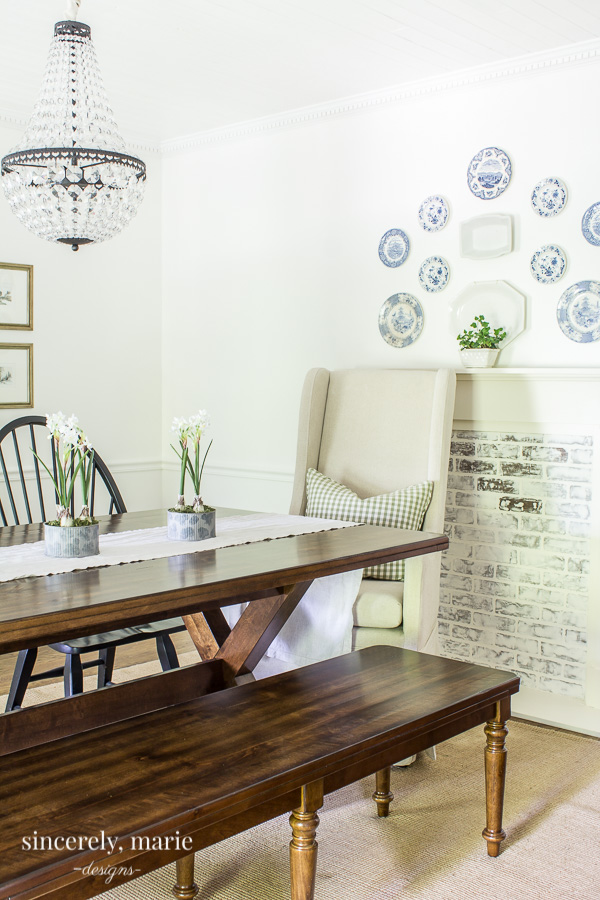
We decided to install tongue and groove on the ceiling just as we did in the foyer and kitchen. I painted the walls and trim all in one color for that clean tone on tone look. I’m still working in this room. This year I’m hoping to get new drapery panels made to bring in more color and because the hardwood floors are in rough shape, we plan to paint the floors in a warm sage for a budget-friendly option until we can replace them. For now the area rug does the trick.
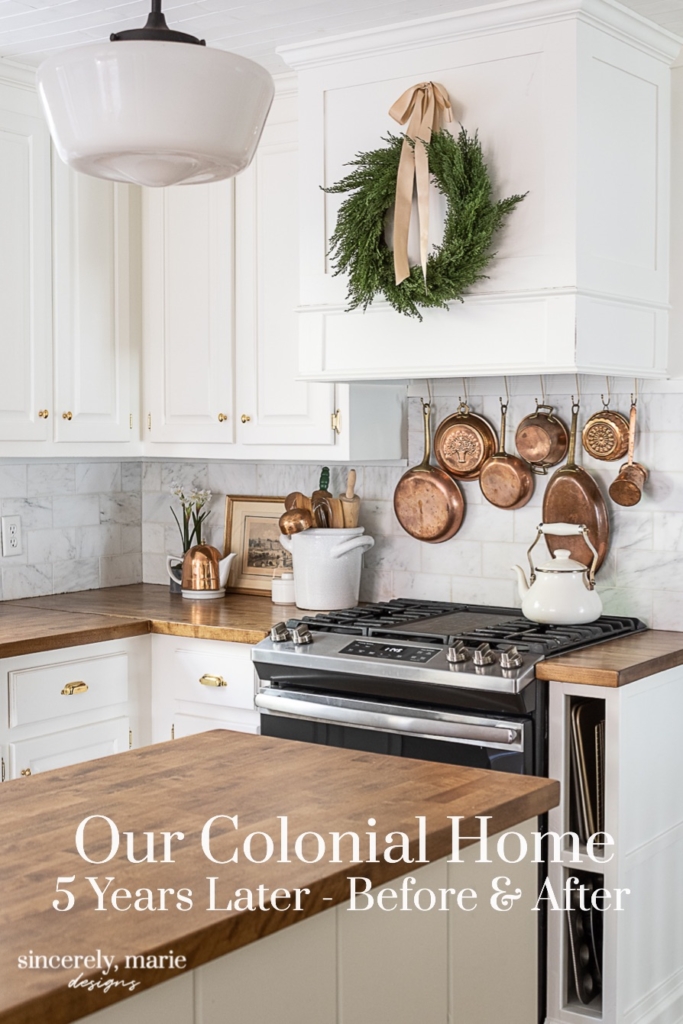
The Kitchen
The kitchen has seen some of the most changes. Although it was rough, the size was fantastic and instead of gutting it, we decided to work with the cabinets that were already there. I was able to custom order the 8 doors that were missing, so we were able to just sand and paint the existing cabinetry.
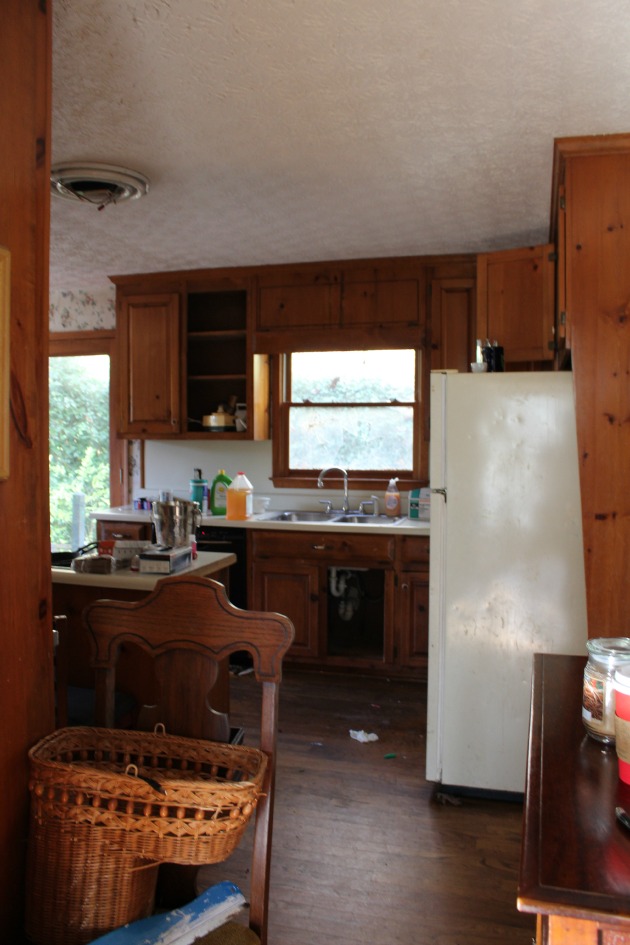
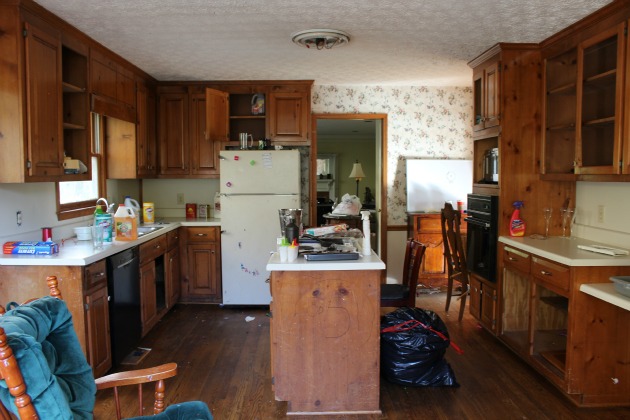
We did rearrange the appliances a bit. We removed the old cook top from the island and put a range where the fridge was and Josh built a custom hood. The new fridge is now where the old wall oven used to be. We installed some brackets on the side of the island that allowed for an over hanging, giving us a longer, more useful island counter top.
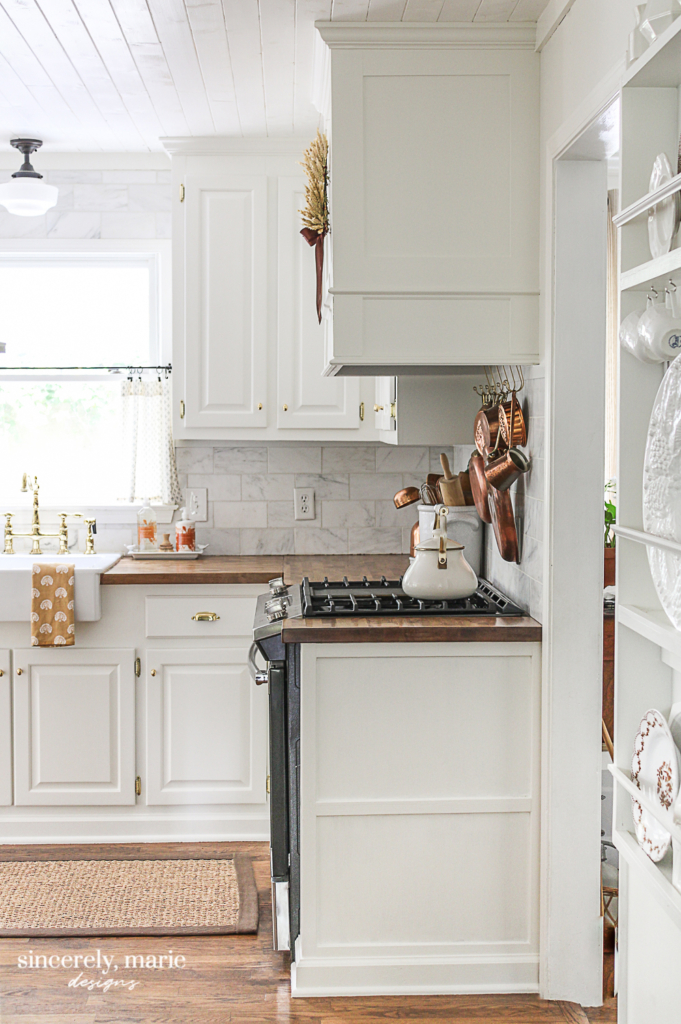
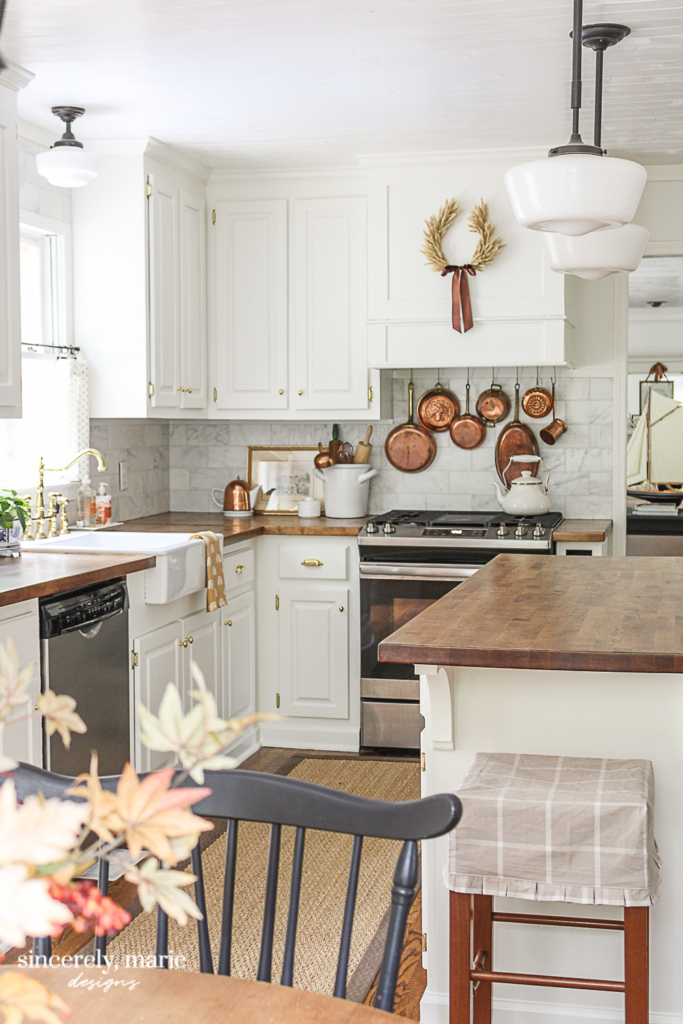
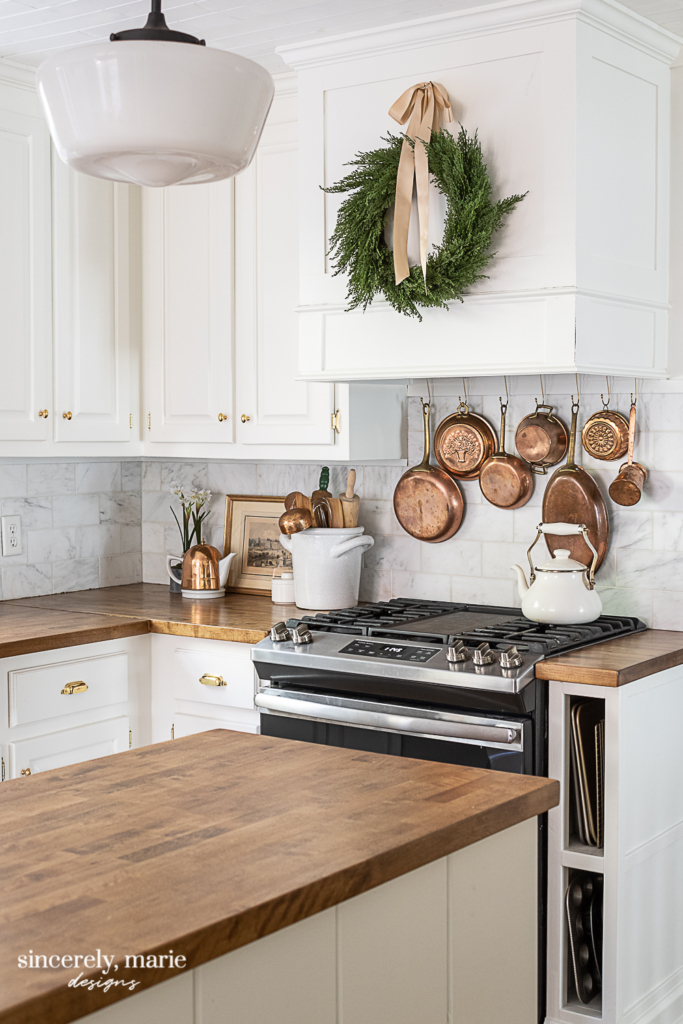
We installed a marble backsplash and butcher block counter tops stained in provincial for a warm cottage feel. I also swapped all of the old hardware for new living brass hardware.

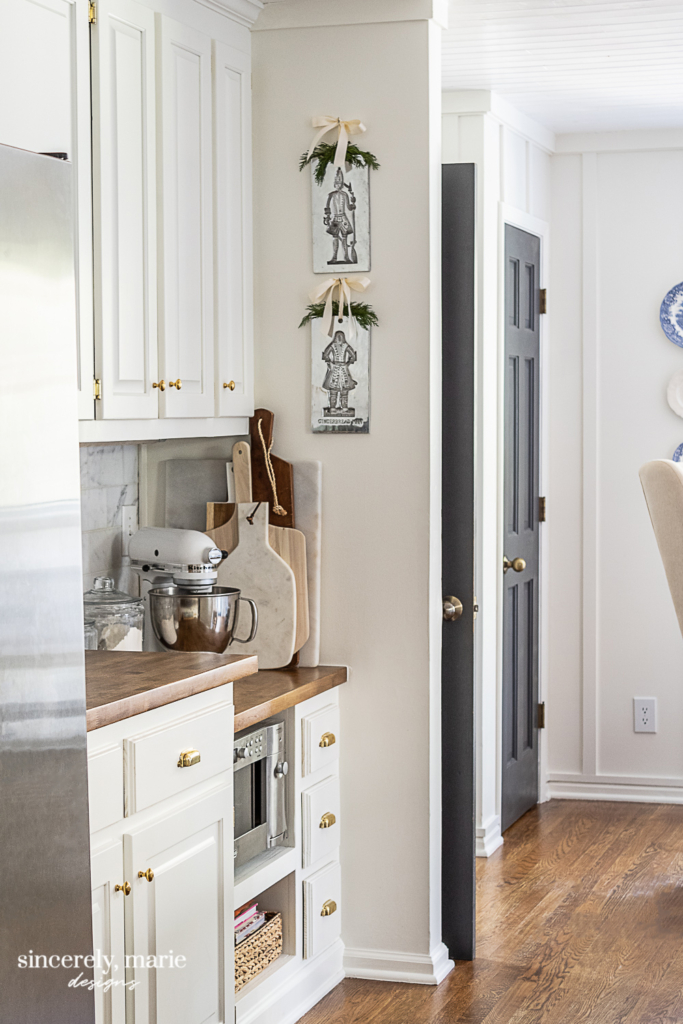
Where there used to be a small desk area, there is now a built-in shelf that holds the microwave and our cookbooks. Above that is my baking station where I keep my mixer and baking ingredients. Mixing bowls, measuring cups, cookie cutters and special baking tins are stored in the cabinets above.
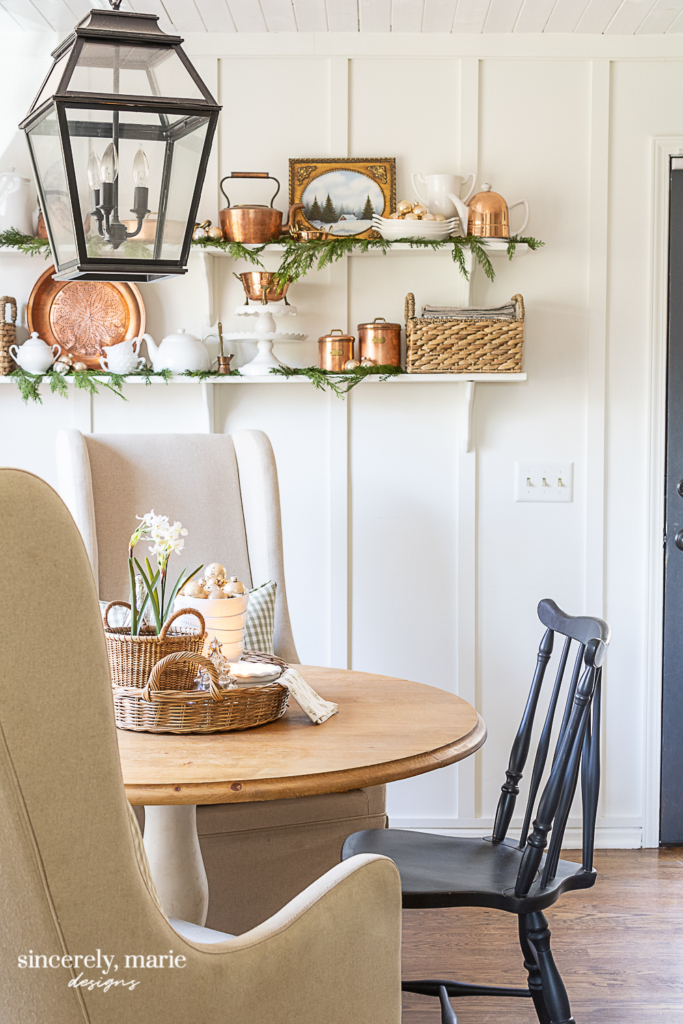
The breakfast nook is one of my favorite spots in our home. We removed the chair railing and wallpaper that used to be in this space and installed floor to ceiling board and batten. I painted the walls, cabinets and trim all in one color for a clean look. We installed shelving to house extra serving ware and some of my vintage copper.
All kitchen sources are HERE.
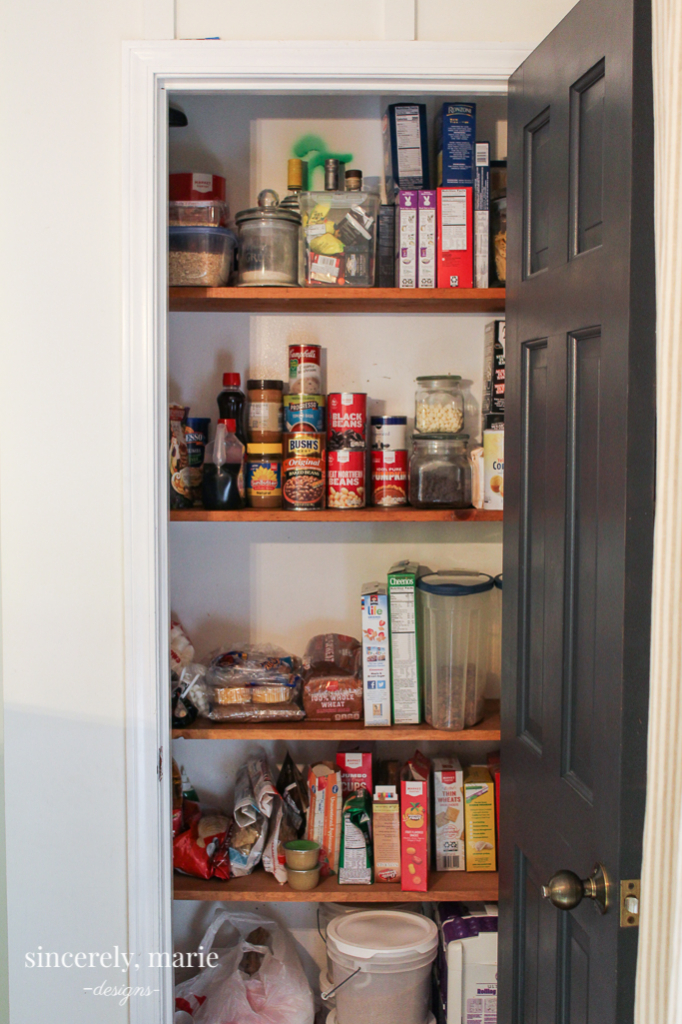
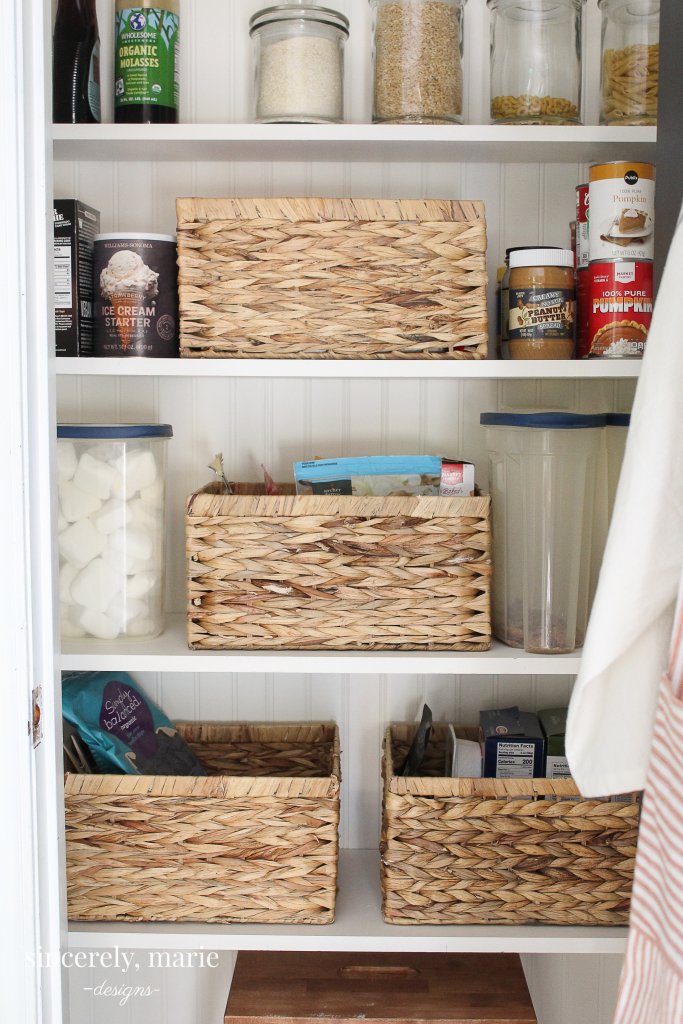
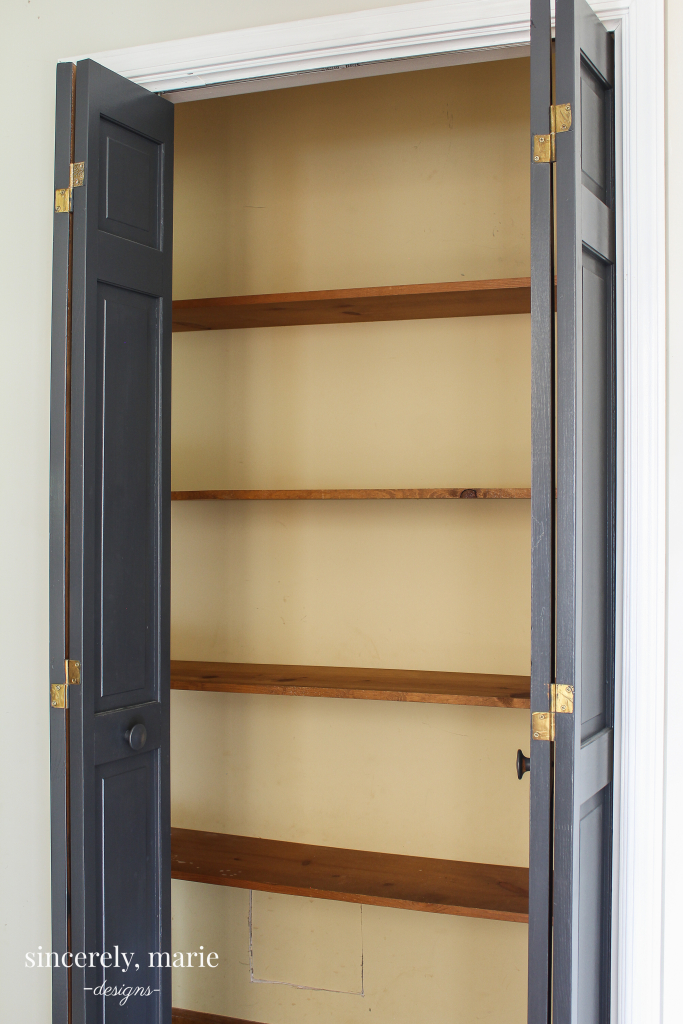
The Pantry
Our pantry is quite small. It’s something that we would like to address in the future but to make it functional for now I did just a few simple things.
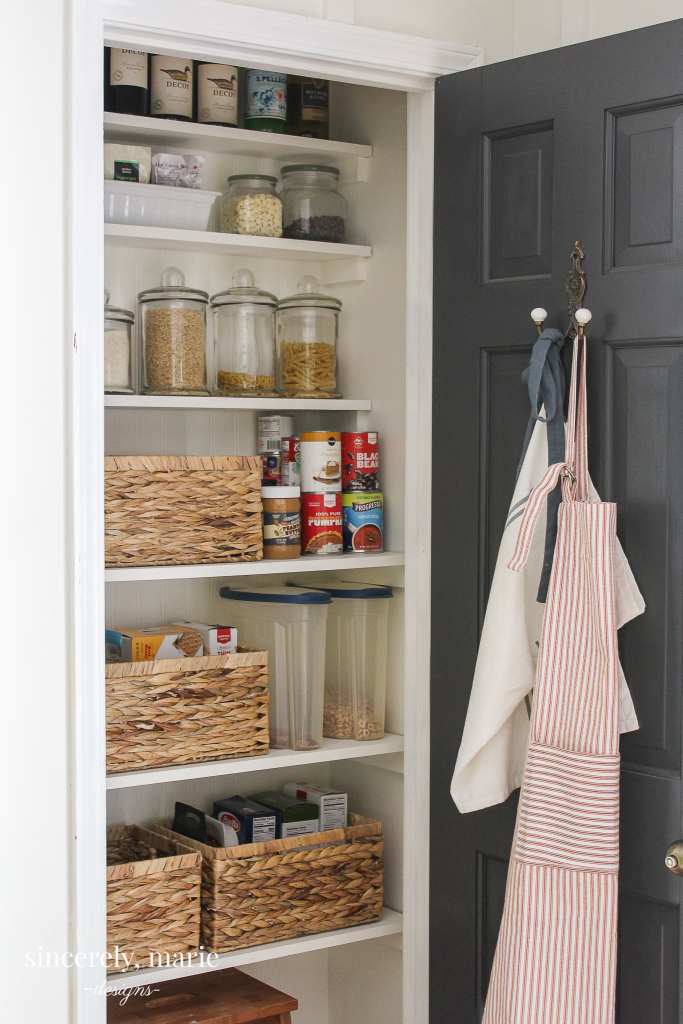
I started by adding a little bead board and then I painted the walls and shelves in a warm white. I added a couple extra shelves and made the highest ones a little more narrow in order to access them easily. Lots of baskets and glass containers help to keep everything in its place. In a pantry this small things can get out of place easily, so organizing it with appropriate containers really made a difference.
All pantry sources are HERE.
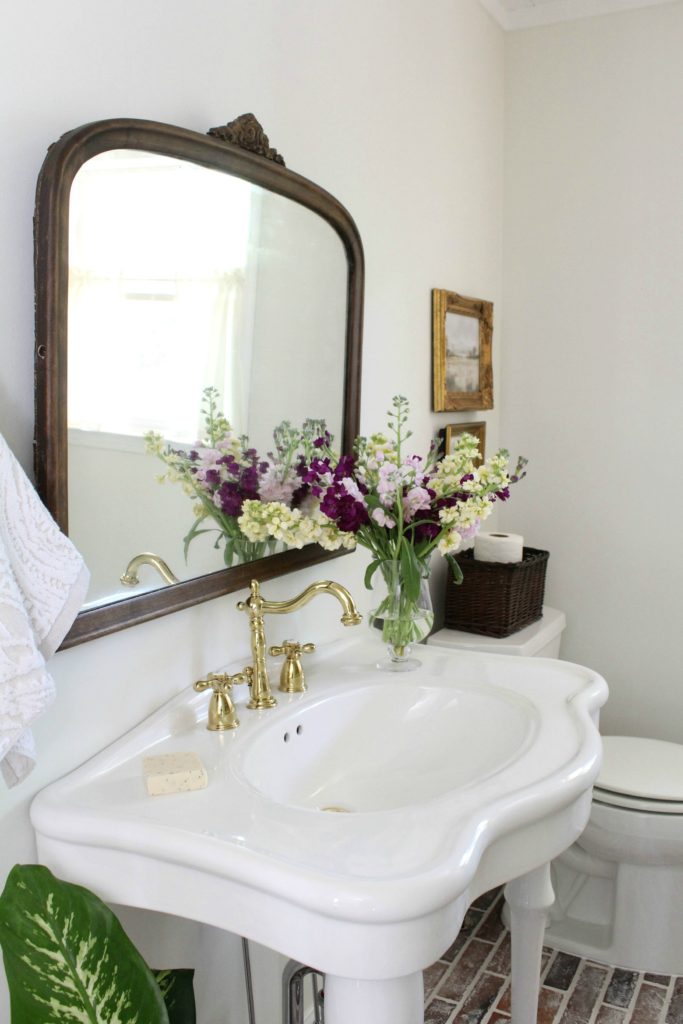
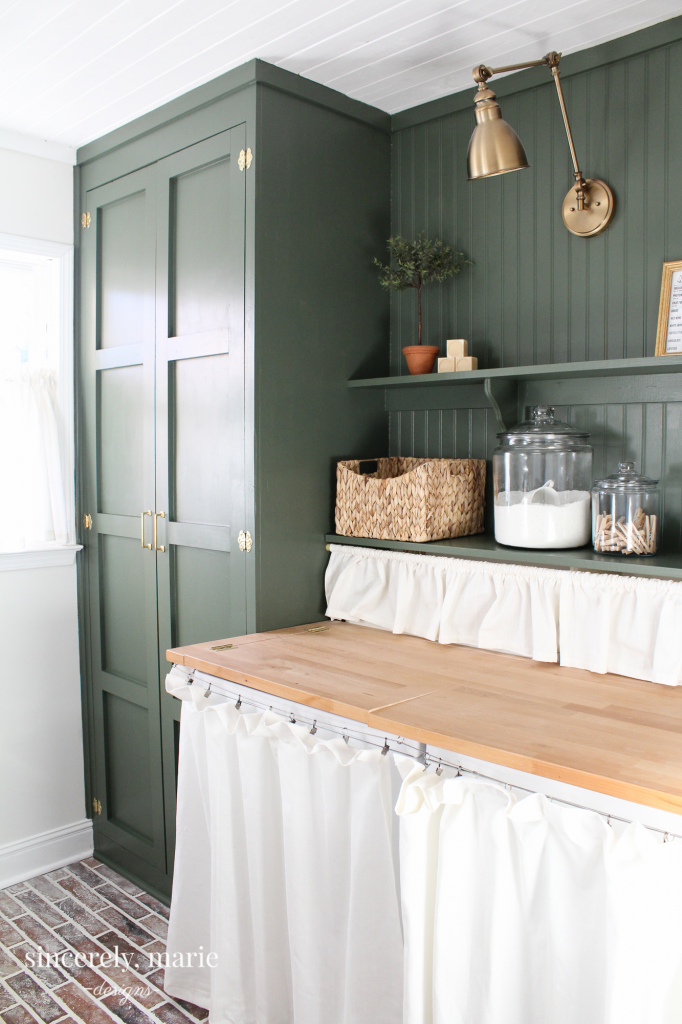
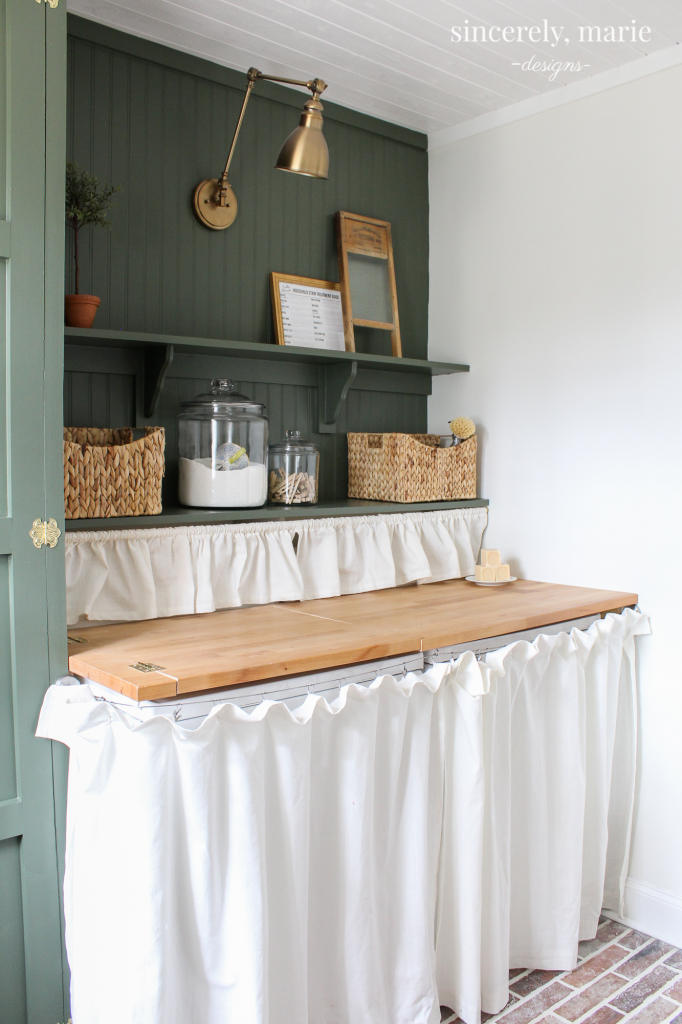
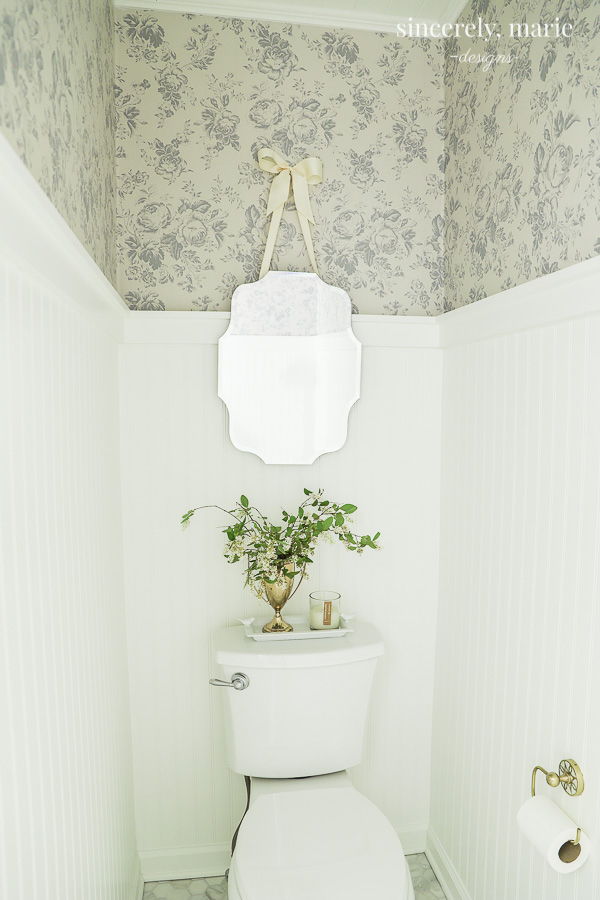
The Powder Room/Laundry Room
Off of the kitchen is the powder room/laundry room. Like the kitchen, this room was pretty rough. We weren’t thrilled that the powder room shared a space with the laundry room but that’s something we plan on breaking up in the next year or two.
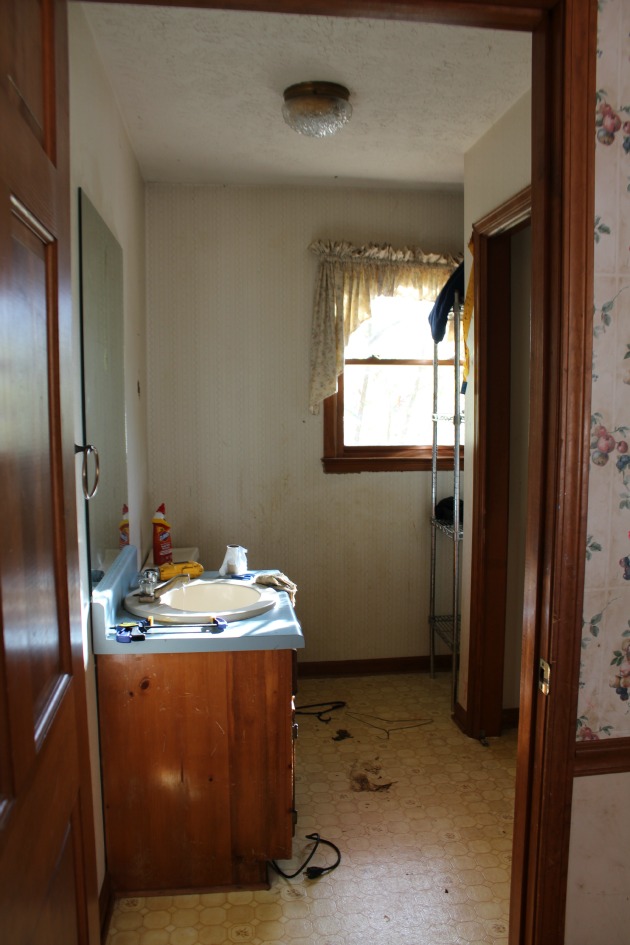
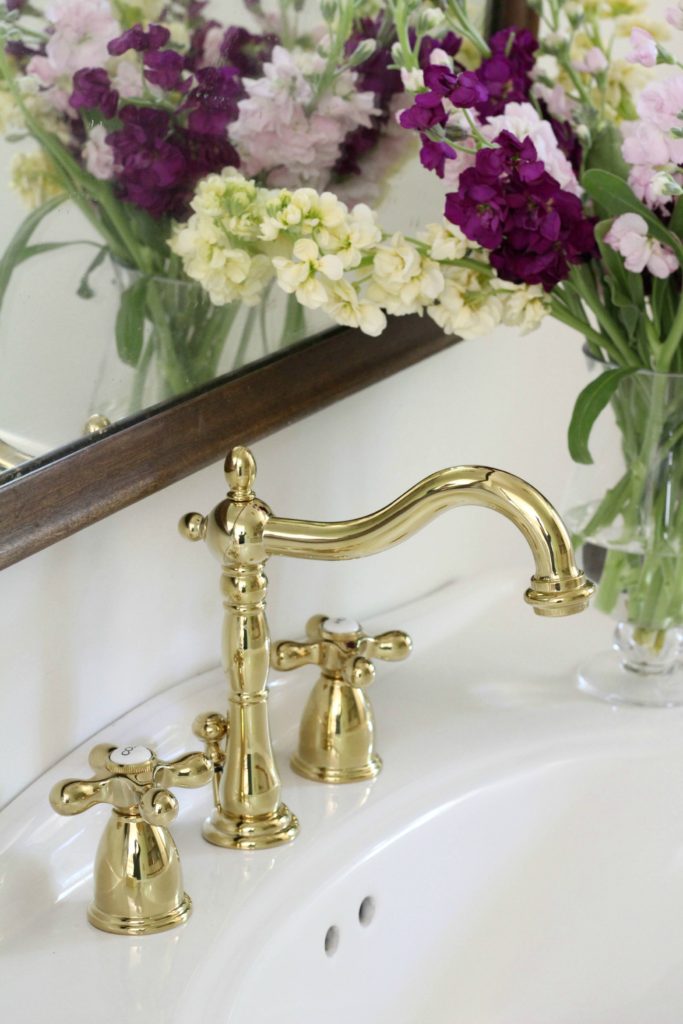
For the time being we removed the awkward walls around the washer and dryer and built a storage closet for brooms, mops and cleaning supplies. We installed a counter top over the washer and dryer and curtain around to hide them while they’re not in use. We replaced the old floor with a brick tile, painted the walls and trim, installed a planked ceiling, new light fixtures and toilet. Lastly, we replaced the old vanity with vintage style sink that we purchased second hand.
All powder room & laundry room sources are HERE.
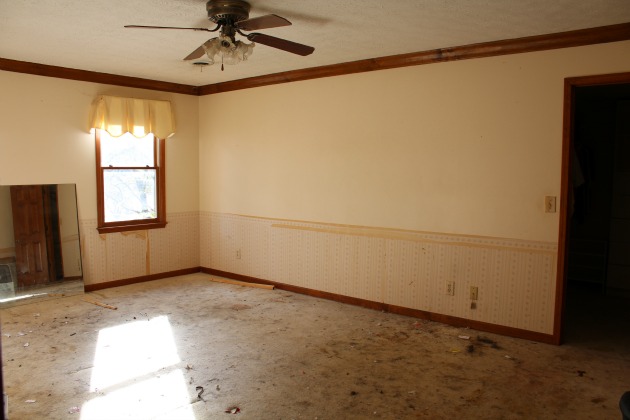
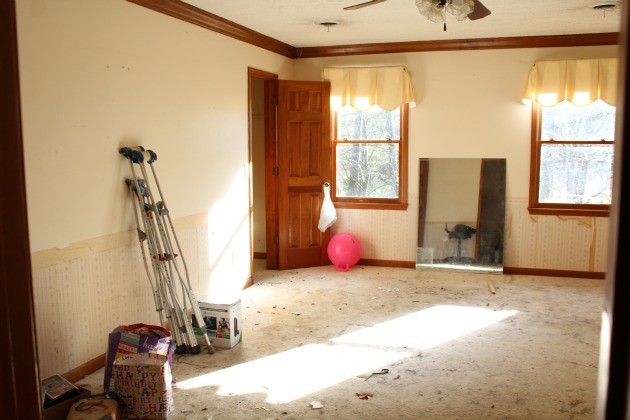
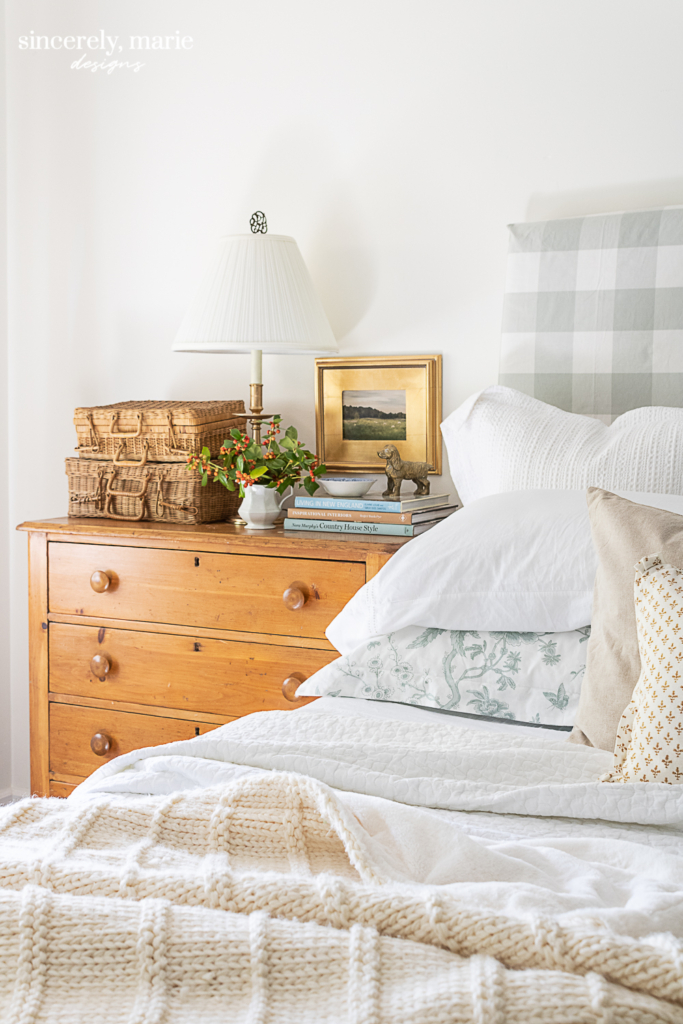
The Master Bedroom
Upstairs is four bedrooms, including the master. The upstairs had so much trash and furniture left behind that we had to use snow shovels to clear it out. The second thing we did was remove the old carpet and painted. We also scraped all of the textured ceilings, installed new flooring, replaced the light fixtures, installed a new HVAC unit and had the air ducks cleaned.
We are still working in the walk-in closets in the master bedroom. We’re hoping to check it off our list this year.


Source:
Wall Color – White Dove by Benjamin Moore
Trim Color – Simply White by Benjamin Moore
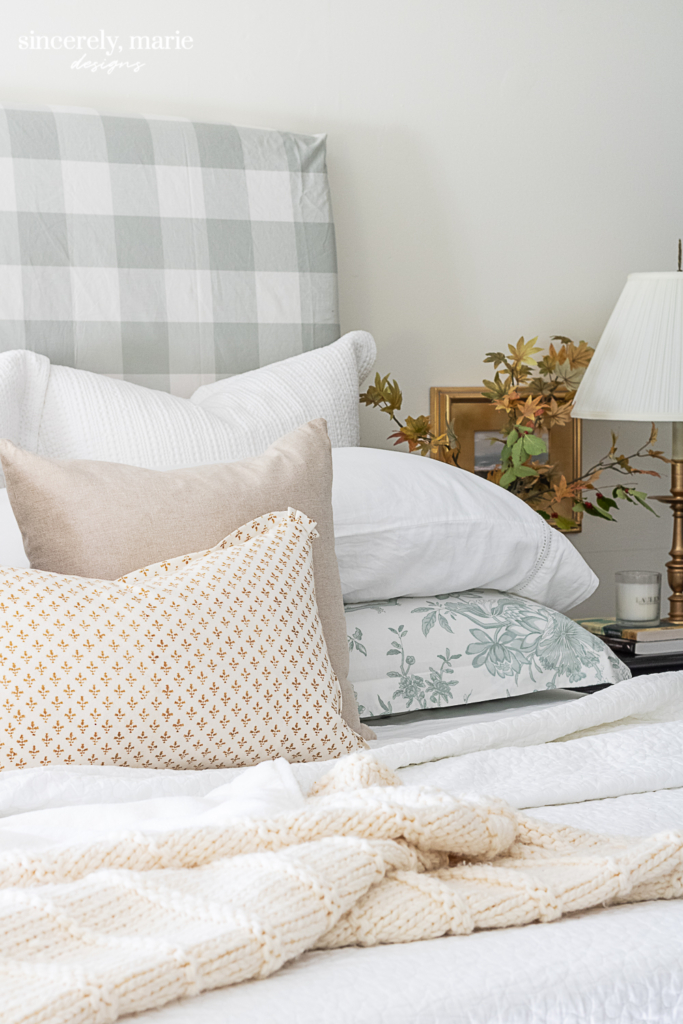
Slipcovered Head board – FB yard sale (slipcover – my tutorial HERE)
Brass Lamps – yard sale find
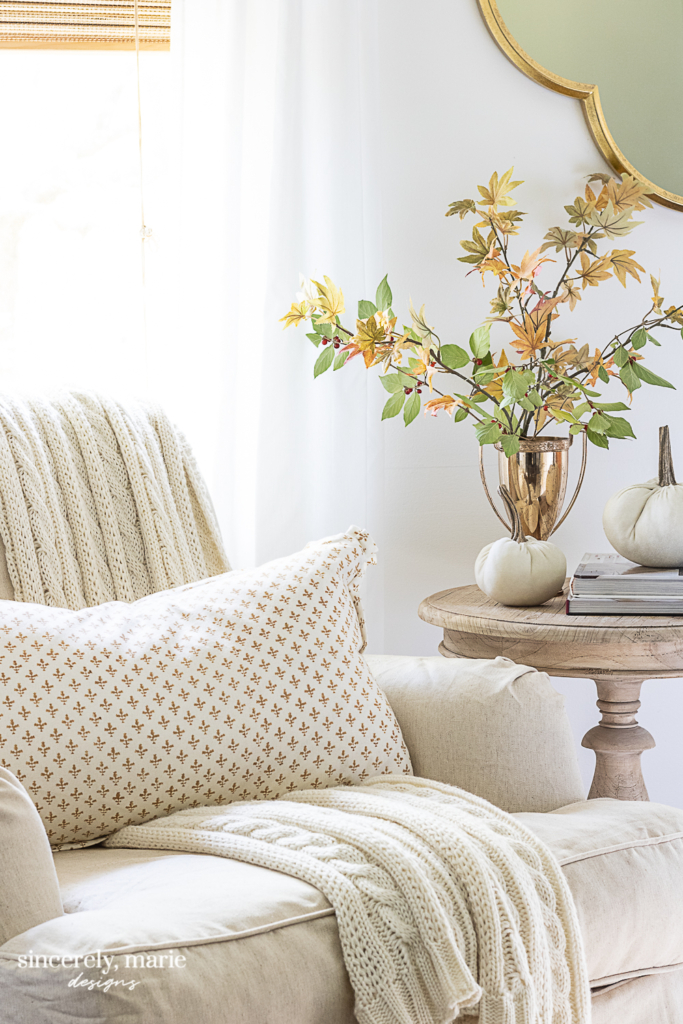
armchair – Ballard Designs
Drapes – Ikea
Bed Skirt, Duvet & Shams – Ballard Designs
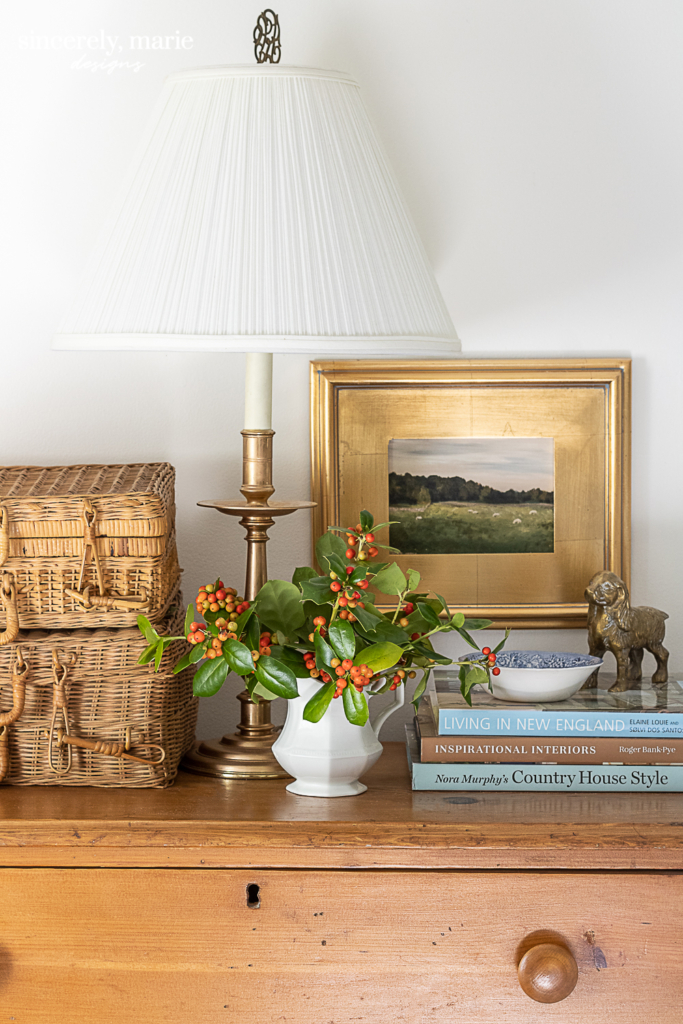
Antique Pine Chest – local antique store find
The rest of the bedroom sources are HERE.
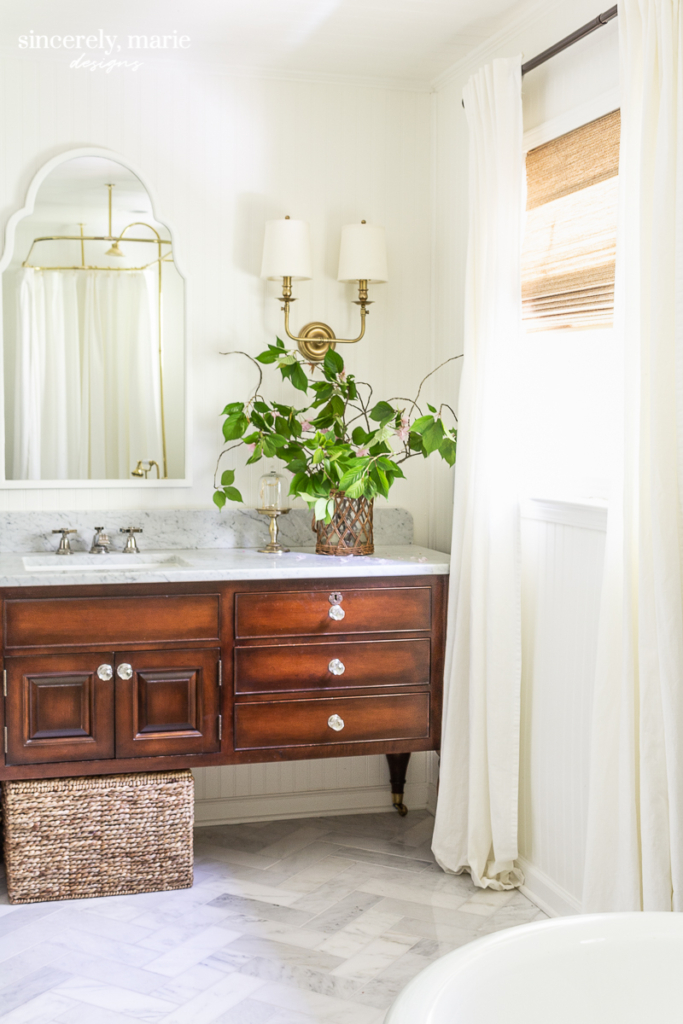
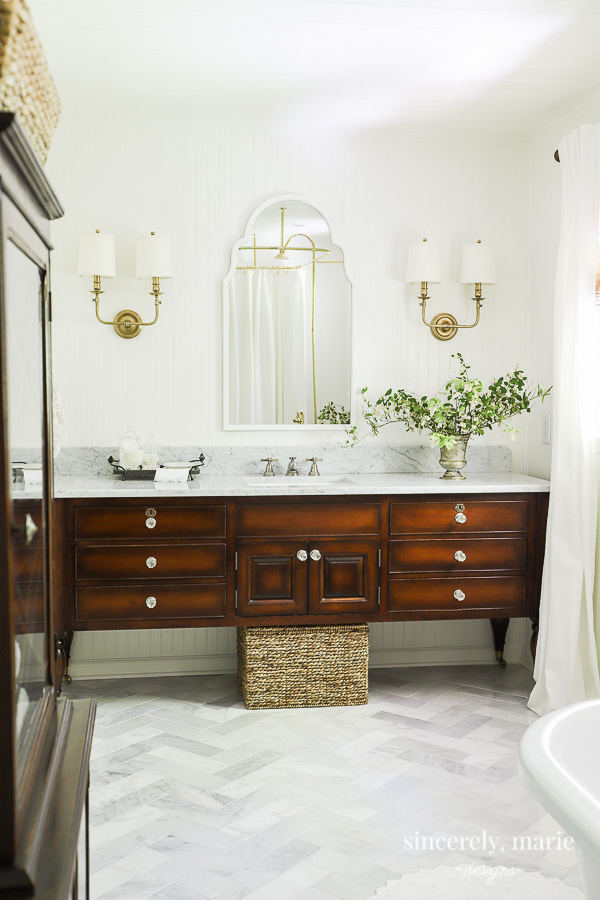
The master Bathroom
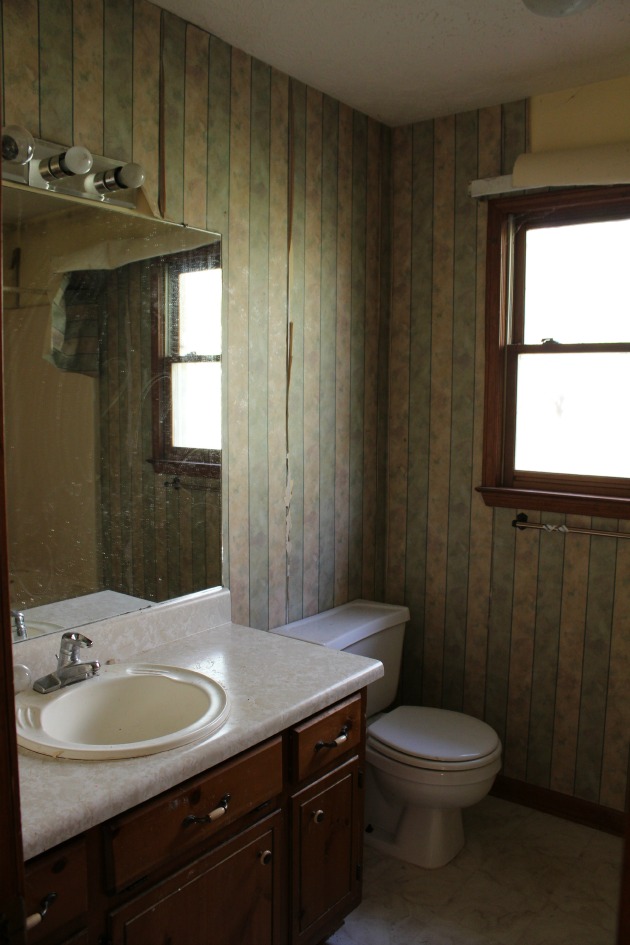
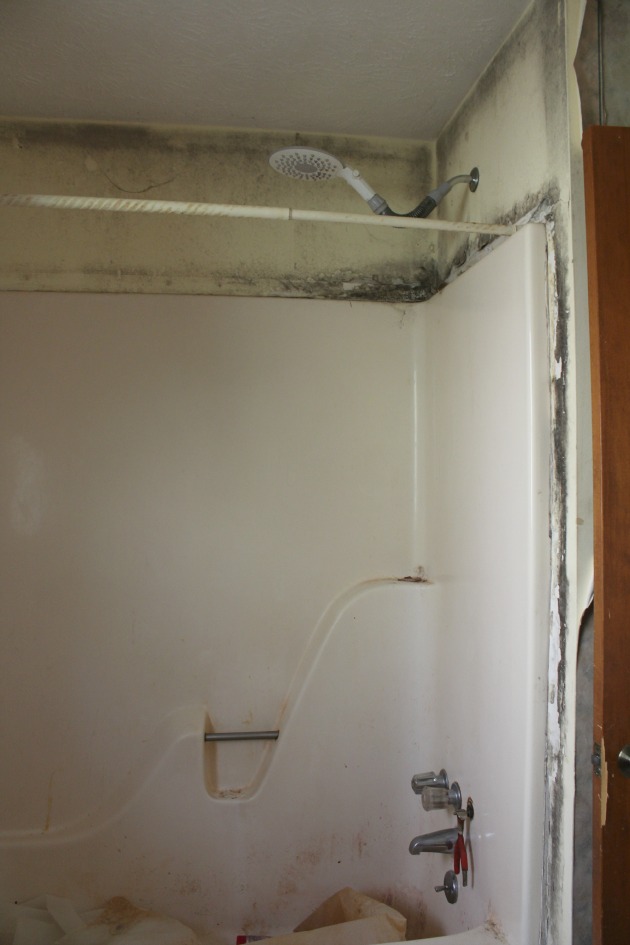
One of the most drastic renovations we undertook was our master bathroom. At first we simply deep cleaned it, replaced the broken plumbing, removed the wallpaper, painted the walls, trim and vanity. After three years we finally worked up the courage to tackle the space and create our dream bathroom.
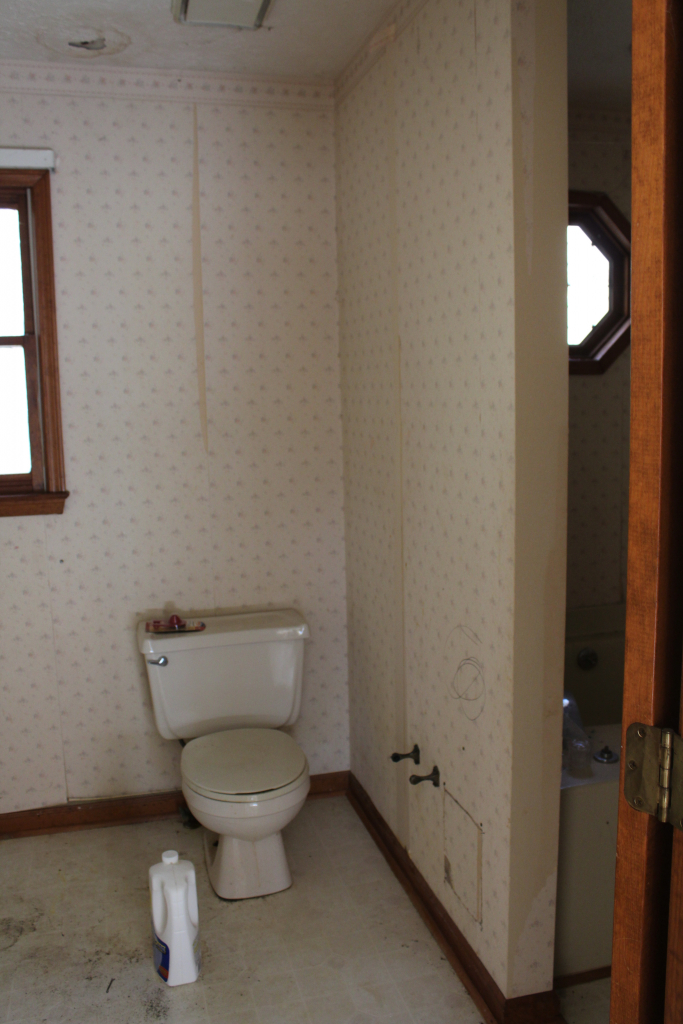
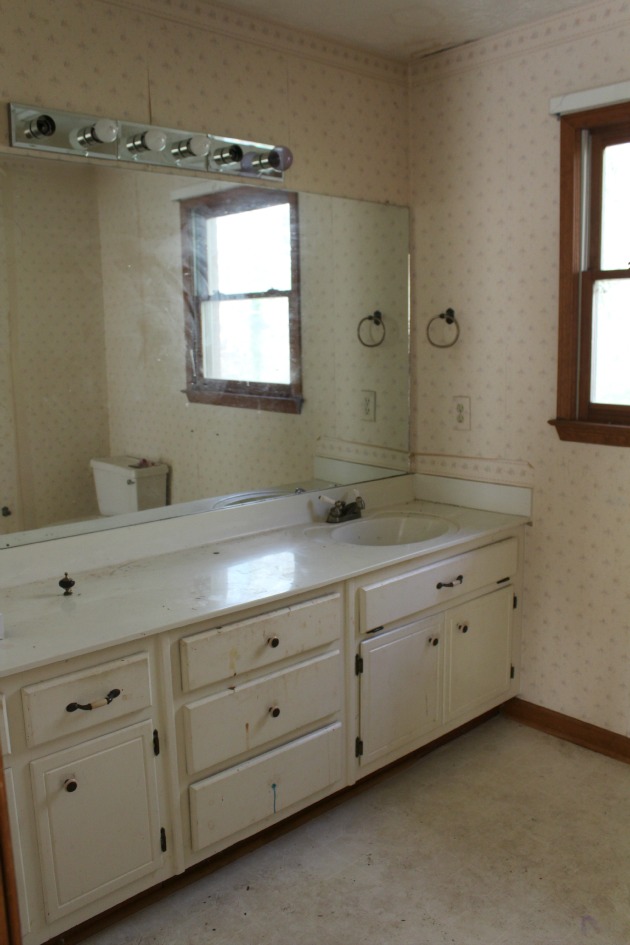
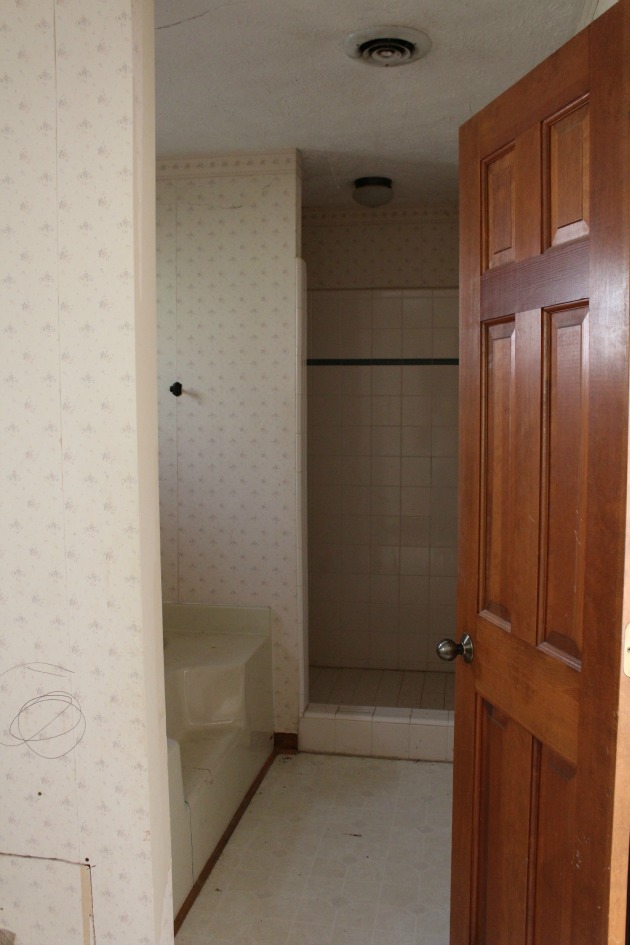
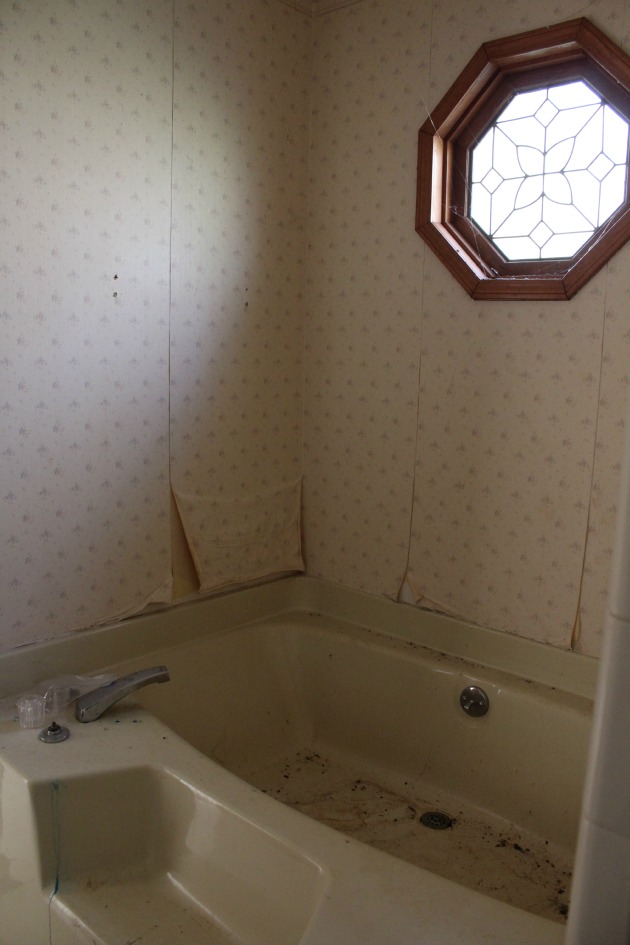
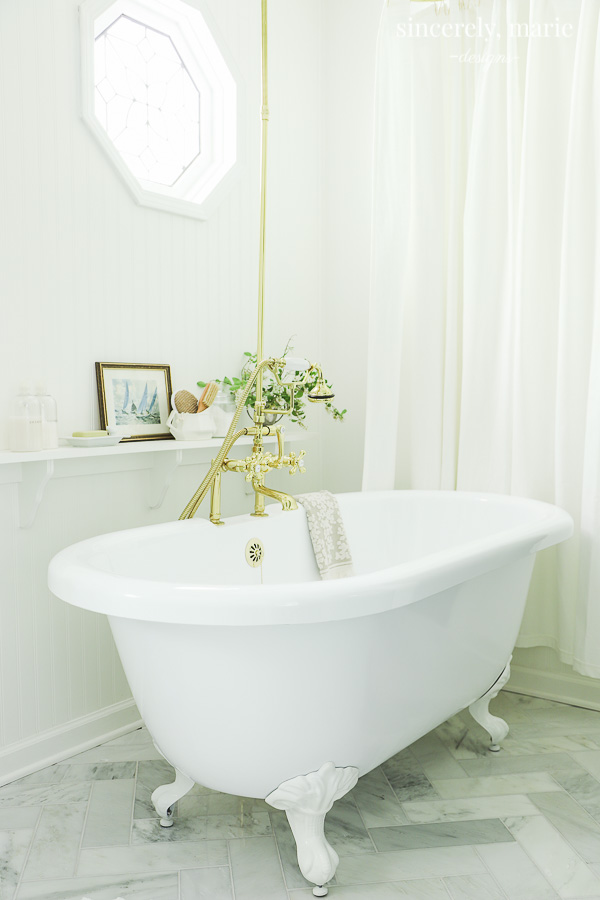
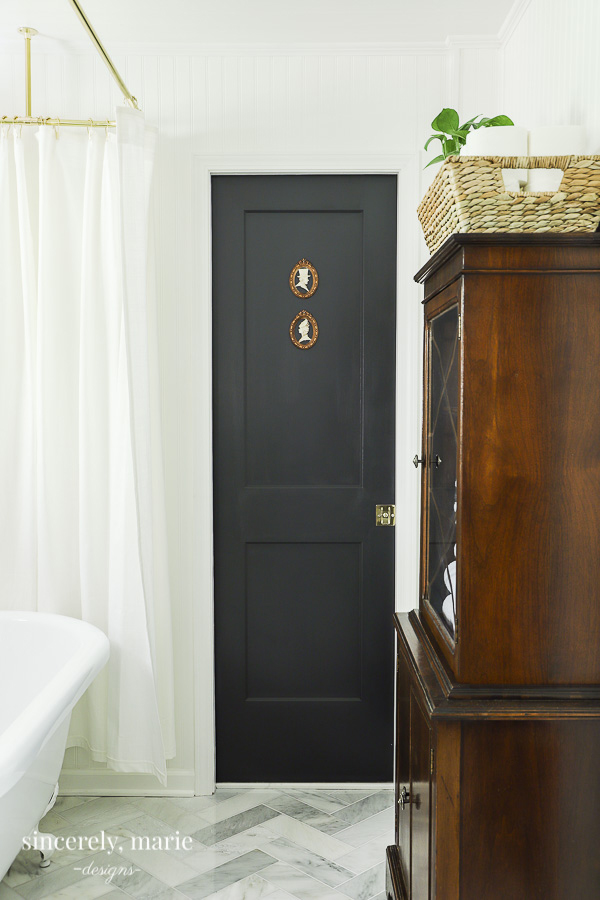
We gutted this room down to the studs. We removed the wall that stood between the toilet and bath tub. Josh rerouted the plumbing to center the sink in the new vanity and to move the toilet into it’s own closet. We planked the ceiling and hung floor to ceiling bead board for extra charm and installed new can lights and sconces. I installed marble tile in a herringbone pattern on the floor and a marble hex flooring in the water closet.
Josh and his dad installed a pocket door to the toilet closet and hooked up the plumbing for the new clawfoot tub and shower. 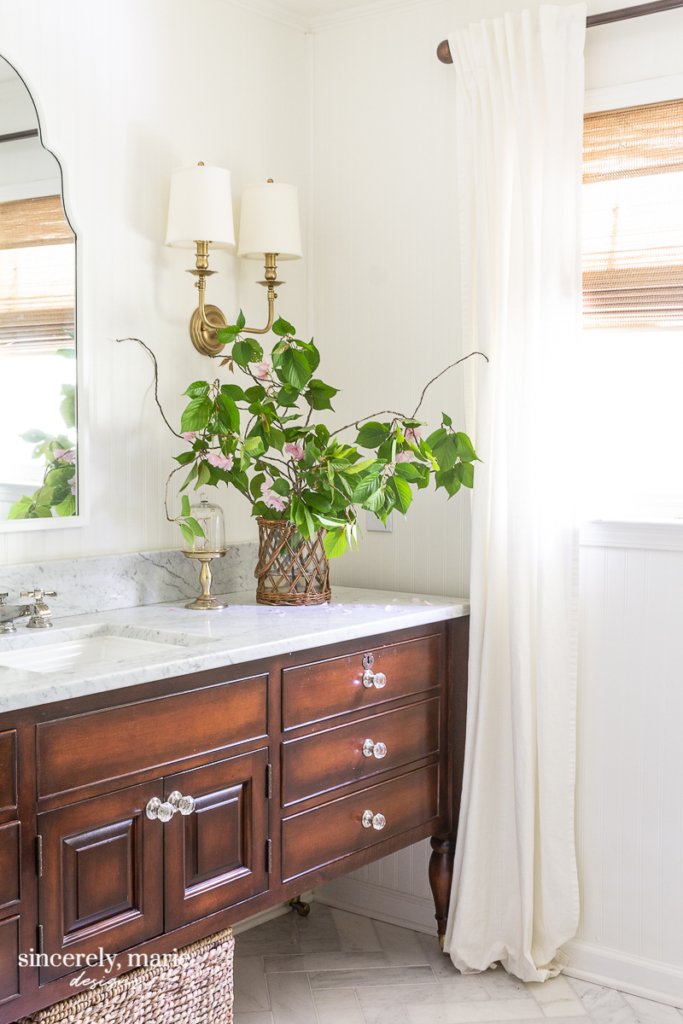
All bathroom sources are HERE.
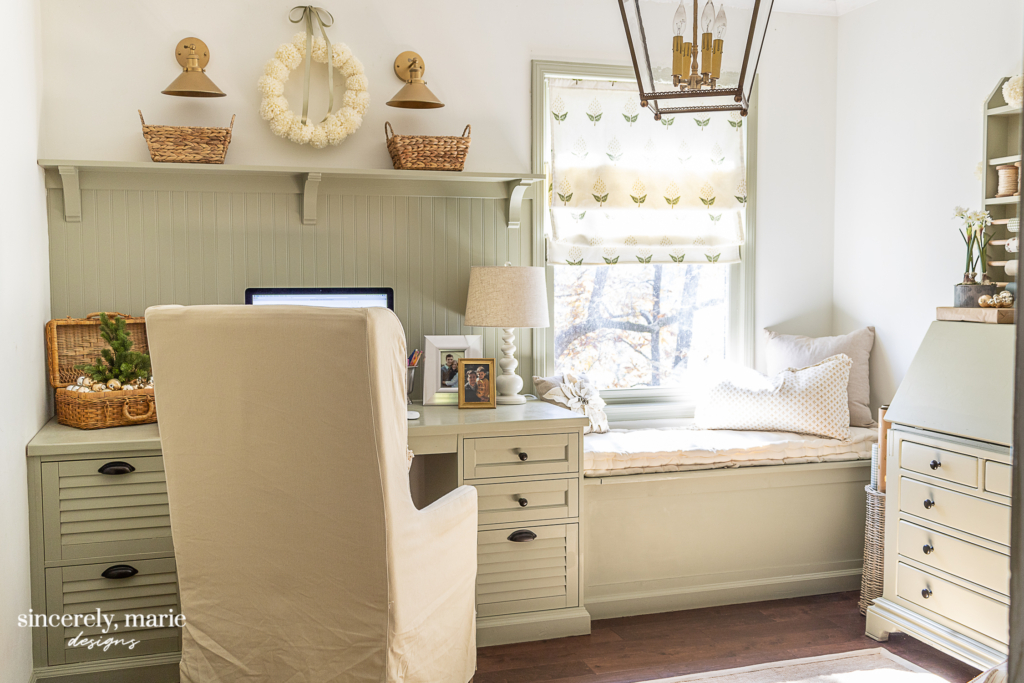
My Office
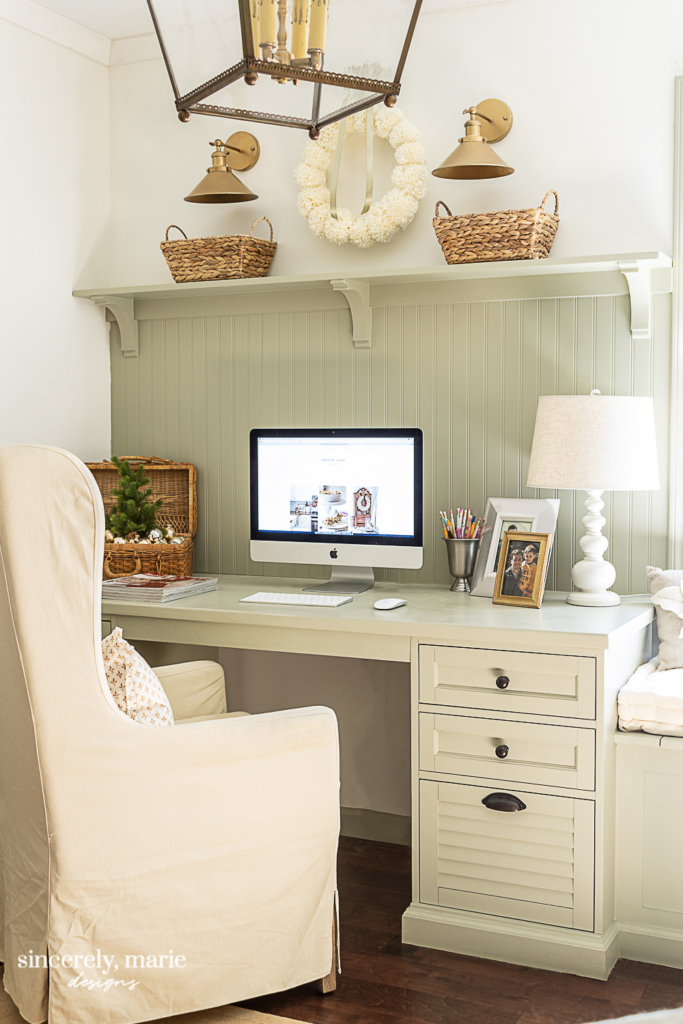
Down the hall is the smallest bedroom and that is now my office. This room didn’t need much. We threw away trash, installed flooring, scraped the ceiling and painted.
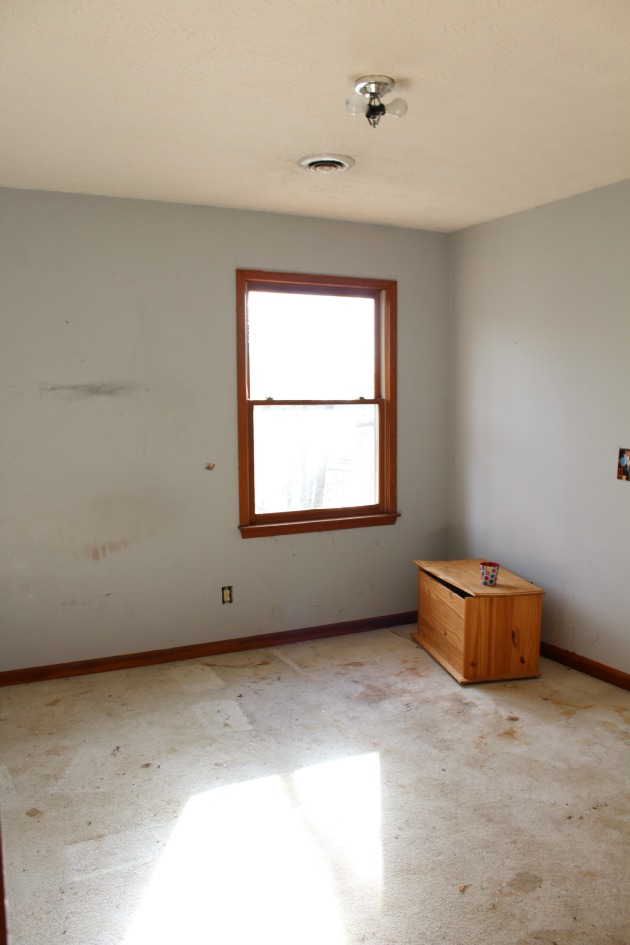
While Josh worked on rerouting the plumbing during our bathroom renovation, I created a built-in desk and window seat here. I used two desk cabinets from the pottery barn outlet, along with a DIY top to create a built-in desk. A little paint and it was good to go! The window seat serves as storage for my sewing machine and fabric.
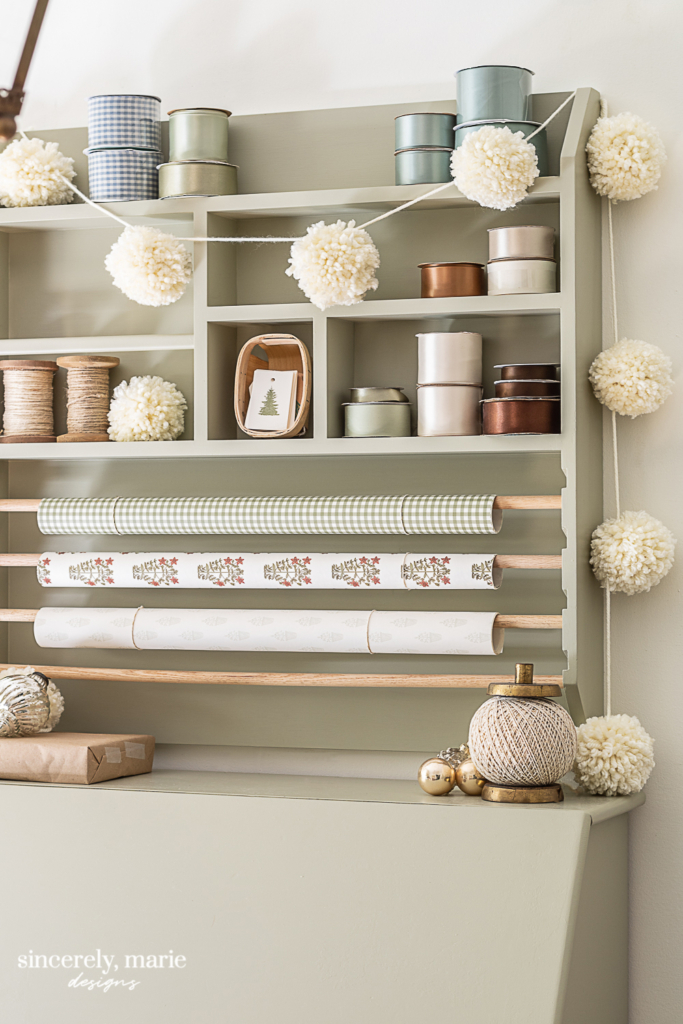
I used the same paint on the desk, trim, cabinet and gift wrap shelf to tie everything together. I have since painted the crown molding the same color.
All office sources are HERE.
Guest Bathroom
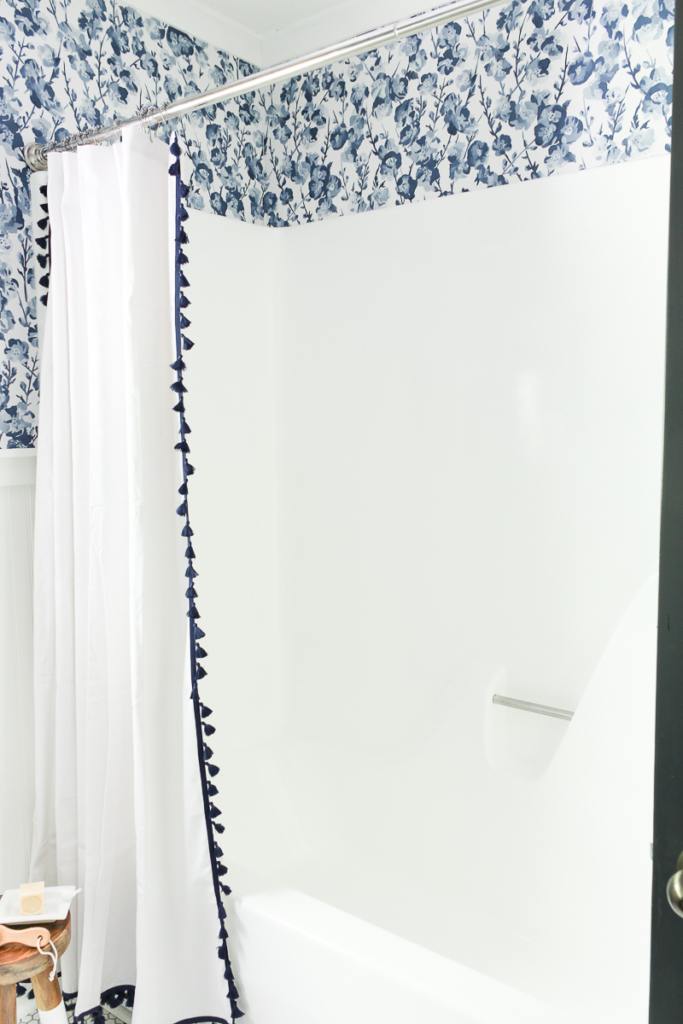
The upstairs guest bathroom got a pretty big over haul as well. We removed the old vanity, replaced moldy sheetrock, installed a new tile floor, light fixtures, and refinished the tub and shower.
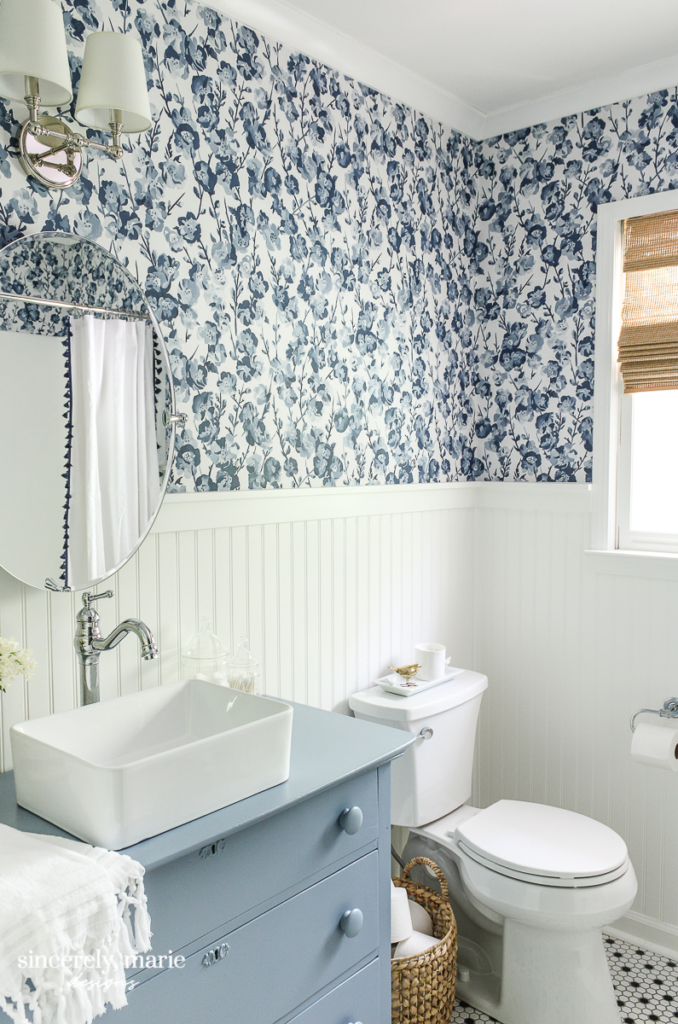
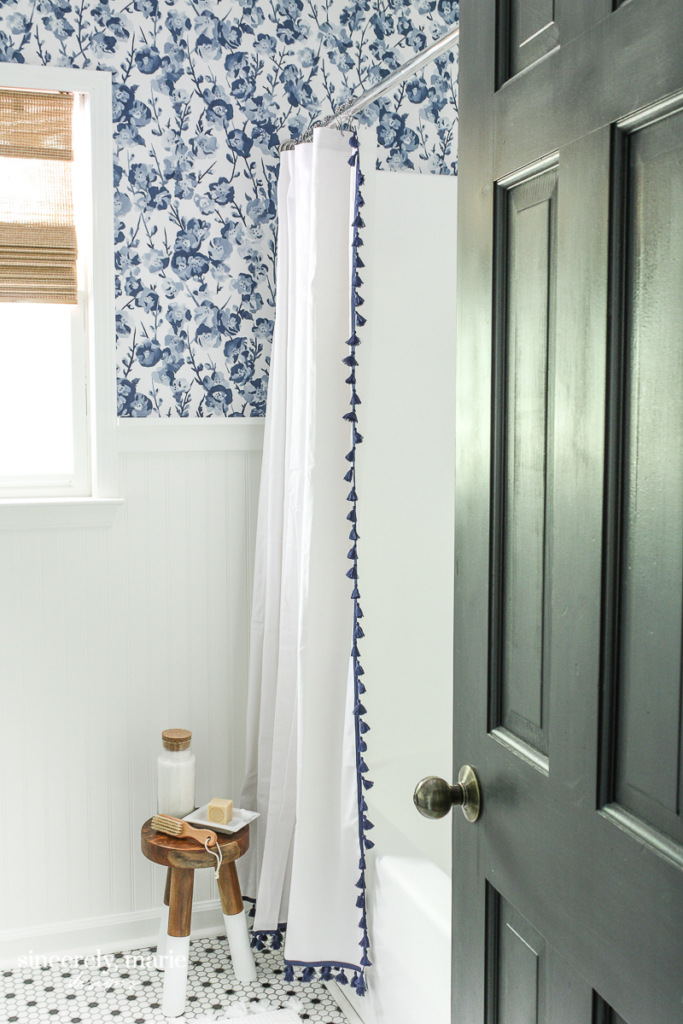
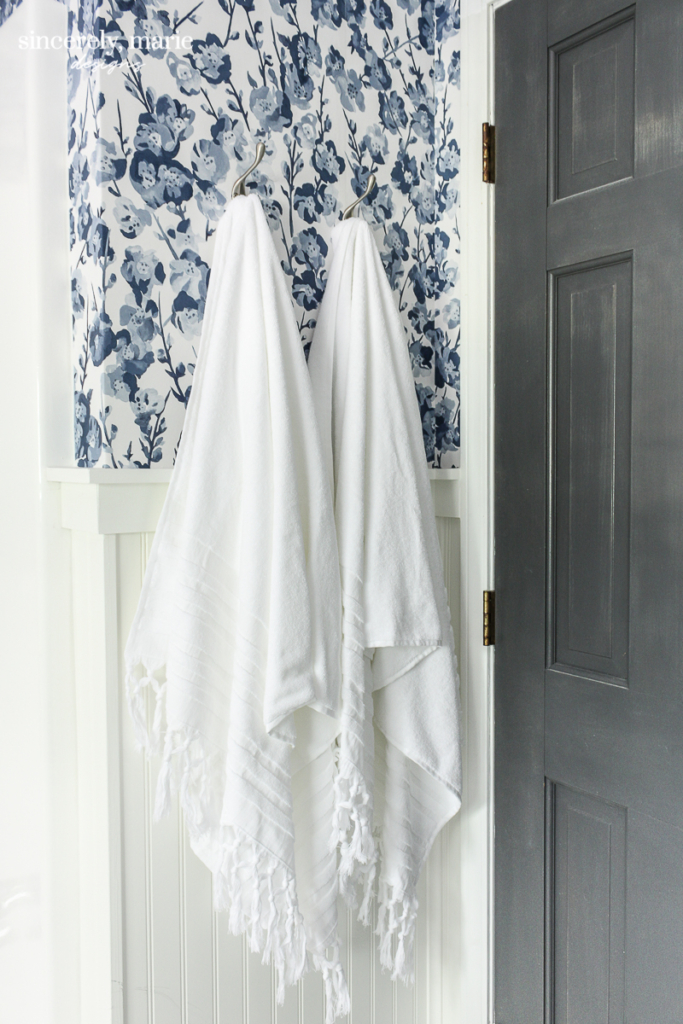
By now you know I love bead board. We installed it half way up the wall and pair it with a fun wallpaper. The vanity is an antique dresser I purchased from a yard sale for $30.
All bathroom sources are HERE.
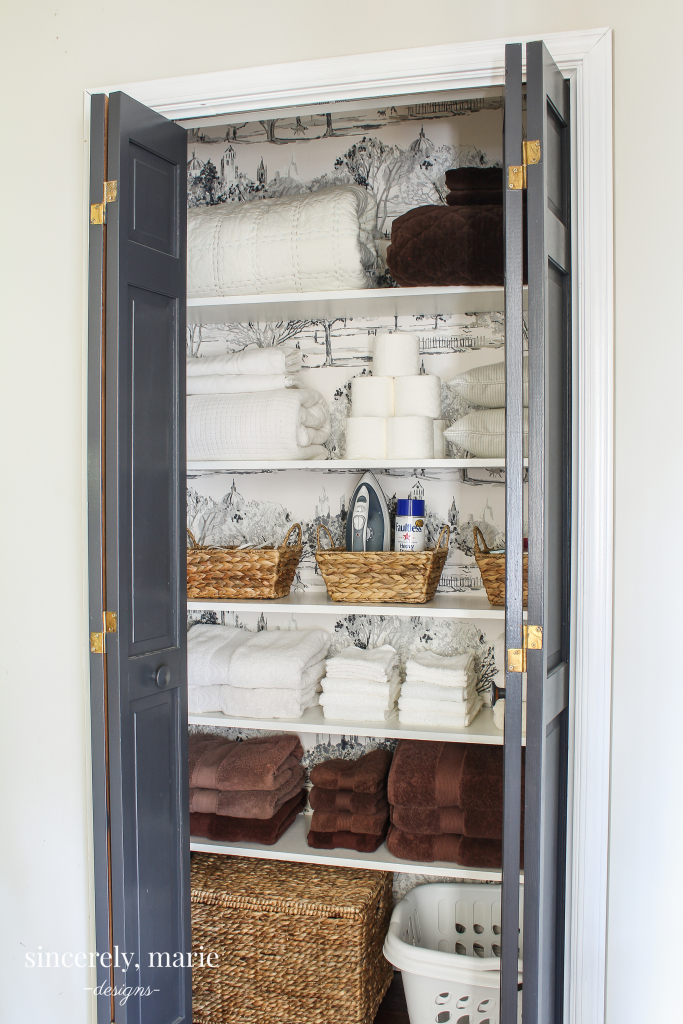
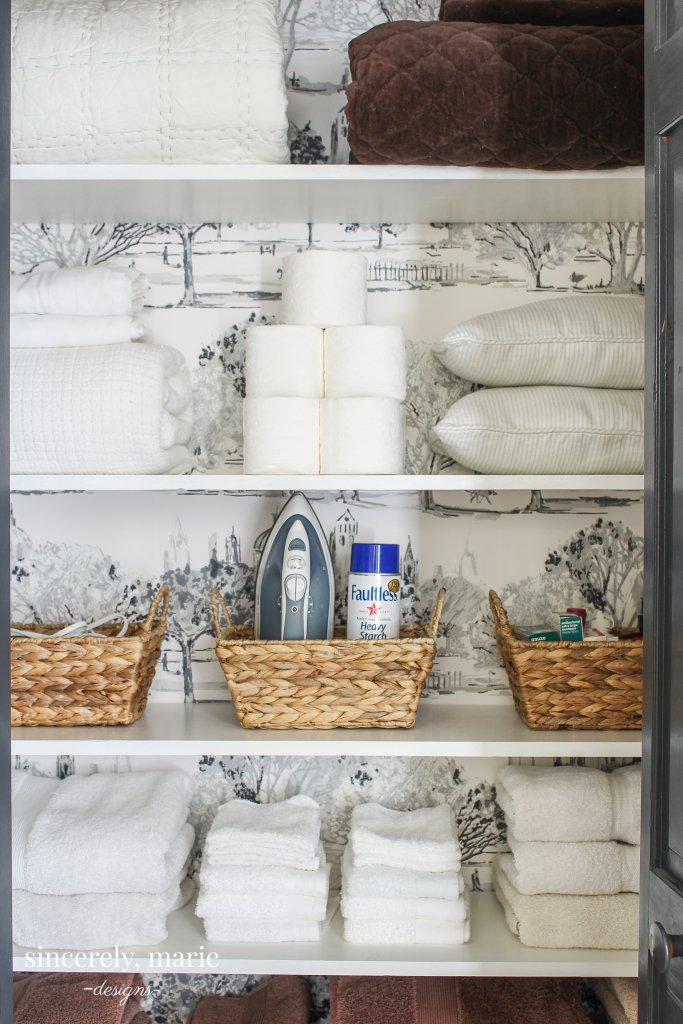
Guest Linen Closet
Our hallway linen closet is mainly for guests and stores extra bedding, towels and toiletries. I could have left it a basic closet but I thought it would be fun and unexpected to install some wallpaper that I already had on hand.
All linen closet sources are HERE.
Charlie’s Bedroom
Charlie’s bedroom was the worst of the bedrooms. It had once had wallpaper that had appeard to been removed, leaving the glue behind. On top of that was acrylic paint. We spent many nights scraping and sanding this room. Many of the walls had a skim coat of sheetrock mud applied to them to make it smooth once again.
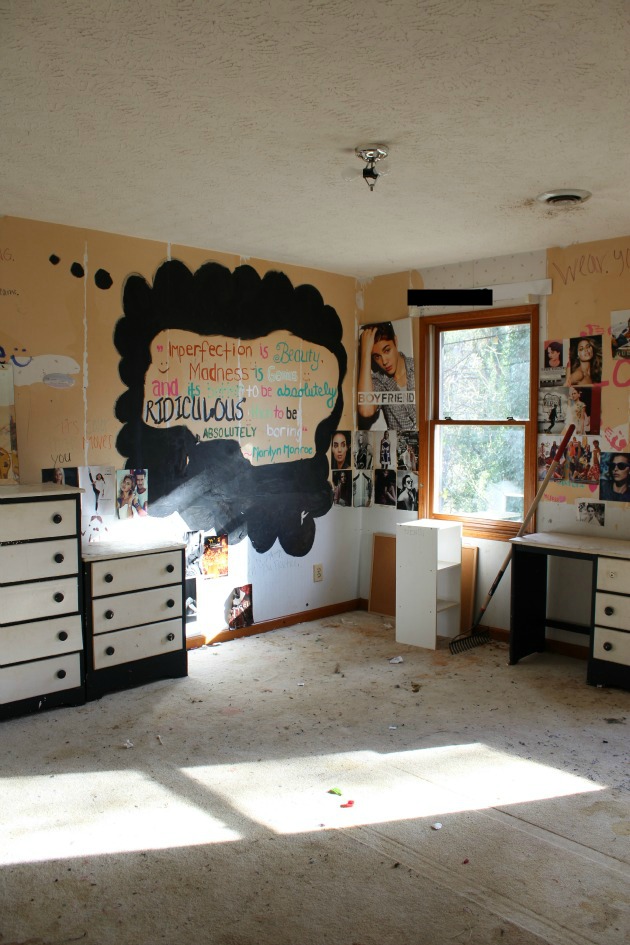
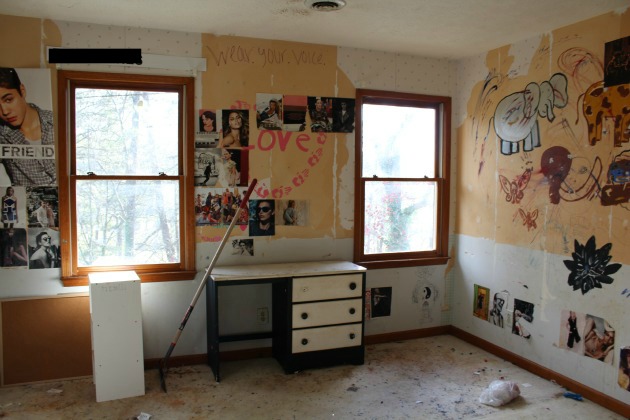
We painted the walls in a warm white with a blue and white check wallpaper for a pop of color. I wanted to keep this room light and bright. We’re still making changes to the space and since these photos we’ve scraped the ceiling and have added crown molding.
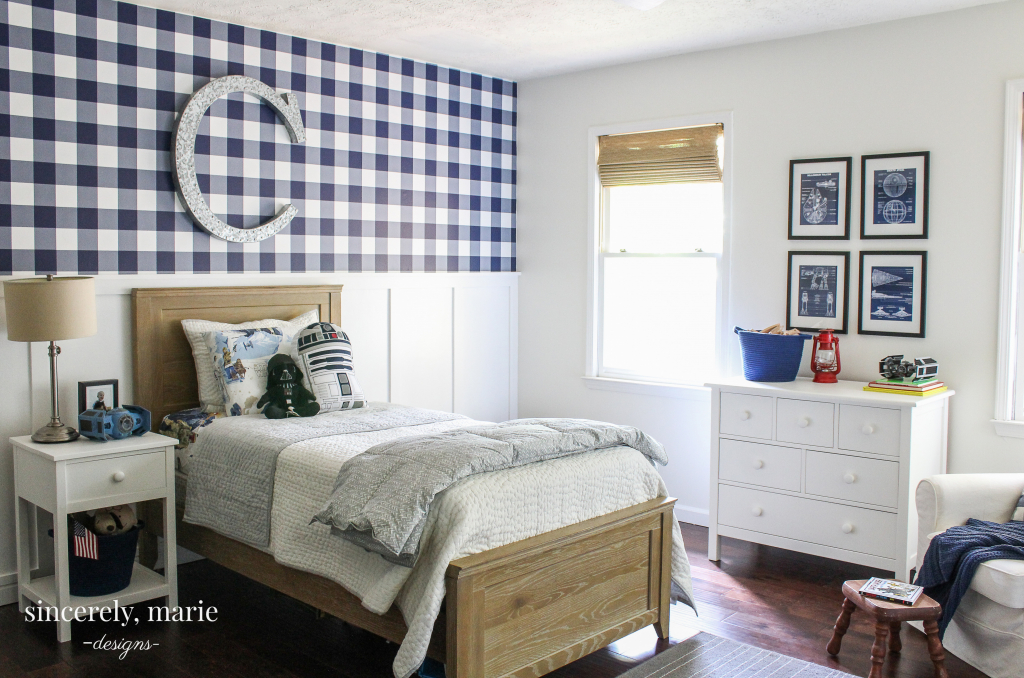


All Charlie’s bedroom Sources HERE.
Guest Bedroom
The latest room to have gone through changes in our guest bedroom, the fourth bedroom. This room is north facing and doesn’t get quite the same amount of sunlight as the others but I wanted this room to be a cozy and inviting space for our guests.
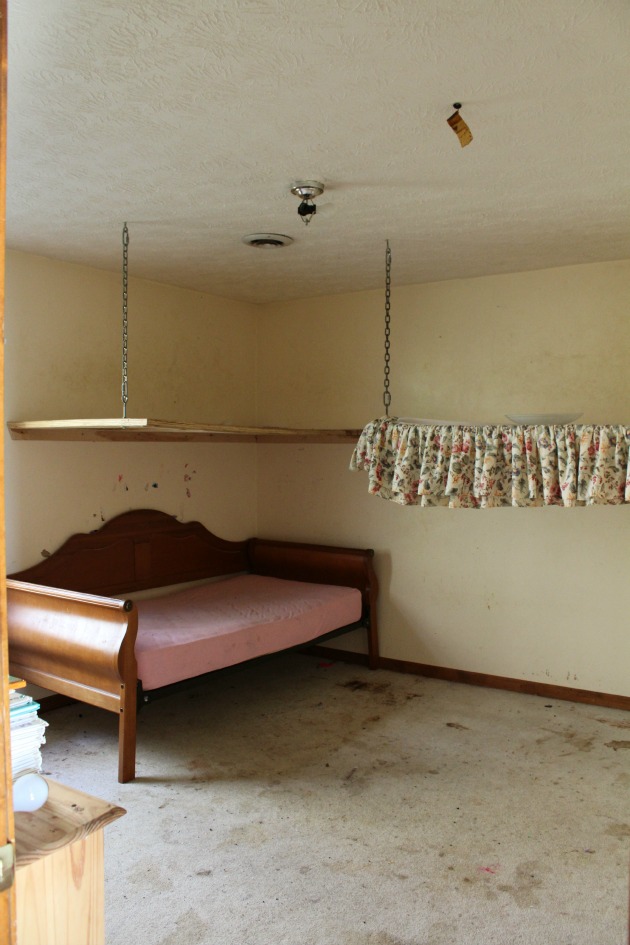
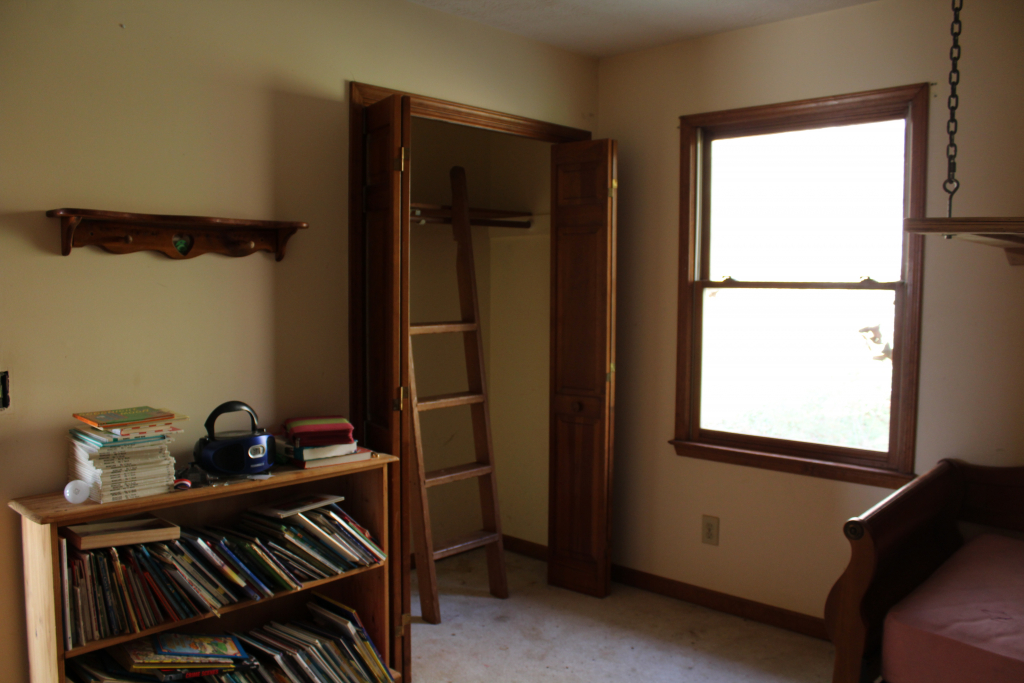
After cleaning the room, installing new floors and painting right after we purchased the home, for years this room was storage for us more than anything. Last year I decided to tackle it and I scraped the ceiling, hung a new light fixture, installed bead board wallpaper and painted the walls and trim all in one warm, rich color.
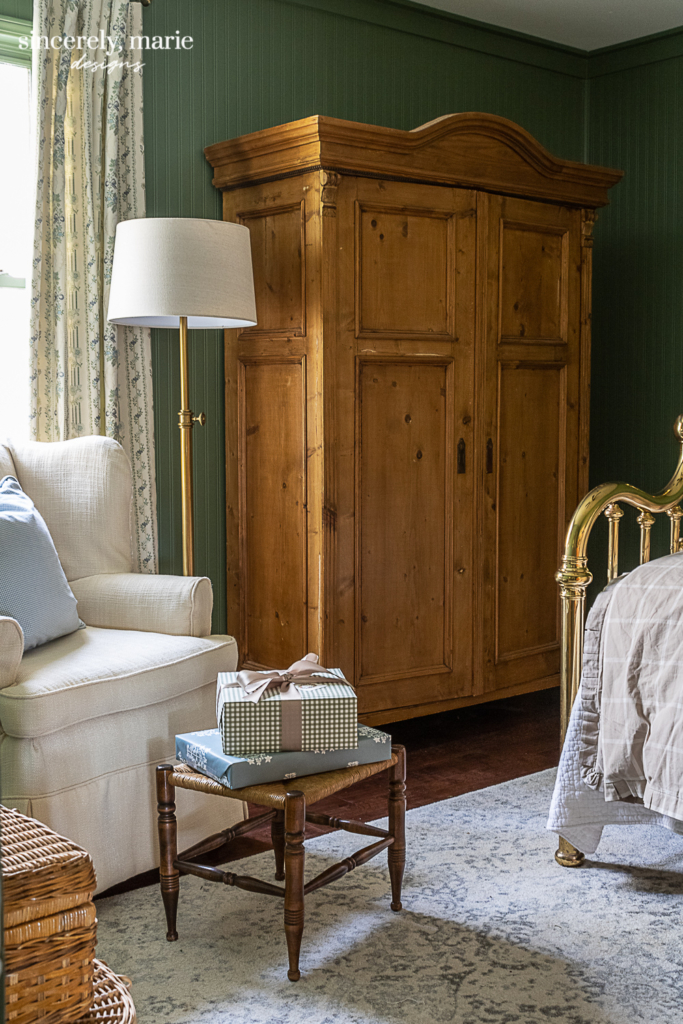
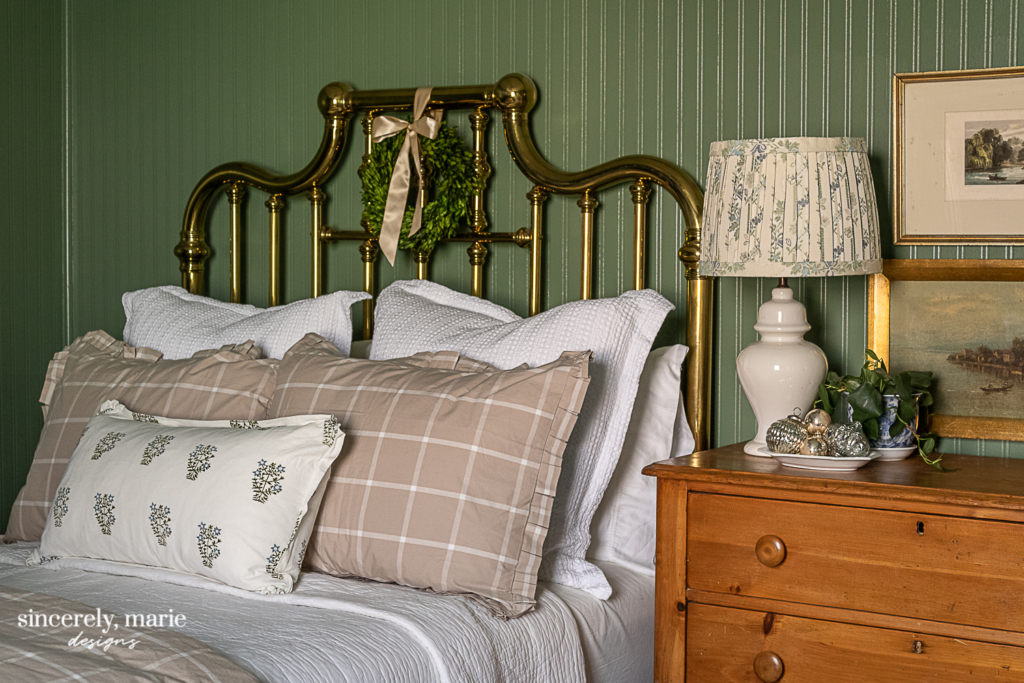
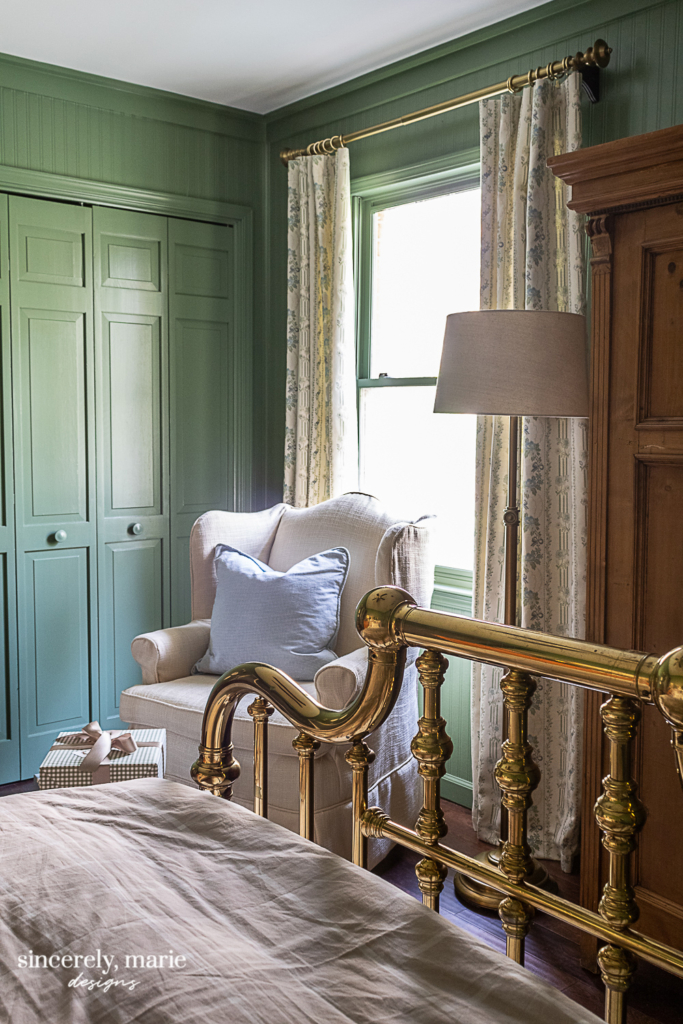

This room is full of antique and vintage finds. The entire space was done on a small budget, using many things we already had. The result is exactly what I had envisioned. It’s now a cozy cottage style guest bedroom!
All guest bedroom sources HERE.
The Back Porch
Last but not least is our back courtyard area. A lot of our yard is still not quite there but we’ve really loved our back porch. We’ve done a lot of clearing and planting in this space and have really enjoyed evenings out here. It’s private and very lush with greenery.
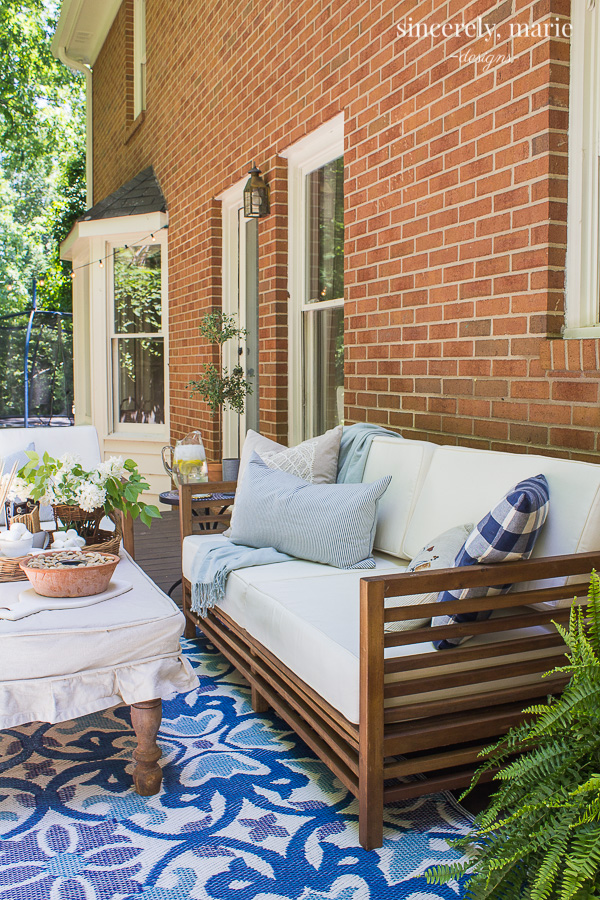
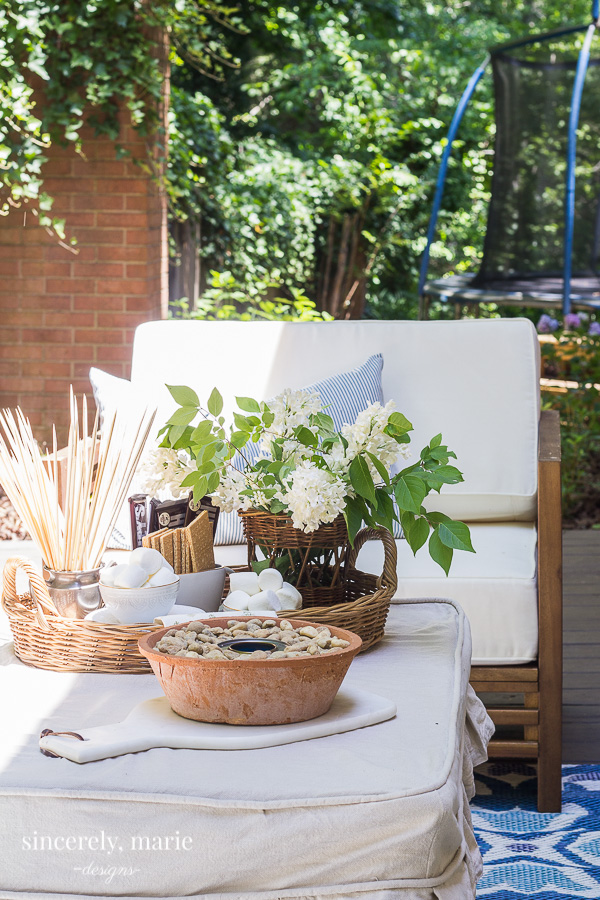
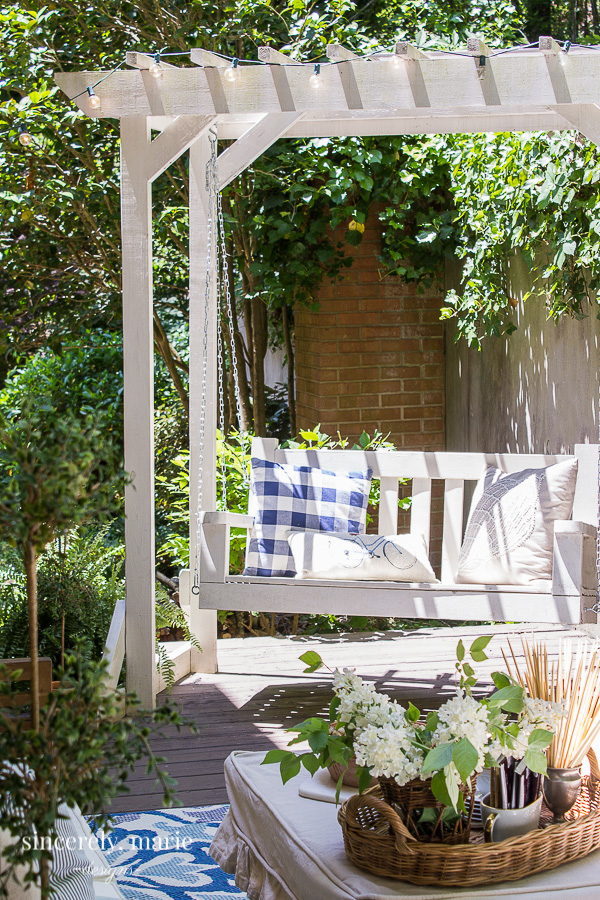
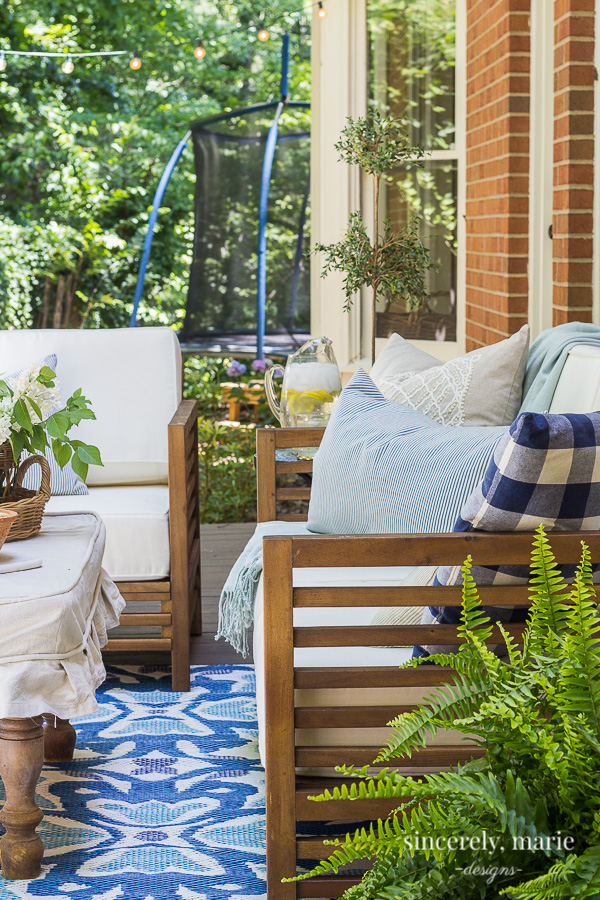
All back porch sources HERE.
We still have a lot to accomplish here, but it feels so great to look back and see how far we’ve come. We’ve poured our hearts and souls into this house and I feel as though it’s become a true reflection of who we are. We’ve grown in our building and design skills. It hasn’t always been easy, most of the time it’s been quite trying, but it’s always been worth it.
In the years to come we hope to landscape the property and create a fire put area and a vegetable garden. We want to finish part of our basement for a play room and create a separate workshop space. We hope to renovate our master bedroom closets this year with built-in organizers. We would like to move the down stairs powder room and to install a wash sink and cabinetry in the laundry room.
I’m so thankful for you all. It’s been such an adventure and I’m so glad you could all come along. I’m looking forward to sharing more decorating, makeovers and recipes this year. I hope you’ll stick around to be a part of it!


Shop Our Home


What a journey and yet how beautiful everything is coming together! You got to wonder what the former owners would think of this home now!! Looking forward to the next five years!! Thank you for sharing……….
Thank you Julie! It certainly has been a journey and yet, we’ve had so much fun with along the way. I’ve often wonder that myself. I think they might be a little shocked and possibly not recognize it.
There is not one, single thing I do not love about your home. OMG-it’s stunning. Definitely, one of the most beautiful homes on IG and all the blogs I follow. If you ever find yourself in Chicago, I’ll pay you to stop over to my house for some spiffing up! You are sooooo talented!
Pat in Chicago
That is the best compliment I could receive. Thank you so much, Pat! I’m so glad to have you following along. 🙂
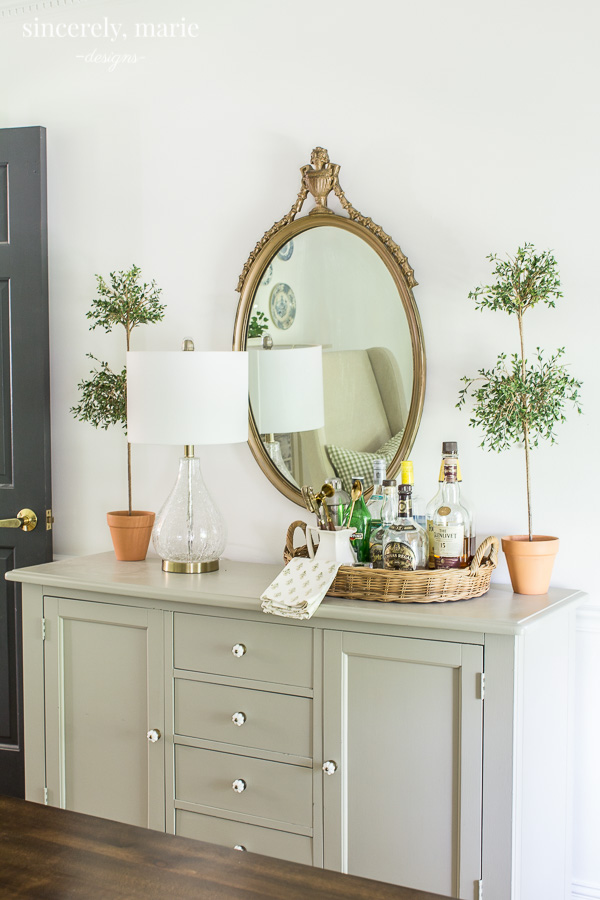
I love the styling and remodeling of every room in your house! They are beautiful and you stick to your style and do not follow trends. My wuestion is how did you hang the antique mirror in your powder room? I have a similar one that long ago was attached to a dresser. There is a very small margin of wood on the surounding back edge to attach hangers and wire. Do you have eye hooks on the side? Ours is very heavy and I am sure yours probably was too. I will appreciate hearing from you.
Thank you Vicki! My friends and I joke that I have old lady style… if that’s true, I’m okay with it. I think it’s classic. 😉 I used eye hooks, one of each side with thick picture hanging wire. Currently I have a very large, very old antique mirror in my dining room that is sitting on my buffet because I’m in the same boat as you. I’m a bit worried to hang it the same way because I don’t know if the frame is quite strong enough to take the weight. I’m hoping to find a solution. In the case that I do, I’ll be sure to share it here.
So very impressive and what I like best, is that it’s not a carbon copy of everything else you see on social media. Very classy & timeless!
Thank you so much, Ann! That means a lot. 🙂 Life is too short and I’m too cheap to follow the trends closely. Lol I think everyone should decorate with what they love. Homes would be so much more unique that way. 🙂
Your home is quickly becoming one of my favorites. One thing I do not see is what kind of blinds you have up in some of your bathrooms and bedrooms. I have a bay window in my dining/kitchen area that I don’t know what to do with. Its currently bare as I have only woods behind me. I am thinking some bamboo blinds would be nice. I like to be able to see outside and watch the birds. Thanks for sharing an update of your home. You and your husband have surely put a lot of thought and hard work into it.
Well, I’m honored. Thank you! A lot of our windows have roman/bamboo shades. However, the windows on the back of our house, with exception to the bathrooms do not have any shades. We live in a very private area and back from the road enough that you can’t see in our windows. The shades we do have were purchased from Home Depot. Sadly, they’ve been discontinued. I love wooden shades. They add a little warmth and match just about anything.
You have done a.beautiful job! Such a beautiful blend of.new…old….reusing from.other rooms and yard sales. It is perfect!!
Would you please link the exact product you used on your ceilings? With so many different options, I find it difficult to know which to choose.
I applaud you for your vision and hard work. Great job!
Wow! What a transformation! You have made such wonderful choices for your lovely home. Congratulations on working so hard and achieving such beautiful results.
Hi Amanda, What beautiful rooms and home. So warm and cozy. Could you please tell me where your living room sofa was purchased? I love the color and size.
Thanks
What an incredible amount of work you and your husband have done! I’m especially impressed with the changes made to your master bath. What a nightmare it was before and it’s so beautiful now! I’m looking forward to seeing more changes in the years to come.
You are such a talented woman with your visions and making them happen!! Your home is just absolutely beautiful and welcoming! From your foyer, I’d feel welcome to come in, sit down and enjoy a cup of coffee with you! Beautifully decorated with such a cozy feeling that any guest would be comfortable spending time there with you and your family! Job well done and as with all that you’ve accomplished already, that yard will get done, too! You and your husband are definitely a credit to your neighborhood and your children are so fortunate to be living there!!
I just adore your home. We have a very similar fireplace and I’m wondering what you did to yours? Did you redo the grout? I’m not exactly in love with ours, but can’t bring myself to lime wash or paint the brick.
Hi Amanda,
I love your style! Your home is so beautiful! We have been remodeling a 120 year old home for 2 years. Almost done. Would love to what style & brand the sofa in your living room is & where you purchased the fireplace the fireplace screen. Looking to seeing more of your work!