Hello friends! I can’t believe that today is the day. I finally get to share our butler’s pantry with you all! This project took a few twists and turns and like most projects, took a little longer than we expected, but we are completely over the moon with it. This new pantry space is truly a dream come true for us.
A couple of weeks ago I wrote a post on the progress of this space and how we went from creating a new powder room to shifting to a new pantry instead. You can read all about that here. Our new pantry is in the back right corner of our living room. When you walk into our living room from the foyer, you enter into the back of the living room. To the right you’ll find the fireplace on the far wall with chairs and a sofa. Straight ahead is a French door leading outside and to your left you will find a built-in bookshelf. Just past the shelf is a small hallway that goes straight our kitchen. In the hallway there is door to our garage and basement and across from that is now where our pantry sits. At the bottom of the post I’ve shared two through videos for you!
Here’s a couple of photos of the corner before.

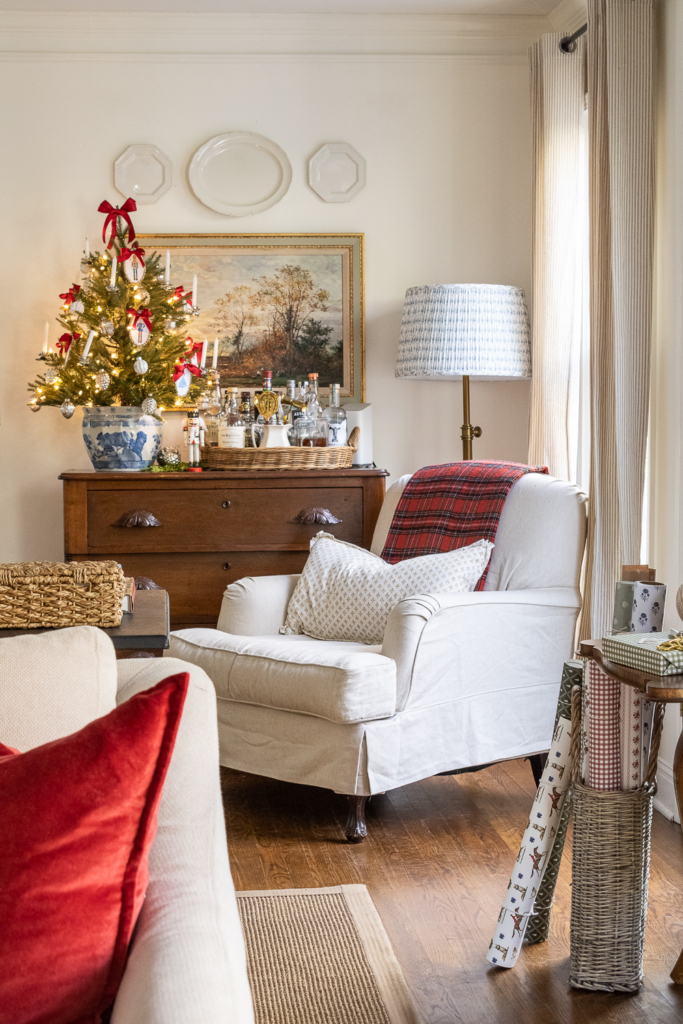
Although fun to decorate, the corner before didn’t serve us any purpose. I can imagine it would have been a great spot for a baby grand piano, but for us it was just wasted space.
The New Pantry
Standing in the kitchen, here’s that same corner today!
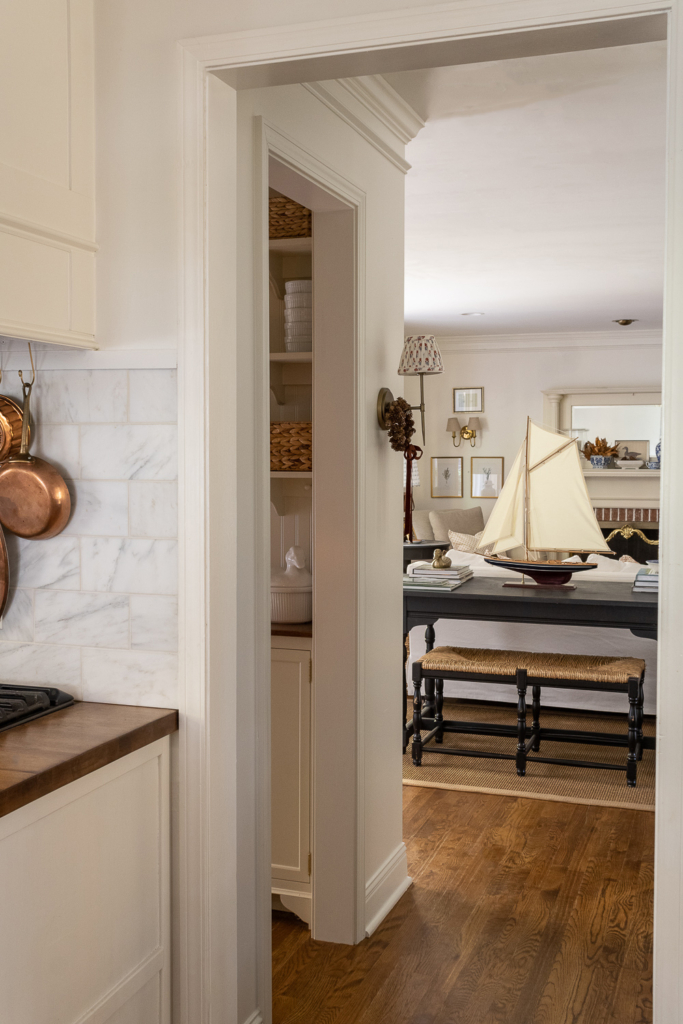
 Isn’t she just lovely?

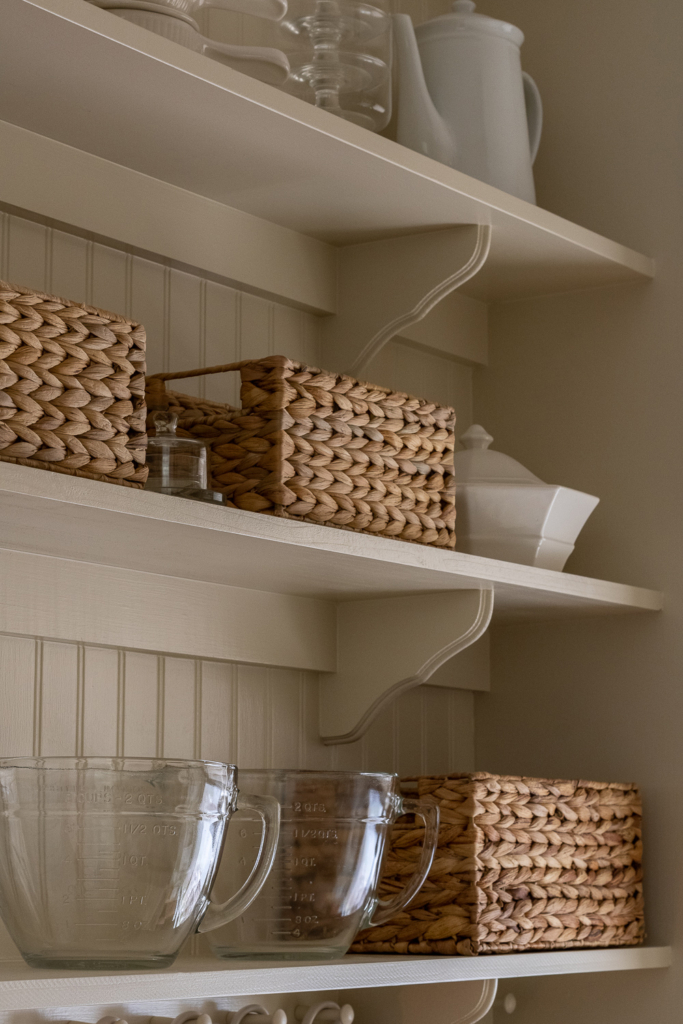
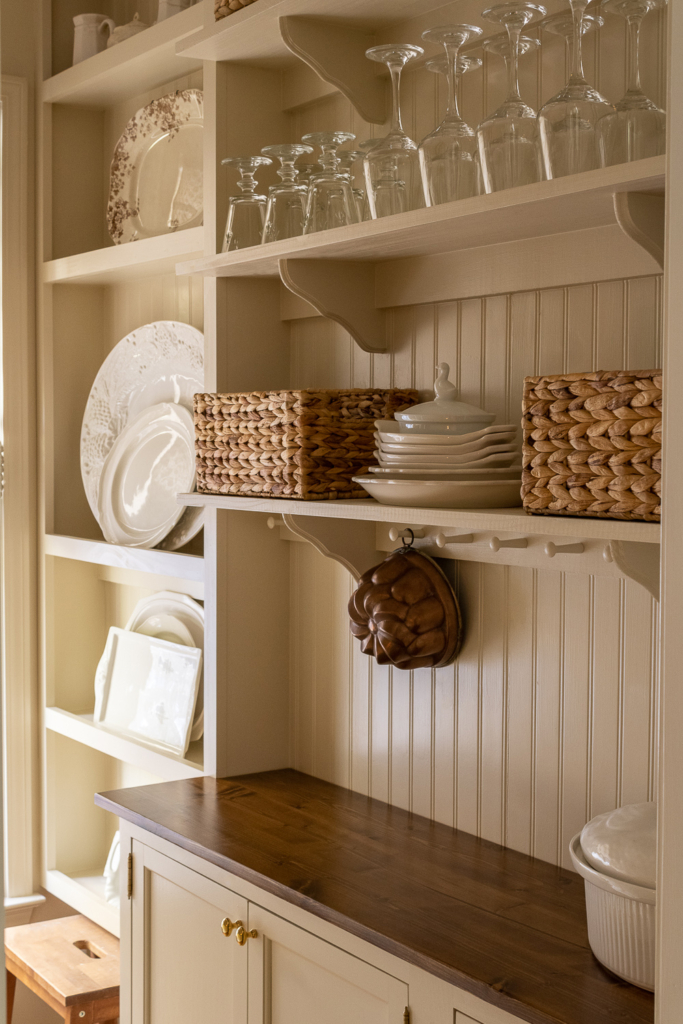
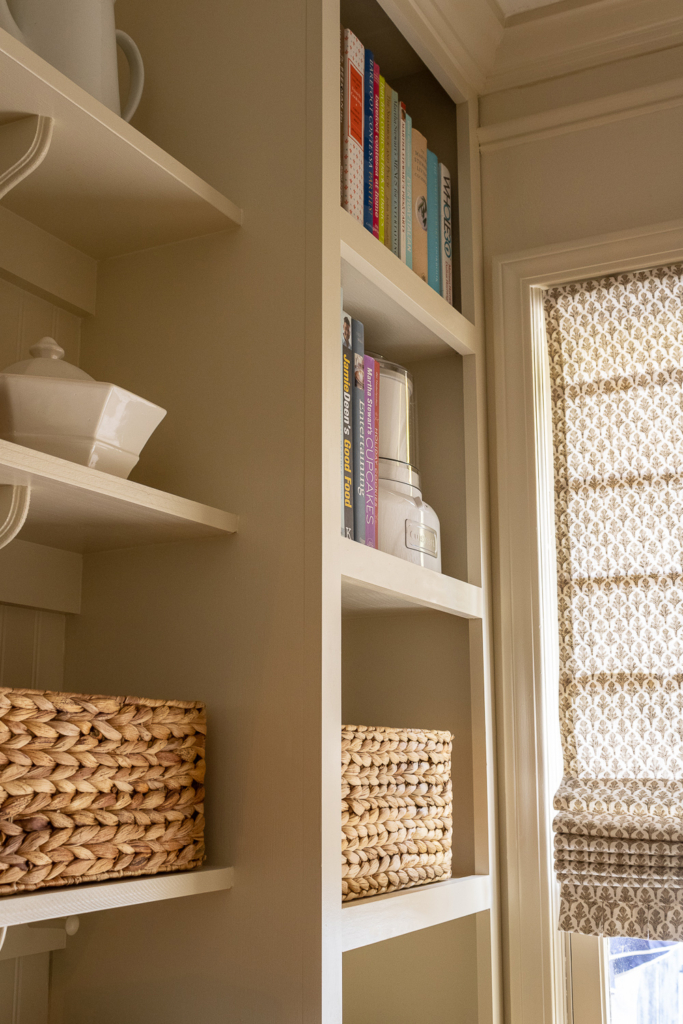
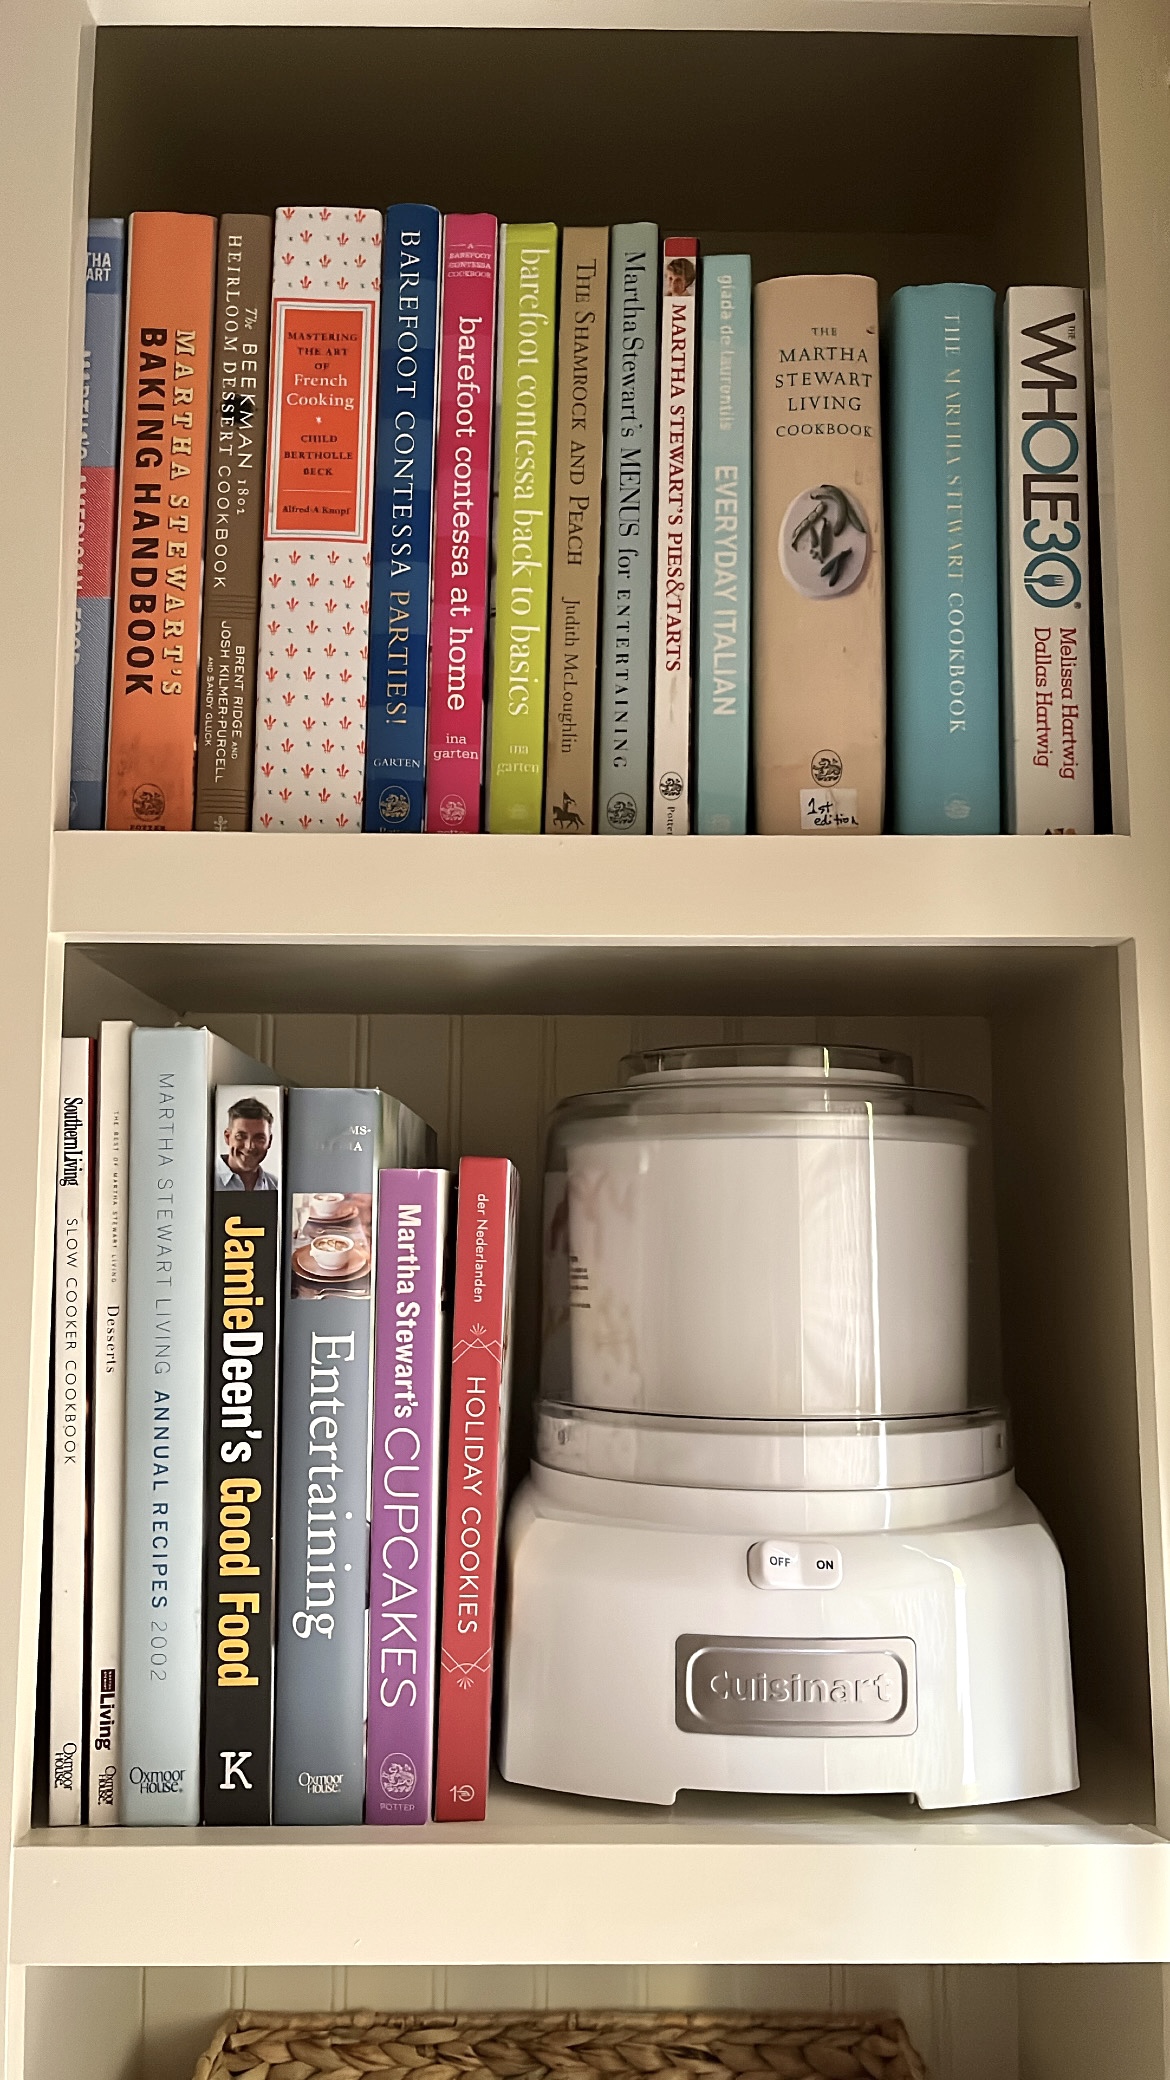
The pantry consists of two walls of storage with a large window in the center. We lined both walls with cabinets and shelves. We originally planned to install upper cabinets instead, but once we got them in place we realized the room felt far too heavy. It was just too much for this narrow room. I know some people are not fans of open shelving, but I love them. The dusting aspect just doesn’t bother me and I’ve always found open shelves to be timeless. When it comes to design and your home, you have to do what works best for you.
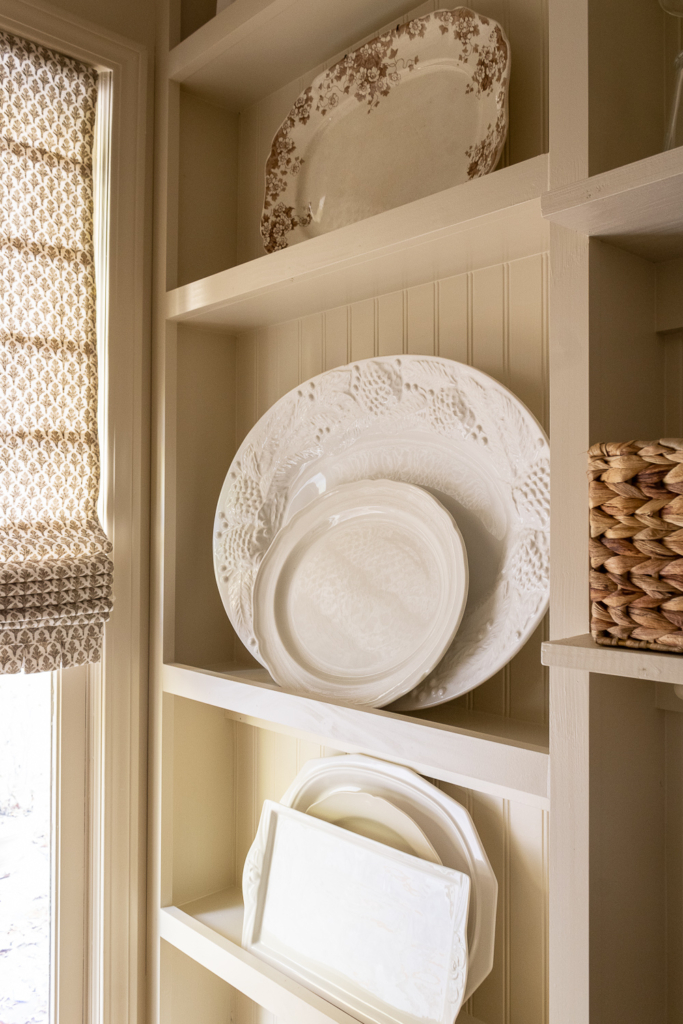
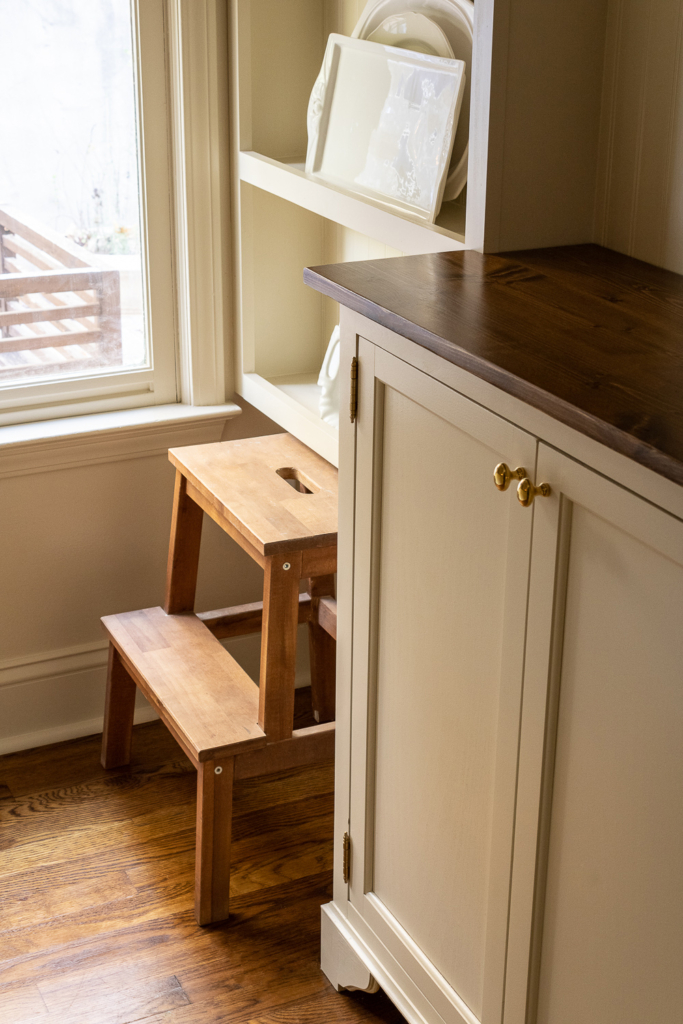
While planning around the window, we decided to use the narrow space to the right for a plate rack. I knew I wanted a large one and this wall ended up being the perfect size for one. The rack goes to the ceiling and stops just above our wooden stool that we’ve tucked underneath. I still need to add a thin rail just above each shelf to make sure nothing falls forward and off the rack, I hope to get to that this week. Fingers crossed!
Our budget for this project was not a large one. We did all the work ourselves, with the exception of running new wiring for electric. Lucky for us, my brother-in-law is an electrician. Josh and his dad studded the walls and door opening. Josh and I then did the sheet rock, trim, shelving, and cabinetry, followed up by paint and counter tops.
The Cabinets
The cabinets are basic stock cabinets from home depot that we modified so that the doors would be inset. I also added decorative trim and feet to the bottoms of them for a custom look. The pantry is narrow due to the exterior door on the other side, but it’s very fictional and has all the storage space we need.
Our original plan was to make our own inset cabinets, but after making cabinets for our laundry room (I hope to share that soon.) we were burnt out and ready to get it finished. We decided to go with the wood stock cabinets. Here is a list of the cabinets we used:
1 – 15” wall cabinet
I took it as a challenge for myself to find a way to make them just like I wanted them. I can honestly say that I couldn’t be happier with the outcome! I’ll share all the details on how we converted these cabinets in the next week or so. There’s too many details to share in this post. The cabinets will need their own blog post.
Counter Tops
For the counter tops we used inexpensive pine “project boards”, as Lowes calls them. They come in 3, 4, and 6 foot lengths and are about 30” wide. I would have loved to use butcher block, but this was a much cheaper and lightweight option. We used our table saw to cut each board to the width we needed and I then used the same process to stain and finish them as I did with our kitchen’s butcher block. The stain color is Provincial by Minwax. You can get on the finishing process here. I did seal these with three coats of lacquer. The smell was very strong. I finished them in the garage, but would recommend using it outside if at all possible. It gave the counter tops a super smooth finish that should be very durable.
I wasn’t so sure about the thinner wood tops originally, but I absolutely love how they turned out! In fact, I later found several photos of old houses on Pinterest that also had thin wood counter tops in butler’s pantries. It’s a great option when you’re on a budget, but still want something pretty and functional.

Paint
I used the same paint for the trim, cabinets and walls. I went with Benjamin Moore’s Advanced line for cabinets, doors and trim. I think it might be my favorite paint I’ve ever used. It has a super hard finish to it and has a nice gloss without being too shiny. Many of you have been wanted to know what color I used. After trying more samples that I can count, (thank goodness for the paint store in my basement, ha!), I wasn’t finding a warm cream/mushroom that was right for this north facing room. I finally decided to do what I did in our master bedroom and laundry room. I started mixing colors that I had on hand. Finding the right color was quite tricky. The final color ended up being 50% Carrington Beige by Benjamin Moore and 50% Navajo White by BM. I used a large bucket to mix the cans together myself, however some BM employees are willing to create the mix in the store for you. As I’ve suggested in the past, make sure you’re using BM’s paint when using their colors. Color matching at Lowes, Home Depot, etc. doesn’t always result in the same color. I know this from experience.
I love both of these colors on their own and have Navajo white on our living room’s fireplace mantle currently, but they just didn’t work well in the pantry on their own. Together they make the most beautiful, warm cream. It reminds me of a soft knitted sweater. I wanted a warmer paint color for this space and this one is so cozy day or night, sun or clouds. I’m even considering using it on our living room trim.
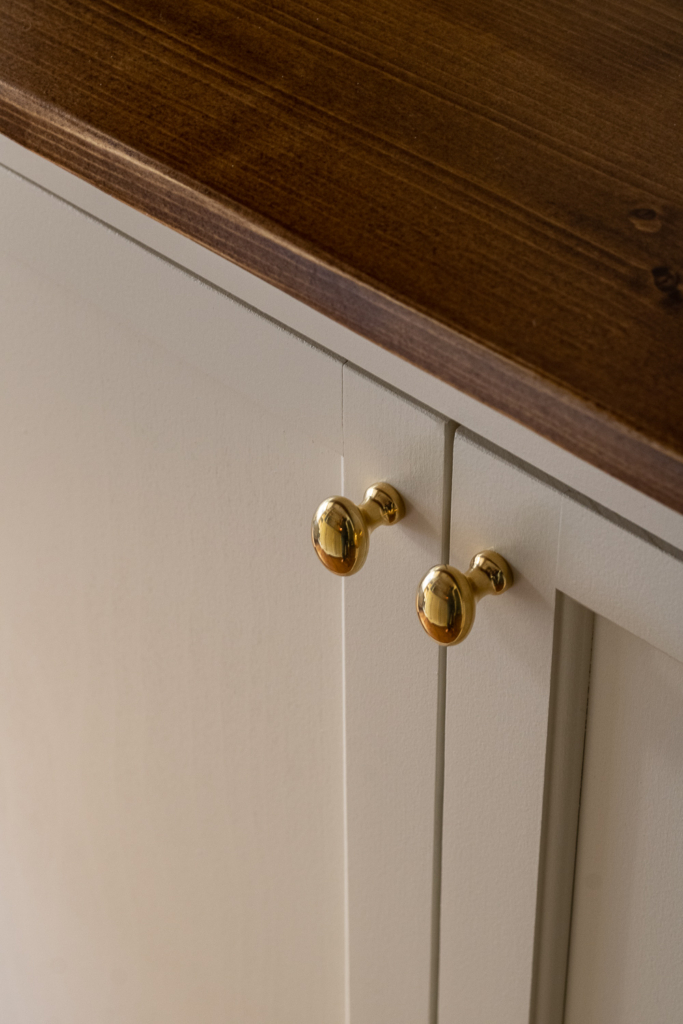
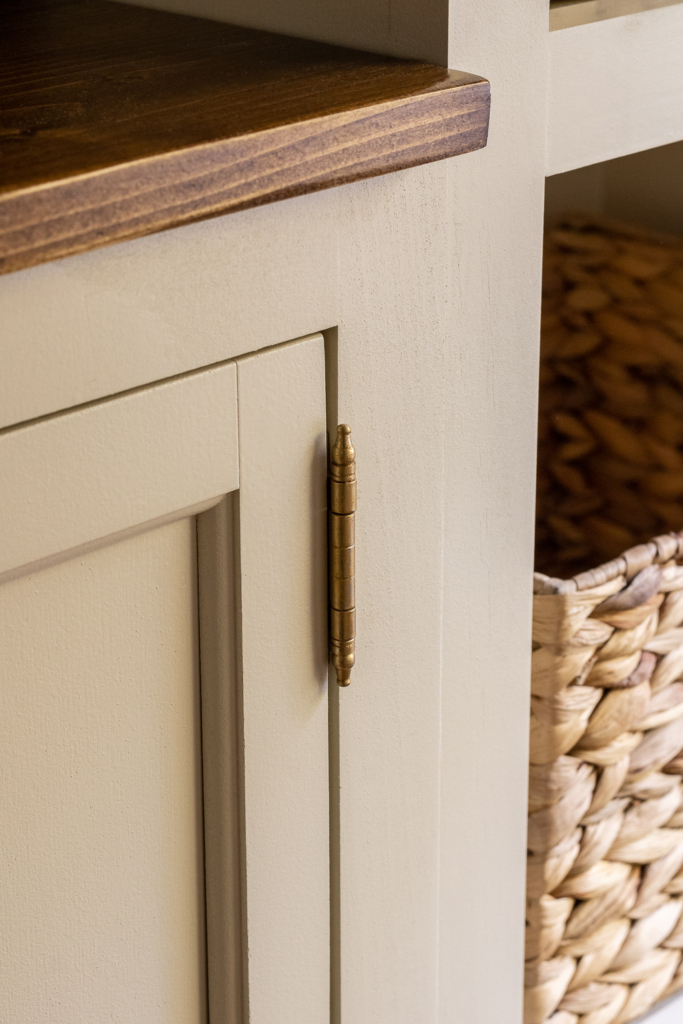
Hardware
We used the same timeless oval knobs in un-lacquered brass as we did in our kitchen. The hinges are and called non-mortise hinges. I couldn’t find any in an un-lacquered brass within our budget, so I purchased brushed nickel and used Rub-n’-Buff in gold leaf on them. I’ve used this product in many places, including lamps and light fixtures and it’s always served me well. The hinges turned out great and as the knobs begin to patina, they’ll match even better.
Details
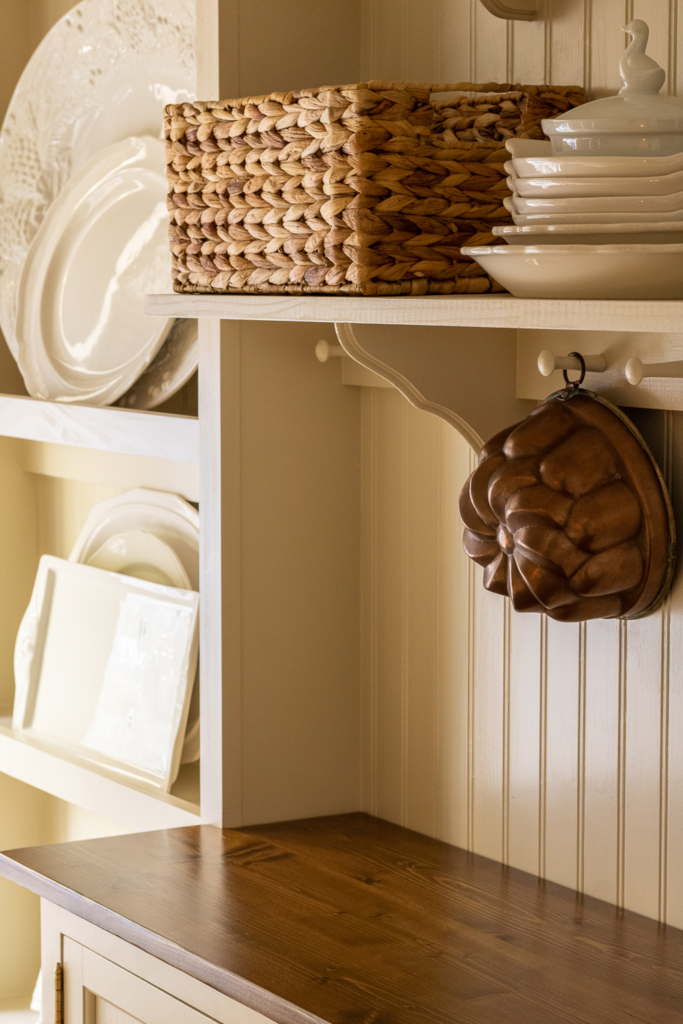
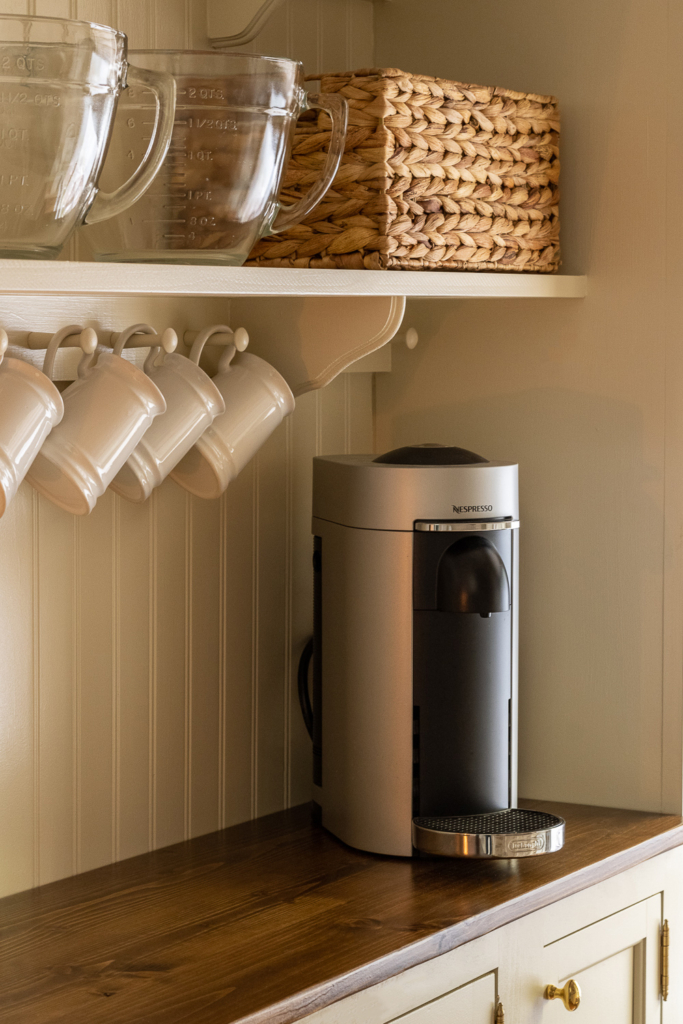
For the pegs below the lower shelves, I purchased these screw in pegs. They made the job so easy and they’re super affordable! To paint them, I stuck them into some styrofoam and sprayed them while I was painting the cabinet doors. This was so much quicker and less of a hassle than painting each one with a brush. I love the charm peg hooks add to a space and just how functional they are.
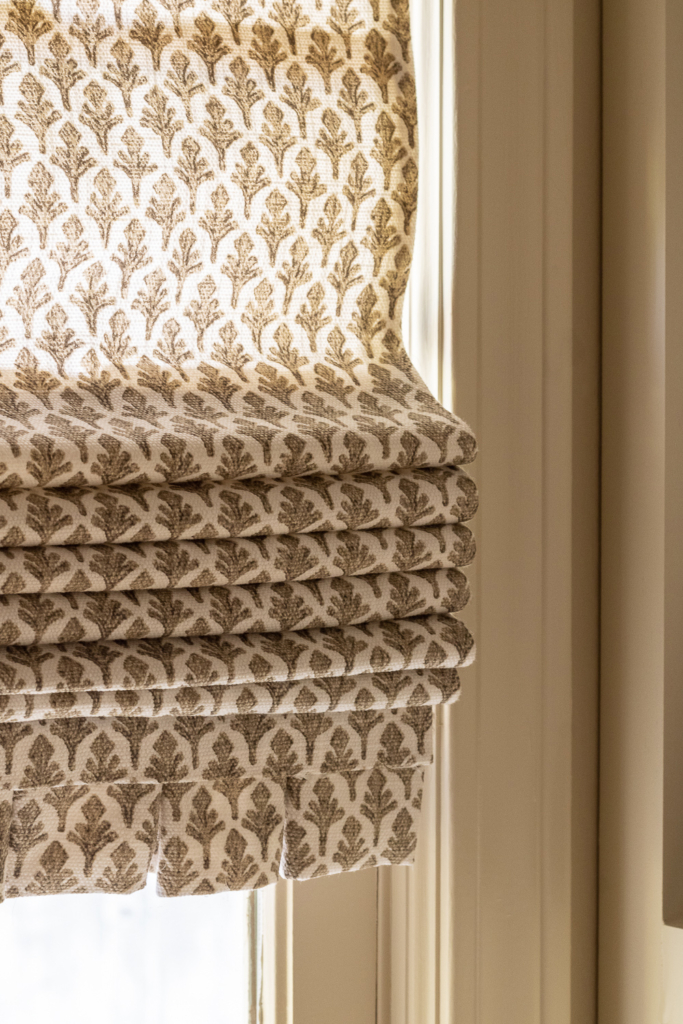
I chose a roman shade for the window covering. This shade was homemade using a cordless blind from Lowes. You can find my tutorial for the shade here. I did add a pleated edge to the bottom for a pretty touch. The fabric is by Lacefield Design. The print is Ponce and the color is stone.


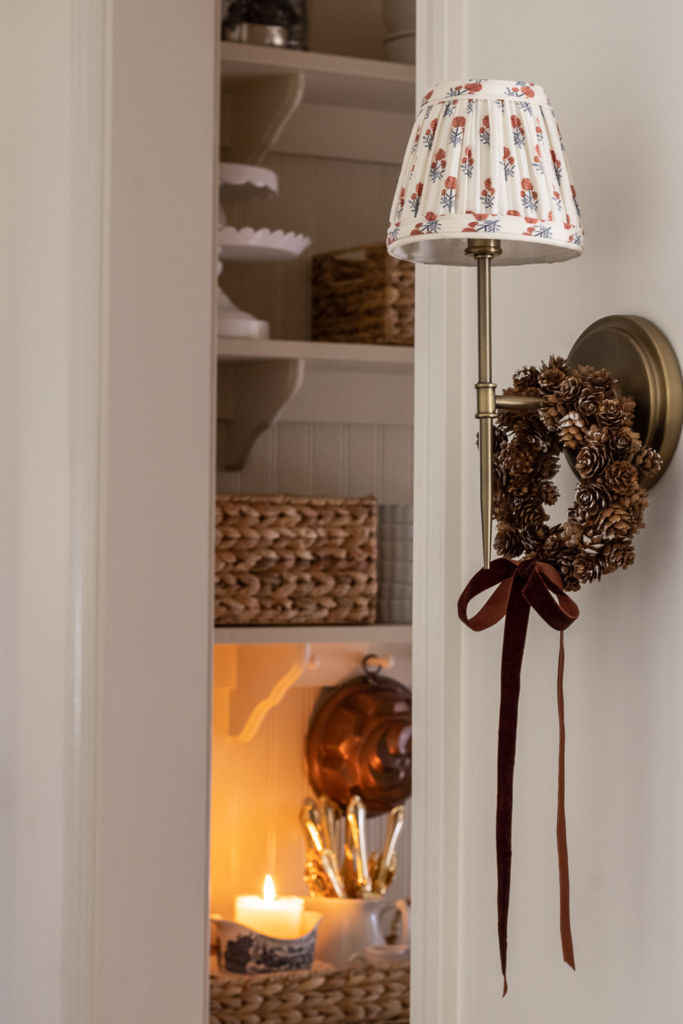
The hallway from the pantry to the kitchen ended up being a little darker in the evenings than we thought it would be, so we added this wall sconce and shade. I’ve loved having a sconce here verses a can light. Sconces give off that “lamp-like” feel, so cozy.
This pantry is already getting so much use that I kick myself that we didn’t do it sooner. Sometimes I just stand in the door way and stare, ha! It feels as though Christmas came early this year. I’m so glad you could stop by and take the tour with me. I hope it can inspire you, maybe even help you imagine that unused space in your house as something new. Until next time, have a great week friends! 


Pantry Sources:
Paint Color – 50% Carrington Beige by BM & 50% Navajo White by BM
Cabinetry – Links listed above
Wood Countertops & Stain Color – Lowes – Provincial by Minwax
Wooden Stool – Ikea (purchased years ago)
Baskets – Homegoods
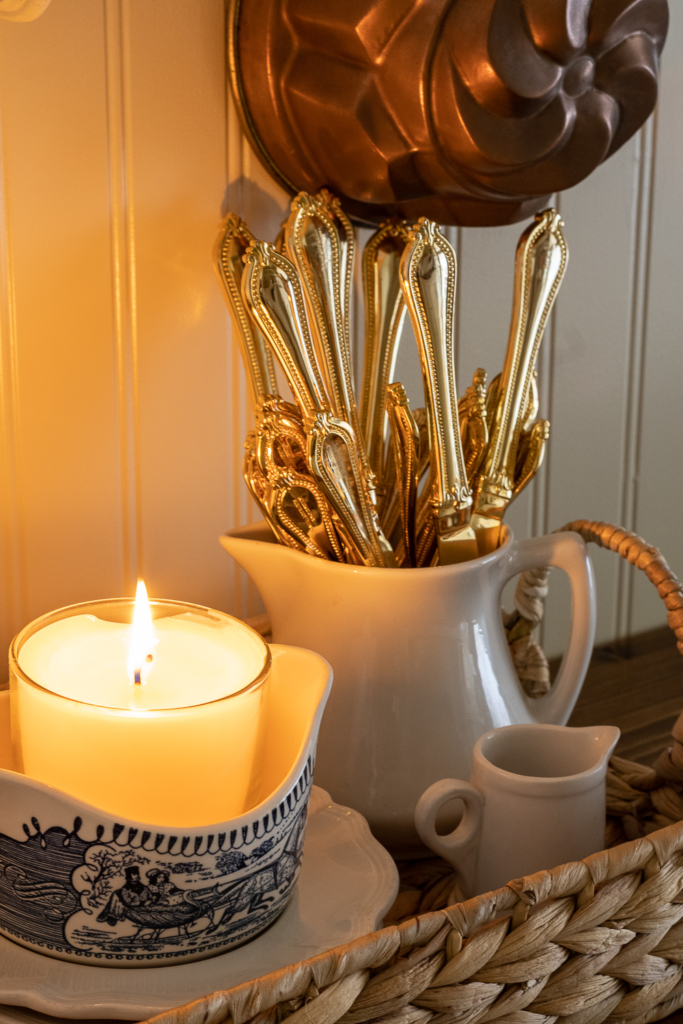
Antique Copper Molds – Antique store in Franklin, TN
Wine Glasses – Homegoods
Ironstone Mugs – FB Marketplace
Platters & Pitchers – Antique Markets, Thrift Stores, Homegoods & Williams Sonoma
Vintage Duck Baker – Local Antique Market
Pinecone Wreath – Local Shop
Let’s Take A Walking Tour!
Our Pantry From The Living Room

I’m so impressed. This turned out absolutely beautiful. And I love the functional space it provides. Job well done! Thanks for always inspiring me with your timeless design.
Thank you Ruth! I love that this space serves a purpose now. Have a wonderful week!
Brava, Amanda Marie!… Every detail is perfection!… And that final touch of adding the mini-pinecone wreath to the sconce? Cherry on the top of this butler’s pantry sundae!
,,, Denise Wilbanks | This Is My Everybody ✨😎✨
Awe you’re too sweet friend! Thank you so much!
I love this! I’ve always wanted a butler’s pantry. You did an amazing job!
Thank you Diana! It’s a dream space for me. Growing up without any kind of pantry, I never would have imagined!
Beautiful! Just beautiful! You and your husband did a fantastic job! I love your plate racks and the shelves. I can see why you just stop and admire your new pantry. I got the calm feeling while looking at your pictures too. Enjoy!
Thank you so much Cindy! I’ve always been so thankful for how well we work together. When we first got married, we working together full-time for over 6 years. I think it really set a good foundation for us. Have a wonderful week!
I don’t know if you shared this somewhere already but can you share the dimensions of this space? I love the use of the space and am curious how much space is needed to create an area like this or even a new powder room?
I didn’t, but I should have! The pantry is only about 5.5′ x 7′. It’s not a large space by any means. It’s amazing what you can do with a small corner like this one.
This is a beautiful space and seems to fit perfectly into your home, as if it had always been there. The mark of a great renovation! I always enjoy reading your posts. ❤️
Thank you so much Leah! It really does feel original, so grateful for that. Thank you for stopping by and have a great rest of your week!
Beautiful! I love your timeless style, so warm and cozy.
Thank you Shirley! That means so much to me <3
Amanda it is gorgeous. Good job. I have a coat closet that I am just starting to dream about. I did a lot of pinning thank you.
Thank you so much! I say go for it! It so nice when you can take a useless space and turn it into something useful.
Your pantry is beautiful. It is so functional, and the details are so well thought out. Wonderful job. Thank you for sharing.
Karen B.
Thank you so much Karen! It turned out better than I had even envisioned.
Wow!!! Amazing!!! You and your husband are a great team! Just beautiful. I think I’d pull up a chair and have my morning coffee in there every day!☕🍁
What a beautiful and functional butler’s pantry. The room ties in perfectly with the rest of your lovely home.
Perfect! Warm, elegant and practical.
Love your creative use of available materials.
Love how this turned out. I think it is a great use of the space and really suited to your home. I love the wall sconce you added, it contributes to the overall warm feeling this pantry has. I would love to have such a useful pantry myself.
Amanada, this turned out so amazing!!! Love every detail!
Creamy dreamy! Love all the warm color you brought to this space. Everything looks so professional. If you ever sell your house the new owners will be thrilled with their custom pantry! But you probably don’t ever want to move and I wouldn’t blame you 😉
You and your hubby did a great job with the pantry. Looking forward to your post on the cabinets. Love everything from the plate rack, the open shelving right down to the Roman shade. Such a lovely and functional space.
We’re those stock corbels you used for the shelving?
As with the rest of your lovely home, this room turned out beautifully! It truly looks as if it was always there, I love it! You’re so right about having paint mixed at the correct store, I had my kitchen painted last spring and the painter apparently had it mixed somewhere other than SW as the color is not what I wanted….but after having him repaint it twice (before I figured out the problem) I just went with it. It’s not ugly, just not what I envisioned.
Thank you for sharing your home with us and giving such detailed instructions on how you make it so beautiful.
Judy
It’s perfect in every way!! Your style is so timeless and beautiful 🥰❤️❤️
Your pantry is so beautiful and classic looking! My husband is remodeling my 1920 kitchen, and he is currently building a large hutch for one wall. It will house our microwave hidden in the lower cabinets. I have the same project panel for the countertop, so I was thrilled to see that you used that in your space. Now I know it will look beautiful 😍 You created such a beautiful pantry!
Your new pantry is beautiful!
I love your pantry and think you will enjoy it much more than a powder room. I wish they put walk in pantries in all homes. Is the wall sconce wired in to electricity? If so, was it hard to do?
If I could live in any house I wanted….. it would hands down be yours. We’ve designed/built 5 (yes, five) and remodeled any other we’ve lived in (military family – move a LOT). We’ve built (and are in the process now, in fact!) our own cabinets…. We’ve done pretty much everything ourselves….. so I truly appreciate the love and dedication you have poured into this lovely home. I simply love what you have crafted with the help of God. ❤️ Thank you for sharing it with us. Such a visual feast of beauty and peace.
I am OBSESSED. Absolutely obsessed with this. I’ve looked at it for so long today it’s starting to be creepy. I keep coming back to it and the video in your stories is my fave so I can see the view from the kitchen! Love, love, love, love, love, love!
Thank you for sharing! This space is beautiful and full of inspiration. I love the choices you made in regard to paint color, counter finish, beadboard, pegs, shelving, etc. it is just beautiful!
Lovely! Beautiful job, you two!
This is so beautiful and so smart of you to steal a little living room space to do it. I am in AWE of your DIY skills. It’s just stunning.
LOVE LOVE LOVE watching the progress of this pantry. The details are amazing. I have followed along on IG and loved the progress reports. Can you share more on how you inset the cabinet doors and built up the legs of the cabinet? I just love the look of that custom work.
Also, the wooden stool in your pantry is darling. Do you have a link for it?
Thank you so much for sharing your beautiful home! This pantry blows me away ! So much I would love to figure out how I too could have one. Can you tell me how big this space was when you mapped it out in your living room? Do you remember the square footage? It’s just the perfect size! Thank you so much .
I’m crazy about it! So timeless and thoughtful and handcrafted – what a labor of lovely! I would just stand and stare too – that is always a very good sign when you want to linger! Bravo.
Are your counter tops soley just the project board cut and stained or did you stack them or manipulate in any way ?
Yes, they’re just cut and stained. We didn’t add or manipulate them in any way. ☺️
Project board is 1/4 in thick , was the board applied to plywood and miter the front edge or did you only stain the project board and call it a day
No, our boards are 5/8” thick. We just stained them and called it a day.
Question, do you have dimensions for this space? I’m trying to get an idea for making an area similar to this, but am curious what dimensions you were working within as far as the aisle, overall room dimensions, cabinet depth, etc.. Thank you so much.